• Beware of Counterfeit Woodturning Tools (click here for details)
  • Johnathan Silwones is starting a new AAW chapter, Southern Alleghenies Woodturners, in Johnstown, PA. (click here for details)
  • Congratulations to Keven Jesequel for "Big Leaf Maple" being selected as Turning of the Week for April 15, 2024 (click here for details)
  • Welcome new registering member. Your username must be your real First and Last name (for example: John Doe). "Screen names" and "handles" are not allowed and your registration will be deleted if you don't use your real name. Also, do not use all caps nor all lower case.

Mcnaughton Center saver users

Bill Boehme

Administrator
Staff member
Beta Tester
TOTW Team
Joined
Jan 27, 2005
Messages
12,895
Likes
5,179
Location
Dalworthington Gardens, TX
Website
pbase.com
Here is what I found with my HF digital caliper. Measuring at several locations on each of my four blades, the thickness for my large and standard blades were very close to 5.8 millimeters or a bit less than 0.23 inch.
 

john lucas

AAW Forum Expert
Joined
Apr 26, 2004
Messages
8,333
Likes
3,585
Location
Cookeville, TN
Ideally the steel needs to be tempered to a spring steel tempering. not just the edge but the whole thing. At least that's what I think. I didn't do that on mine because at the time I didn't have a forge or any way to heat treat a whole piece of steel that size. If it's a big spring it won't break if bent and will tend to return to it's normal shape. A properly made knife should be treated to the point you can bend it and it won't break. Of course it should be hard enough to hold a good edge but a really hard edge will be too brittle. We need a different tempering for a tool that is basically the shaft of the cutting edge. It needs to be stiff but have enough spring to not break. I've been doing some research but right now I'm still a good ways from having my forge set up. I also purchased a steel bender at a yard sale just recently that should help me bend the arc better. I have a very limited set of tools for my McNaughton because I rarely have rare wood that's worth saving by coring. I bought the set because a lady left me a really sweet box elder log and wanted 3 big bowls for her sons. If I turned them there wouldn't be anything left of the log so I bought the coring system and made some really nice bowls for me as well. I did the first set really well and was proud of myself for watching Mike Mahoney and few other core. Then I tried some Walnut bowls and fought it like crazy and broke one of the cutters. That's what got me into making my own. I'll try to measure the steel in a few minutes when I get out to the shop. It is thicker than 1/4" If I remember correctly but not as thick as 5/16. I'll let you know in about an hour.
I had Mike Hunter retip one of my tools and I like it a lot better.
 

Bill Boehme

Administrator
Staff member
Beta Tester
TOTW Team
Joined
Jan 27, 2005
Messages
12,895
Likes
5,179
Location
Dalworthington Gardens, TX
Website
pbase.com
I'll try to measure the steel in a few minutes when I get out to the shop. It is thicker than 1/4" If I remember correctly but not as thick as 5/16. I'll let you know in about an hour.
I had Mike Hunter retip one of my tools and I like it a lot better.

Maybe your system is the original design. The blades on the new M8 are slightly less than 1/4" thick for both large and standard sizes. I like it he idea of using replaceable carbide tips.
 

john lucas

AAW Forum Expert
Joined
Apr 26, 2004
Messages
8,333
Likes
3,585
Location
Cookeville, TN
I just measured all my blades. The bigger ones were about .275. The middle size was .250 and the smaller ones were around .235. Actually the .250 is the one I made now that I think of it.
 
Joined
Apr 9, 2010
Messages
83
Likes
18
Location
Allen, TX
I just measured my new, still in the box, standard set and got 0.228 on all three blades. The curves measure 9.5, 5, <4.5 on Bill's pdf checker.
 
Last edited:

Bill Boehme

Administrator
Staff member
Beta Tester
TOTW Team
Joined
Jan 27, 2005
Messages
12,895
Likes
5,179
Location
Dalworthington Gardens, TX
Website
pbase.com
I just measured my new, still in the box, standard set and got 0.228 on all three blades. The curves measure 9.5, 5, <4.5 on Bill's pdf checker.

In post #37 I have a second chart that covers the smaller range. On my small standard blade the radius is 3.5".
 
Joined
Aug 14, 2007
Messages
5,478
Likes
2,832
Location
Eugene, OR
I don't think I mentioned this here before, but the old blades were cast stainless steel. I had some carbide tips put on some old blades, and they were just totally wrong. I took them off by twisting in a vice, which took off some of the metal. It had that powdered look to it, and not the shiny finish of the blade. Not totally sure, but they do cast stainless...

robo hippy
 
Joined
Nov 12, 2011
Messages
253
Likes
83
Location
Gassaway, WV
Website
www.steercreekwood.com
I just finished coring a maple burl using the middle size regular blade. It was easy to set the center about 5/8" above center, I have a spacer on the toolrest to get the center, and after stalling the lathe umteen times it stopped cutting. I had to drop the center back to center to finish the cut. It was a smallish burl so two pieces is all I could get. Lathe on low belt set around 600 rpm, stalls and squealing belts is the name of the day.
 

Emiliano Achaval

Administrator
Staff member
Beta Tester
TOTW Team
Joined
Dec 14, 2015
Messages
3,315
Likes
4,267
Location
Maui, Hawaii
Website
hawaiiankoaturner.com
I think you guys are worrying to much about things that are not important. You have to practice with the McNaughton to get better... The learning curve is steep, it helps if you take a lesson from someone like Mike Mahoney or Andi Cole. I'm lucky Andi is a 30 minute flight away... I got one out today, Its not pretty, but, its a $175 bowl and not shavings on the floor...
 

Attachments

  • IMG_4720.JPG
    IMG_4720.JPG
    736.7 KB · Views: 39
Joined
Aug 6, 2009
Messages
706
Likes
503
Location
Lummi Island, WA
I've been using the bowl saver for a few years now. I found the simplist way to find the entry angle, for me, is to set the tool on top of the mounted blank,, as Al describes, with the tip where I want it to end up. The shank of he blade is at the forward edge, the same distance from the outside of the blank as the turret. Pinch the blade between two fingers (like the turret posts) and slowly withdraw the blade until the tip is between your fingertips (it's the reverse path you want the tool to make through the blank). As you withdraw the blade, the handle end will pivot around. When the tip is between your fingers, the handle will be at the correct angle of entry for the cut to proceed on the same path.
Takes way longer to describe than it does to do, but it works quite well for me.
 

Emiliano Achaval

Administrator
Staff member
Beta Tester
TOTW Team
Joined
Dec 14, 2015
Messages
3,315
Likes
4,267
Location
Maui, Hawaii
Website
hawaiiankoaturner.com
I've been using the bowl saver for a few years now. I found the simplist way to find the entry angle, for me, is to set the tool on top of the mounted blank,, as Al describes, with the tip where I want it to end up. The shank of he blade is at the forward edge, the same distance from the outside of the blank as the turret. Pinch the blade between two fingers (like the turret posts) and slowly withdraw the blade until the tip is between your fingertips (it's the reverse path you want the tool to make through the blank). As you withdraw the blade, the handle end will pivot around. When the tip is between your fingers, the handle will be at the correct angle of entry for the cut to proceed on the same path.
Takes way longer to describe than it does to do, but it works quite well for me.
I will have to try your tip...
 

john lucas

AAW Forum Expert
Joined
Apr 26, 2004
Messages
8,333
Likes
3,585
Location
Cookeville, TN
Here is a photo of my bending jig I build to make the McNaughton cutters. This was homemade. The different holes are to set the rear pin a different distance from the big pin. I now have one of the Harbour Freight metal benders which should do a better job if I build some larger circular bending adaptors.
 

Attachments

  • metal bender.jpg
    metal bender.jpg
    42 KB · Views: 73
Joined
Aug 14, 2007
Messages
5,478
Likes
2,832
Location
Eugene, OR
Your bending jig is close to what you need. Have you ever seen a rebar bender? You have one smaller pin, like the one in your picture, and a rotating wheel or larger pin, again like the one in the picture, then you also have a handle with a pin in it for leverage close to the pivot point. Bending the very tip requires a lot of leverage, more than you can apply with just your hands. I would also suggest that you cut the profile on the nose before you bend it. It does need to be tapered so it will fit down inside the small radius at the center of the bowl. If it is full height, it won't go down all the way.

robo hippy
 

john lucas

AAW Forum Expert
Joined
Apr 26, 2004
Messages
8,333
Likes
3,585
Location
Cookeville, TN
Bill the steel I used was tool steel and came annealed. I don't necessarily recommend tool steel unless you intend to temper it to spring hardness. Then it's important to know what kind of steel it is so you can know how to harden and anneal. It's just what I had handy in that size. I usually have 3 foot lengths so it was easy to put some gloves on and just bend it and cut it to length when I was done. I have also put a piece of pipe over the metal to bend but be careful. It takes a fair amount of force to bend this metal and if the pipe comes off you get to run across the room trying to catch your balance and of course crash into things while doing that. Not that I know you understand I'm just guessing. :)
 

Chuck Lobaito

AAW Board Member
Joined
Jul 22, 2013
Messages
72
Likes
44
Location
Farmington Hills, MI
Practice, practice, practice. I practiced with a cottonwood from a tree from our house and another from our neighbors. Made about a 100 cores in 2 weeks. You really have to watch multiple videos to get the hang of it. Mahoney's video is great overall learning aid, Robohippy's gives a different perspective, and Boener's video gives you the math and measurements. Also, I learned to use a shorter handle for better control. A long handle does not actually help if you are doing it right.

If I have not cored in a while, then I watch them again and again.

BTW the cottonwood cores became milk painted utilitarian bowls.
 
Joined
Apr 1, 2015
Messages
603
Likes
443
Location
Sitka, Alaska, United States
Website
www.zachlaperriere.com
Coring Spalted and Softer Woods

Thank you, everyone. I've found this thread very useful. I'm hoping to resurrect the thread and hear what others do for spalted and softer woods.

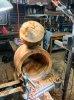
I'm coring spalted red alder, which is both soft and spalted. Tear out is aweful, which makes the going painfully and the chips love to plug. Here's what helps:
1. cutting a wider groove at the rim
2. spray water—too a certain extent
3. constant blowing 100 psi with the air chuck to clear chips

I don't have that much experience with the McNaughton, but I can make a decent core in a harder wood in a quarter of the time, maybe less.

Part of me wonders if I purchased the wrong coring system for these softer woods. I was drawn to greater versatility of the McNaughton, but I wonder if cutters like the Oneway would cut better in softer woods. I own Hannes Michaelsen's Magnus Tool and the acute angled carbide cutter slices through these softer woods like butter. I can make a 16" platter in 20-30 seconds. Of course the Magnus Tool is only for cutting straight cores, and the cutter on the Magnus probably wouldn't work with a curved coring knife, but I suspect a different style of cutter might work better than the McNaughton scraping cutter.

As always, thanks for any thoughts or ideas.
 

hockenbery

Forum MVP
Beta Tester
TOTW Team
Joined
Apr 27, 2004
Messages
8,629
Likes
4,969
Location
Lakeland, Florida
Website
www.hockenberywoodturning.com
Part of me wonders if I purchased the wrong coring system for these softer woods. I was drawn to greater versatility of the McNaughton, but I wonder if cutters like the Oneway would cut better in softer woods.
I don't core at all anymore and never cored soft woods. They don't like to scrape and sometimes the torn fibers want to bind in a narrow curf - making a relief cut eliminates the binding.

A friend who was one of the best people I know at using the McNaughton switched to the ONEWAY.
When I asked her why? She said, " it is so much easier to use. It only does hemisphere shaped bowls but that is mostly what I turn and I still have the McNaughton if there is something I can't core with the ONEWAY."
 
Joined
Apr 1, 2015
Messages
603
Likes
443
Location
Sitka, Alaska, United States
Website
www.zachlaperriere.com
I don't core at all anymore and never cored soft woods. They don't like to scrape and sometimes the torn fibers want to bind in a narrow curf - making a relief cut eliminates the binding.

A friend who was one of the best people I know at using the McNaughton switched to the ONEWAY.
When I asked her why? She said, " it is so much easier to use. It only does hemisphere shaped bowls but that is mostly what I turn and I still have the McNaughton if there is something I can't core with the ONEWAY."

Thank you, Al. I may have to try the Oneway. At least it's cheaper than the McNaughton! :D

I've tried some mighty thick relief cuts, and though it helps, it doesn't eliminate the troubles once the knife is in several inches. And the speed at which it cuts compounded by the relief cut...it makes patience I virtue in short supply! Then there's the 3/8" or so of torn out grain that needs removing from both the bowl and the core. Painful.

Here's why I persisted in coring...a beautiful sunburst spalting pattern. When these are finished it's just over the top.
starburst.1.jpg
 

Bill Boehme

Administrator
Staff member
Beta Tester
TOTW Team
Joined
Jan 27, 2005
Messages
12,895
Likes
5,179
Location
Dalworthington Gardens, TX
Website
pbase.com
Thank you, Al. I may have to try the Oneway. At least it's cheaper than the McNaughton! :D

The prices for the McNaughton coring system are far better at Lee Valley than they are at Craft Supplies. For example the Lee Valley price for the standard size set is $359 and includes three curved blades, a straight blade, handle, gate, and tool post. The price at CSUSA is $393.95 ... and, surprisingly that doesn't include the straight blade at that price. You can, however, buy it separately for an additional $72.50.
 

Emiliano Achaval

Administrator
Staff member
Beta Tester
TOTW Team
Joined
Dec 14, 2015
Messages
3,315
Likes
4,267
Location
Maui, Hawaii
Website
hawaiiankoaturner.com
I made a replacement blade after breaking one using my really poor technique ( A Mike Mahoney I aint) I didn't do a serious search for the right size metal and this one is just a little too thin. Not far off but it makes a difference in how much it chatters. Since then I've also been reading up on making spring steel so I can (if I ever get time) make the steel stronger by heat treating it to the spring steel level. I also now have a larger metal bender so some day when I settle down from this move I'll fire up the forge and make myself a whole set and get serious about this coring stuff.
Wow! That was probably a good scare for you! The McNaughton definitely has a learning curve, when once you understand it, its by far the best coring system out there...
 

john lucas

AAW Forum Expert
Joined
Apr 26, 2004
Messages
8,333
Likes
3,585
Location
Cookeville, TN
Zach Call Mike Hunter and see if he is still retipping them with some carbide cutters. I have one and like it a lot but I don't do enough coring to be an expert on this. It cuts cleaner and easier than the tips that came with the McNaughton. Still the most important thing is to keep the cutter at or above center all the way to the middle.
 
Joined
Apr 1, 2015
Messages
603
Likes
443
Location
Sitka, Alaska, United States
Website
www.zachlaperriere.com
Zach Call Mike Hunter and see if he is still retipping them with some carbide cutters. I have one and like it a lot but I don't do enough coring to be an expert on this. It cuts cleaner and easier than the tips that came with the McNaughton. Still the most important thing is to keep the cutter at or above center all the way to the middle.

Thanks a lot, John! I'll try calling Mike. I made note of the cutting above center—a great tip and I appreciate you repeating it in case I'd missed it. And who knows...senility has gotten the better of me more than once! :D

I noticed Emiliano's quote about making your own knives from a while back. The Oneway website says of their knives (which are of course different) say: "The support fingers for knife sets #1 & #2 are constructed using 60,000 lb tensile carbon steel, whereas the support fingers for knife sets #3 & #4 are made from 100,000 lb chrome nickel steel."
 

Bill Boehme

Administrator
Staff member
Beta Tester
TOTW Team
Joined
Jan 27, 2005
Messages
12,895
Likes
5,179
Location
Dalworthington Gardens, TX
Website
pbase.com
Zach Call Mike Hunter and see if he is still retipping them with some carbide cutters. I have one and like it a lot but I don't do enough coring to be an expert on this. It cuts cleaner and easier than the tips that came with the McNaughton. Still the most important thing is to keep the cutter at or above center all the way to the middle.

That's very interesting. Are they the same type of tips that have the raised edge like the carbide cutters on his hollowing tools?
 
Joined
Aug 1, 2015
Messages
138
Likes
525
Location
Iota, LA
I've got funnel makin down pat.. also improving on the real thing. One thing I've learned over the past two years is don't practice on your good wood. Practice makes , not perfect, but better.
 
Joined
Aug 6, 2009
Messages
706
Likes
503
Location
Lummi Island, WA
I found the simplist system for setting the height is to back the turret away from your blank and extend the blade out all the way, aiming at the center of the blank. set your height so the blade tip is slightly above center. Cut a piece of pvc pipe and put it on the turret stem - you shouldn't neet to move it from that height ever.
To set the angle, I do as Al said and place the blade on top of the blank with the tip at the center line of the blank, and right at the point you want to cut to (the bottom of your bowl). This assumes you're able to get up high enough to look directly down on the blank and blade. Keeping the point where it is, line up the blade where you want to enter the blank. pinch the blade at the point where it crosses the front edge of the blank with two fingers and draw the blade out, allowing the handle to swing to the right until the tip is between your fingers. Look at the handles angle to the bed, sight along it the find something its aimed at. Duplicate that angle with the blade in the turret.
Hope that sounds as simple and quick as it is in practice. It works very well for me.
With really nice wood, I always start with the largest core first, cutting a recess in the face so I can chuck it up and turn a tenon. chuck up that core and do it all again. I generally only aim for three bowls or four blanks from the setup. Trying for nested sets with 6 or 7 finished pieces is well beyond my skill set, but getting 3 or 4 decent sized bowls from a nice piece of wood rather than turning it all into shavings is my goal most of the time.
 

john lucas

AAW Forum Expert
Joined
Apr 26, 2004
Messages
8,333
Likes
3,585
Location
Cookeville, TN
Bill The type of cutter Mike put on my tool is an elongated diamond and has a slight cup behind the cutting edge. I believe it is a standard metal cutting carbide tip because I have some similar for my metal lathe. It is not the polished cupped circular cutters that he normally sells.
 

Bill Boehme

Administrator
Staff member
Beta Tester
TOTW Team
Joined
Jan 27, 2005
Messages
12,895
Likes
5,179
Location
Dalworthington Gardens, TX
Website
pbase.com
Bill The type of cutter Mike put on my tool is an elongated diamond and has a slight cup behind the cutting edge. I believe it is a standard metal cutting carbide tip because I have some similar for my metal lathe. It is not the polished cupped circular cutters that he normally sells.

Thanks, John. I might call him, but it might be an expensive proposition to put carbide cutters on all of the blades that I have. Maybe if I could get a diamond wheel for my Tormek I would be able to sharpen them.
 
Joined
Apr 1, 2015
Messages
603
Likes
443
Location
Sitka, Alaska, United States
Website
www.zachlaperriere.com
Bill The type of cutter Mike put on my tool is an elongated diamond and has a slight cup behind the cutting edge. I believe it is a standard metal cutting carbide tip because I have some similar for my metal lathe. It is not the polished cupped circular cutters that he normally sells.

Thanks, John. Does it look anything like this? This is from the Magnus Core Tool, and it throws clean shavings, even in the softest of spalted woods.

Screen Shot 2017-08-24 at 12.46.16 PM.png
 
Joined
Feb 26, 2010
Messages
184
Likes
16
Location
Riverside Ohio
I have had one for several years now. It is the most scary tool I have ever tried to use. Can't master it no mater what I do. I think I'm going to find a one way system.
 

Bill Boehme

Administrator
Staff member
Beta Tester
TOTW Team
Joined
Jan 27, 2005
Messages
12,895
Likes
5,179
Location
Dalworthington Gardens, TX
Website
pbase.com
Andy Cole from Hawaii demonstrated the McNaughton system on making a nested set of natural edge bowls at SWAT this past weekend. I attended his session twice because I found him to be very informative and entertaining ... not to mention that he handed out dark chocolate covered macadamia nuts to the audience. He also discussed the evolution of the system. I believe that he said that the large blades were originally about 7.5 mm thick and now they are about 5.5 mm thick. Also, the curvature of the blades have changed. He said that he prefers the older blades which are more stable, but changes the profile from the original straight across to a V shape like the newer Mark 8 design. Andy also used the straight blade to plunge in a couple inches when designing the size and shape of each of the nested bowls. I liked that idea so I will be ordering a straight blade.
 
Joined
Apr 1, 2015
Messages
603
Likes
443
Location
Sitka, Alaska, United States
Website
www.zachlaperriere.com
Andy Cole from Hawaii demonstrated the McNaughton system on making a nested set of natural edge bowls at SWAT this past weekend. I attended his session twice because I found him to be very informative and entertaining ... not to mention that he handed out dark chocolate covered macadamia nuts to the audience. He also discussed the evolution of the system. I believe that he said that the large blades were originally about 7.5 mm thick and now they are about 5.5 mm thick. Also, the curvature of the blades have changed. He said that he prefers the older blades which are more stable, but changes the profile from the original straight across to a V shape like the newer Mark 8 design. Andy also used the straight blade to plunge in a couple inches when designing the size and shape of each of the nested bowls. I liked that idea so I will be ordering a straight blade.

That's a great tip, Bill, on plunging straight in. I've been doing that with my Magnus Tool, and I like that it can be done free hand with so little effort before putting the McNaughton in place.
 

Emiliano Achaval

Administrator
Staff member
Beta Tester
TOTW Team
Joined
Dec 14, 2015
Messages
3,315
Likes
4,267
Location
Maui, Hawaii
Website
hawaiiankoaturner.com
Andy Cole from Hawaii demonstrated the McNaughton system on making a nested set of natural edge bowls at SWAT this past weekend. I attended his session twice because I found him to be very informative and entertaining ... not to mention that he handed out dark chocolate covered macadamia nuts to the audience. He also discussed the evolution of the system. I believe that he said that the large blades were originally about 7.5 mm thick and now they are about 5.5 mm thick. Also, the curvature of the blades have changed. He said that he prefers the older blades which are more stable, but changes the profile from the original straight across to a V shape like the newer Mark 8 design. Andy also used the straight blade to plunge in a couple inches when designing the size and shape of each of the nested bowls. I liked that idea so I will be ordering a straight blade.
He was our first demonstrator at our club. A great guy. I had given up on the system, thanks to him I’m coring now...
 

Bill Boehme

Administrator
Staff member
Beta Tester
TOTW Team
Joined
Jan 27, 2005
Messages
12,895
Likes
5,179
Location
Dalworthington Gardens, TX
Website
pbase.com
That's a great tip, Bill, on plunging straight in. I've been doing that with my Magnus Tool, and I like that it can be done free hand with so little effort before putting the McNaughton in place.

The straight blades need the gate so that they won't twist once it's in the wood. There are other systems like the Johannes Michaelsen tool that have an arm brace and a side lever.

Mike Mahoney doesn't use the straight blade for coring, but Andy said that Mike attended one of his coring demos and was favorably impressed by using the straight blade to start the cuts. I bought my sets from Craft supplies so they didn't include the straight blades. I plan on buying a large straight blade (Craft Supplies call it the Jumbo blade). It does make sense that a straight blade would be much better for starting a natural edge cut.
 
Joined
Aug 26, 2006
Messages
656
Likes
558
Location
Hampton Roads Virginia
Bill, it's so fun when things go "click". Your description of the use of the straight blade was it...As some folks say, worth the price of admission. Then I went to Andy's web site and watched his video...Ties it all together. Now just waiting for the wood fairy...

Ps. I really like the wood knob extension on his oneway handles...
c
 
Back
Top