• Beware of Counterfeit Woodturning Tools (click here for details)
  • Johnathan Silwones is starting a new AAW chapter, Southern Alleghenies Woodturners, in Johnstown, PA. (click here for details)
  • Congratulations to Keven Jesequel for "Big Leaf Maple" being selected as Turning of the Week for April 15, 2024 (click here for details)
  • Welcome new registering member. Your username must be your real First and Last name (for example: John Doe). "Screen names" and "handles" are not allowed and your registration will be deleted if you don't use your real name. Also, do not use all caps nor all lower case.

Photography tent and continuous tungsten lights......

Joined
Jan 24, 2010
Messages
3,058
Likes
901
Location
Cleveland, Tennessee
Sometimes, all that technical knowledge just gets in the way of progress.........Heh,heh,heh........
My friend used to refer to confusing the issue with facts!:eek:
This has been "enlightening." I'm going to experiment with some of the techniques described. Thanks to all!
 

odie

TOTW Team
Joined
Dec 22, 2006
Messages
7,109
Likes
9,706
Location
Panning for Montana gold, with Betsy, the mule!
New light set-up......first photo

Just got the new tent and tungsten light set-up put together this evening.

I made a PVC frame around the tent and attached two incandescent 60w lamps above, and the tungsten lamps are sitting on each side just above level. The PVC and incandescent lights were an afterthought for me, and after seeing Robert Manning's lights, I decided to add them......

This is the very first photograph. The color of the Ash shallow bowl looks a little washed out......maybe I can change out the 60w bulbs for 40w....????

It looks like my usual "hot spots" aren't there, except for a tiny little bit on the opposite side under the inward turned rim.......the tent is probably why, I think. Shot was done with no flash. This aspect looks very promising to me.

The depth of field looks good to me......

comments welcome.

I realize I've got more experimenting to do......I need to get better color in the wood. The white backdrop is obviously wrinkled, but that can be fixed with an iron to smooth it out.

The tent comes with black, red, blue and white back drops. I'm thinking black might look pretty good, but haven't tried that yet.

I am going to re-look that video over about setting the "white balance"......

Instead of trying for perfection on the first attempt, I'm hoping I can arrive there by changing a little aspect of my photography at a time......step by step. Hope that makes some sense to everyone. I think my photography, although not professional looking (yet!) is good enough to sell my turnings. I'm not denying need to improve.......just trying to get there in my own way of doing things.

Thanks.........

ooc
 

Attachments

  • IMG_0394.JPG
    IMG_0394.JPG
    107 KB · Views: 59
  • IMG_0396.JPG
    IMG_0396.JPG
    263.4 KB · Views: 56
Last edited:

Bill Boehme

Administrator
Staff member
Beta Tester
TOTW Team
Joined
Jan 27, 2005
Messages
12,894
Likes
5,178
Location
Dalworthington Gardens, TX
Website
pbase.com
Going from 60W to 40W lights will only make the exposure longer, but won't change anything else very much except maybe make the image look a bit more orange.

I am glad that you took a shot of your lighting set up. It look to me that the lights are arranged too symmetrically around the tent. I would try moving the large light on one side further away and removing the small light on that side. I do not think that you need any lights down low. Put both small lights on the bright side and raise them up about 8 to 12 inches. Get some pieces of construction paper (both black and white) to make light modifiers. The black will help with increasing shadows and the white will both block light coming in from the side where it is placed and also bounce some light where you want to make things brighter.

Like you said, the turning looks too flat and it is because the lighting is too uniform. You want to use as much of the dynamic range of light that the camera is capable of capturing. In order to do that, you need both bright light and sufficiently dark shadows. When we see a turning with our eyes, we have the ability to see the three dimensional aspect -- when the camera sees it everything becomes flat. To compensate for that, we need to take advantage of light and shadows to give the perception of depth.

If you have ever noticed in B/W movies, the filmmakers were masters of playing with light and shadows to create strong visual perceptions of three dimensional quality. And, of course, Ansel Adams was the groundbreaking master of this in still photography. The advent of color reduced some of that need, but not entirely. If you really want to get a good feel for your lighting, switch your camera to record B/W images. It will become very noticeable to you when you see only shades of gray and won't have the color information to mislead you. Good luck.
 
Last edited:

Bill Boehme

Administrator
Staff member
Beta Tester
TOTW Team
Joined
Jan 27, 2005
Messages
12,894
Likes
5,178
Location
Dalworthington Gardens, TX
Website
pbase.com
A few more thoughts. In addition to lighting, there are some basic things that can be done in the camera to create the kind of images that you want to see. I noticed in the image metadata that you shot the image in Auto mode which resulted in an aperture of f/4.5 and a shutter speed of 1/80 second at ISO 800.

The camera meters off the entire scene and comes up with an exposure value based on that reading. That may be OK for landscape shots, but the white background is throwing off your camera's exposure reading. A dark gray background would help. Also, the color of the wood is biasing the auto white balance calculated by the camera. You can easily set the camera to use a user-defined white balance instead with a sheet of white paper.

Instead of using an auto exposure, switch to aperture priority exposure (Av) and set the ISO to its lowest value (probably either 80 or 100). Also, set the aperture to a stopped down value like f/11 or even f/16. Zoom the lens to a long value and then back the camera and tripod away from the light tent about five or six feet. Since I am not familiar with your particular camera, you would need to experiment around with this. You could even use manual exposure to get even more options in getting the exposure the way that you would like to see it. One thing for sure -- as long as you leave the camera on auto, things are not going to change a great deal. I know that you think that this is getting too technical, but I assure you that this is just barely breaking out of the basic snapshot mode.

The camera is also wanting a fast exposure so it is opening up the lens to the largest aperture value and running up the ISO to a high value. Both of these things are bad. The wide aperture narrows the depth of field and the high ISO makes the image have a grainy appearance.

Although it is possible to do a lot of stuff in post production with digital images, nothing is ever as good as getting the exposure right in-camera and eliminating much of the need for repairing things in post production. Even so, some post processing shows that pushing a few pixels around can remove some of the color cast and flatness. I did a quick edit which is probably over cooked, but it may help to illustrate. You could easily get something much better in-camera without post processing.

BTW, I really like the design.

odie1a.jpg
 

odie

TOTW Team
Joined
Dec 22, 2006
Messages
7,109
Likes
9,706
Location
Panning for Montana gold, with Betsy, the mule!
Bill.......

Thank you for the comments.......I read them, but need to absorb the information a little more. I'll play around with positioning of the lights, and set the white factor.......among some other things.

I have some software to modify photographs, too. I've been using them, but it looks like you were more successful at getting a better photograph than I was........I need to work on that, too........ How did you make the backdrop more white, while improving the color at the same time?

later......

ooc
 
Last edited:

Bill Boehme

Administrator
Staff member
Beta Tester
TOTW Team
Joined
Jan 27, 2005
Messages
12,894
Likes
5,178
Location
Dalworthington Gardens, TX
Website
pbase.com
..... How did you make the backdrop more white, while improving the color at the same time?...

That was pretty easy to do. All it took was a single mouse click in the upper left corner of the image where I knew the "color" ought to be white. Once I did the mouse click to set white balance, the tint became "neutral" and all the colors looked more like they should.

BTW, "neutral" means that there is no color bias. White is neutral and so are black and any shade of gray.

The software that I used is Adobe Camera Raw. It comes with the various versions of Photoshop. Canon provides some software with their cameras, but I don't think that any of their software allows you to do this with a JPG image very easily.

When the white balance is set correctly, then all the colors will appear as they ought to look -- that is the whole purpose of white balance. To explain the reason why, we need to first understand that white isn't a color -- it is a mixture of all the colors in just the right proportion. If the colors are not in the right proportion, then white is not white, instead it becomes a color. So, just like when doing your laundry, when the whites come out white, all is right with the world and everybody is happy.

Setting up a custom white balance for your camera is pretty easy. It involves shooting something that is white like a sheet of paper that fills more than half of the frame and then going into the camera menu to set it as the custom white balance. This custom white balance is not a "one-size-fits-all" -- it is only for the current lighting that you are using. So, once you have the lighting the way that you want it, make a custom white balance shot, set the camera to use it as the reference white balance, and you are in business for your current shooting session.
 

odie

TOTW Team
Joined
Dec 22, 2006
Messages
7,109
Likes
9,706
Location
Panning for Montana gold, with Betsy, the mule!
Instead of using an auto exposure, switch to aperture priority exposure (Av) and set the ISO to its lowest value (probably either 80 or 100). Also, set the aperture to a stopped down value like f/11 or even f/16. Zoom the lens to a long value and then back the camera and tripod away from the light tent about five or six feet. Since I am not familiar with your particular camera, you would need to experiment around with this. You could even use manual exposure to get even more options in getting the exposure the way that you would like to see it. One thing for sure -- as long as you leave the camera on auto, things are not going to change a great deal. I know that you think that this is getting too technical, but I assure you that this is just barely breaking out of the basic snapshot mode.

I'm still experimenting with this, Bill......

Tried the AV setting and it looks like F8 is the highest setting possible. Custom white balance is set using shortcut button and a white piece of paper......don't know if this is working right, or not, but I think so. On AV, shutter speed is automatic. Will probably have to use manual, because ISO is so high.........

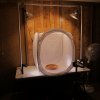
Anyway, so far, not so good. I posted some pics to my AAW album today, and they are still on AUTO setting. Custom White Balance does not work on Auto, but I'm managing to get some clear shots otherwise, with camera close in......better than I've ever gotten before, but they are really big photos......don't see how to change that. The color on these pics doesn't look as nice as without the tent, but the hot spots are greatly reduced. If the Custom White Balance worked in the AUTO mode, I think I could come up with something that looks good.......

I'm going over the manual, but so far, much of it doesn't make much sense to me.......I'm such a novice with cameras, that it's like trying to read it in another language!

It looks like the manual setting will be the way to go, but so far I'm not coming up with anything remotely acceptable.

I've added some clip on incandescent lights, so more light is available.

Will work on this some more...........really frustrating at this point. It's important to me, so somehow I'll muddle through and get results. Someone who knows what they are doing with this S95 camera, could probably show me what to do in a few minutes..........

Thanks for trying to help......:D

ooc
 

Attachments

  • 954-1 figured Ash.jpg
    954-1 figured Ash.jpg
    491.9 KB · Views: 21

Bill Boehme

Administrator
Staff member
Beta Tester
TOTW Team
Joined
Jan 27, 2005
Messages
12,894
Likes
5,178
Location
Dalworthington Gardens, TX
Website
pbase.com
You are doing the right thing by experimenting and learning. Learning what doesn't work is still learning -- just less fun than learning what does work.

There is a book titled "Understanding Exposure" by Bryan Peterson that a lot of beginners swear by and say that they have found it very helpful. I bought a copy to evaluate it and was a bit disappointed, but it might just be because I didn't see anything that I personally found useful. It is a fairly old book (in digital terms) that was revised to cover digital photography and my opinion is that the revised edition was too obviously a minimal effort job -- sort of like slapping some fresh paint on an old barn.

A lot of things are the same when it comes to digital and film such as setting the three basic components of exposure -- shutter open time (also called Tv and shutter speed), the size of the hole that lets light pass through the lens (called the aperture or Av), and sensitivity of the recording medium (ISO) whether film or digital sensor.

What Peterson says about how and why to choose which particular settings to use for those three components are good information and that is the essence about understanding exposure. The problem is that Peterson thought that he had to write a thick book and gets long winded spreading that information throughout the book rather than putting it all together in a nice compact form. Wading through all of his verbiage is what turned me off.

The book has lots of pictures, but too many as far as I am concerned. It seemed like there were too many pictures that had little to do with the text other than showing off some of his photos and making the book thicker.

Anyway, you're correct that when using Av, you do not control the shutter speed. I am surprised that the Av mode doesn't also allow you to also set the ISO value to whatever you want. Hopefully, the camera has the option to allow you to set both aperture and ISO and then let shutter speed be whatever it is.

The ultimate solution is to go to purely manual exposure, but first you will need to have a fairly good understanding of how the three parts of exposure interact.

I do not remember what your lighting set up is, but John Lucas mentioned in one of the early posts about not mixing different kinds of lighting -- in other words do not mix incandescent with fluorescent. This gets into rather deep technical poop pretty fast so I will just say that he is dead on about that. Our eye/brain is able to sort things out so that it looks OK, but film and digital sensors see light for what it is and it ain't pretty.
 
Joined
Dec 2, 2011
Messages
66
Likes
9
Location
San Leandro, CA
Ash Bowl

Odie,

You will get your preferred lighting with experimentation and good advice here. Surely you have the means with your setup. No doubt better results are coming.

I want to comment that I "really" like the Ash bowl. Nice piece!!

Doug Olsen
 
Joined
Oct 14, 2012
Messages
93
Likes
74
Location
Michigan
Wow, have I got a lot to learn. I just posted a few pieces on Etsy and I thought I was doing good with a blue satin cloth as a backdrop.
 

odie

TOTW Team
Joined
Dec 22, 2006
Messages
7,109
Likes
9,706
Location
Panning for Montana gold, with Betsy, the mule!
Odie,

You will get your preferred lighting with experimentation and good advice here. Surely you have the means with your setup. No doubt better results are coming.

I want to comment that I "really" like the Ash bowl. Nice piece!!

Doug Olsen

Thank you very much for the compliment, Doug.......:D

Yep, better photos are coming up! I haven't taken any more photos of my turnings lately, but I do have several more bowls completed. When I get back to it, I've got some ideas for improvement to try out.........

ooc
 

john lucas

AAW Forum Expert
Joined
Apr 26, 2004
Messages
8,332
Likes
3,584
Location
Cookeville, TN
Odie I will try to shoot something next week if I can find the time. I don't use the photo booth much anymore but I'll set mine up and show you how I do it. Then I might also do it with just the softbox and another with just the 12" reflector light.
 

odie

TOTW Team
Joined
Dec 22, 2006
Messages
7,109
Likes
9,706
Location
Panning for Montana gold, with Betsy, the mule!
Odie I will try to shoot something next week if I can find the time. I don't use the photo booth much anymore but I'll set mine up and show you how I do it. Then I might also do it with just the softbox and another with just the 12" reflector light.

OK, thanks John......

I'm sure I'm not the only one who is interested in seeing some photos with explanations of how the different effects were done........:D

ooc
 
Back
Top