So I have stacks and stacks of firewood from hubby's cutting a piece of property. I often run across pieces I'd like to use for spindle turning. Making this stuff square, though, is challenging. I have decent tools -- Unisaw, Makita SCMS and a 14" bandsaw. Oh, and a jointer that's rusty but can be pulled into duty. Do any of you have a jig, fixture and/or technique that makes this process straightforward and pretty safe? TIA!

-
We just finished moving the forums to a new hosting server. It looks like everything is functioning correctly but if you find a problem please report it in the Forum Technical Support Forum (click here) or email us at forum_moderator AT aawforum.org. Thanks! -
Beware of Counterfeit Woodturning Tools (click here for details) -
Johnathan Silwones is starting a new AAW chapter, Southern Alleghenies Woodturners, in Johnstown, PA. (click here for details) -
Congratulations to Dave Roberts for "2 Hats" being selected as Turning of the Week for April 22, 2024 (click here for details) -
Welcome new registering member. Your username must be your real First and Last name (for example: John Doe). "Screen names" and "handles" are not allowed and your registration will be deleted if you don't use your real name. Also, do not use all caps nor all lower case.
You are using an out of date browser. It may not display this or other websites correctly.
You should upgrade or use an alternative browser.
You should upgrade or use an alternative browser.
Safe & efficient way to square up rough stock for spindle turning?
- Thread starter Jamie Straw
- Start date
- Joined
- Aug 31, 2006
- Messages
- 317
- Likes
- 115
- Location
- Montgomery, TX
- Website
- www.gulfcoastwoodturners.org
Square Not Required
Jamie - No need to cut the timber into a square blank. Just clean up the ends, mount the timber between centers, grab your spindle roughing gouge or bowl gouge and have at it. - John
Jamie - No need to cut the timber into a square blank. Just clean up the ends, mount the timber between centers, grab your spindle roughing gouge or bowl gouge and have at it. - John
- Joined
- Jan 27, 2005
- Messages
- 12,897
- Likes
- 5,185
- Location
- Dalworthington Gardens, TX
- Website
- pbase.com
Do like John King said unless you are talking about something that is very large diameter that you are wanting to slice and dice. In that case, begin like John said and make a cylinder with square ends. Next, if it is short, you can stand it on end and use the bandsaw to cut it into blanks. Otherwise, you can make a sled for the bandsaw and screw the cylinder to it so that it won't rotate as you slice it up.
- Joined
- Apr 27, 2004
- Messages
- 8,637
- Likes
- 4,976
- Location
- Lakeland, Florida
- Website
- www.hockenberywoodturning.com
Often you can just mount small limbs and turn goblets, mushrooms etc.
I suspect you want to get seceval pieces from one log section or remove some way out of round material
I like the bandsaw or the chainsaw,for ripping these.
If you have a froe (sp?) splitting is an excellent way to make squares.
No kerf loss and the grain is para lee to the split.
Chainsaw is not good for small pieces, it takes a wide kerf, and it is loud.
Material cut on the bandsaw needs a flat surface to slide on the take to be safe and efficient.
I often rip a log through the pith an then cut a bunch of squares of 2, 3, 4" on the bandsaw putting the chainsaw cut on the table.
Pieces that are two small for the chainsaw can be screwed to a long L shape jig
Two 1 x 6 boards glued to get her to make an L
Google "Bandsaw log cutting jig" the look at all the images. You will see lots of these in use and being set up
The length needs to be about the length of the logs you want to cut.
Put the screws in waste areas,or along a cut line when you take it off the jig.
Also don't cut your screws with the bandsaw.
Al
- Joined
- Apr 1, 2015
- Messages
- 603
- Likes
- 443
- Location
- Sitka, Alaska, United States
- Website
- www.zachlaperriere.com
For ripping big stock, I use a chainsaw, but here's another, much more elegant idea.
Over on a chainsaw milling forum that I enjoy, there's an Australian fellow who put together a very snazzy bandsaw sled.
Over on a chainsaw milling forum that I enjoy, there's an Australian fellow who put together a very snazzy bandsaw sled.
Well, if you are getting blanks from the fire wood pile, I would use an axe to get it some what round, or a fro if you happen to have one of them around. You would get pretty much straight grain, unless you have knots. Other than that, I put them between centers and turn a tenon on one end, then mount that in a chuck and turn it round. It isn't fun taking an 8 inch square blank and turning it down to round without knocking off the corners some first. Most bandsaw tables will tilt, and the Unisaw can do a nice job, but I never felt comfortable cutting off champhers on the table saw because the cut off always seems to be in a kick back spot.
robo hippy
robo hippy
john lucas
AAW Forum Expert
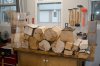
Well I just had to cut down a 20" maple and as I was splitting it into firewood I decided to "Rive" out some pieces for spindles as well as bowl blanks and hollow vessel blanks. I used my big wood splitter which is perhaps overkill for getting wood for the lathe but it worked extremely well. It won't take much work to get it back to round when I get it too the lathe. I did round out a few on the bandsaw because I'm giving those to a friend and made them just small enough to fit his lathe so he won't have to lose much size when trueing them up.
Attachments
I've been busy with sick kitty, haven't had a chance to digest the responses -- just scan them. But to clarify, our firewood is relatively small wedges (for a small fireplace insert), and the goal is prepping stock from these in order to make wine stoppers and such. Will go back tonight and really digest your responses. Thanks!
john lucas
AAW Forum Expert
Jamie I make blanks for bottle stoppers, ornament finials and boxes all the time from firewood. I simply split it roughly square and seal the ends with wax. I put them on the shop floor under a cabinet so they are out of the way and let them dry. Takes maybe 6 months for 1" square, about a year for 2" or so. Usually I have so many that I don't keep track and just try to stack them so the latest are on one end. when I need a blank I just start on the "dry" end and they have always been dry enough to use. I use an old electric skillet set to the lowest setting that will melt the wax. I just use canning wax. It has a low flash point and could cause a fire if you use any kind of flame to melt it. Since it melts at about 160 it's very safe to use. I dropped a larger bowl blank in it one day and splashed it all over me including my face. Didn't hurt at all except trying to get the wax out of my mustache. Did ruin my shirt. I never figured out a way to get the wax out of it.
To both Johns.....
With the wine stoppers, squareness is needed to drill the hole for the mandrel threads to fit in. Looking at John L's wine stopper video, the blank is mounted on a mandrel, I assume the hole is bored for the stopper hardware to fit into. Having learned the hard way that not having square stock when drilling that hole causes fatal geometric problems, what steps do I take (1, 2, 3, 4) with a ratty piece of firewood to get to a blank that I can drill a hole into? I seem to have a mental block about this -- when turning between centers, how can I square off the ends (or even one end) of a piece of stock? Be nice -- I'm feeling rather stupid about this! Also relates to making handles for pie servers and such.
With the wine stoppers, squareness is needed to drill the hole for the mandrel threads to fit in. Looking at John L's wine stopper video, the blank is mounted on a mandrel, I assume the hole is bored for the stopper hardware to fit into. Having learned the hard way that not having square stock when drilling that hole causes fatal geometric problems, what steps do I take (1, 2, 3, 4) with a ratty piece of firewood to get to a blank that I can drill a hole into? I seem to have a mental block about this -- when turning between centers, how can I square off the ends (or even one end) of a piece of stock? Be nice -- I'm feeling rather stupid about this!
Also relates to making handles for pie servers and such.
Last edited:
Jamie
I drill all my stopper blanks on the lathe. Drill bit and Jacobs chuck in the tailstock, stopper blank in the scroll chuck. I true up the face slightly concave, this ensures that the stopper sits tight to the blank with no gaps. Then dimple with the toe of a skew and drill.
The main thing to remember when drilling on the lathe is to hold onto the Jacobs chuck when retracting the bit as it could come out of the tailstock.
If I decide to tap the hole, I do that next, with my left hand turning the chuck and my right hand holding the tap/wrench. In “soft†wood, I don’t usually tap, but I do use 100% silicon sealant to glue in/on the stopper.
cc
Jamie
I drill all my stopper blanks on the lathe. Drill bit and Jacobs chuck in the tailstock, stopper blank in the scroll chuck. I true up the face slightly concave, this ensures that the stopper sits tight to the blank with no gaps. Then dimple with the toe of a skew and drill.
The main thing to remember when drilling on the lathe is to hold onto the Jacobs chuck when retracting the bit as it could come out of the tailstock.
If I decide to tap the hole, I do that next, with my left hand turning the chuck and my right hand holding the tap/wrench. In “soft†wood, I don’t usually tap, but I do use 100% silicon sealant to glue in/on the stopper.
cc
That's how I've been drilling also. But does not the stock end that's held in the scroll chuck have to be square (the end square to the axis of the lathe)?? The first few stoppers I made were from store-bought blanks that I trued up on the miter saw before turning. When I went to my own rough stock, all kinds of problems are popping up.
- Joined
- Jan 27, 2005
- Messages
- 12,897
- Likes
- 5,185
- Location
- Dalworthington Gardens, TX
- Website
- pbase.com
That's how I've been drilling also. But does not the stock end that's held in the scroll chuck have to be square (the end square to the axis of the lathe)?? The first few stoppers I made were from store-bought blanks that I trued up on the miter saw before turning. When I went to my own rough stock, all kinds of problems are popping up.
I think that maybe you are turning them backwards from what Clifton said. And, no need for a scroll chuck, just turn between centers. You can drill from the headstock while holding the blank from rotating. Then reverse the piece and make the end slightly concave. a cone center works well for centering in the drilled hole. I haven't made many bottle stoppers, but I think that I would approach it the same way that I turn a tool handle.
john lucas
AAW Forum Expert
I put my stopper blanks in a vise and drill them on the drill press. The bottom is rarely square to the sides since they are usually just rouged out by eye on the bandsaw when I throw them in my stopper blank. I put them on my stopper mandrel and square up the bottom using my parting tools and then proceed to turn the rest of the blank. If it's a longer blank that will sometimes chatter out on the end I loosen my chuck jaws and slide the mandrel and stopper in until the bottom butts against the chuck jaws. This usually stops the chatter.
I think that maybe you are turning them backwards from what Clifton said. And, no need for a scroll chuck, just turn between centers. You can drill from the headstock while holding the blank from rotating. Then reverse the piece and make the end slightly concave. a cone center works well for centering in the drilled hole. I haven't made many bottle stoppers, but I think that I would approach it the same way that I turn a tool handle.
Nope, turning them just as Clifton described, at least in terms of the scroll chuck in headstock, drill bit coming from tailstock end via Jacobs chuck. Only difference is that I use Ruth Nile's technique of insetting the top of the stopper just a tad (more so than just a concave surface). Appreciate the time-saving suggestion of drilling from the headstock sans scroll chuck, though it's hard to imagine being so steady holding it that I get a perpendicular hole. Will try it on some scrap.
Silicon?
Silicon -- that's a new one (to me). Since I like to use spalted maple, I'm interested. Why silicon rather than epoxy?
[Snip] In “soft†wood, I don’t usually tap, but I do use 100% silicon sealant to glue in/on the stopper.
cc
Silicon -- that's a new one (to me). Since I like to use spalted maple, I'm interested. Why silicon rather than epoxy?
- Joined
- Jan 27, 2005
- Messages
- 12,897
- Likes
- 5,185
- Location
- Dalworthington Gardens, TX
- Website
- pbase.com
Nope, turning them just as Clifton described, at least in terms of the scroll chuck in headstock, drill bit coming from tailstock end via Jacobs chuck. Only difference is that I use Ruth Nile's technique of insetting the top of the stopper just a tad (more so than just a concave surface). Appreciate the time-saving suggestion of drilling from the headstock sans scroll chuck, though it's hard to imagine being so steady holding it that I get a perpendicular hole. Will try it on some scrap.
As long as you are leaving the blank in the scroll chuck and not moving it after drilling the hole I would think that there shouldn't be any problem with the top mating perfectly flush with stopper. But then I'm not really into making bottle stoppers ... primarily I just buy pretty looking bottle stopper kits and fancy blanks with good intentions of using them one of these days. At the rate of about two per year, my present inventory should be good for the next couple decades.
Last edited:
Jamie,
I don't think there is any problem with epoxy, as I recall I was having that internal conversation, nuking it out to the nth degree...A fairly heated discussion, till I finally said " just glue the gosh darn thing" or words to that effect...I think at the time I was thinking about the stopper going in and out of the fridgidaire, warm to cold, cold to warm, condensate, wood movement, metal movement, moisture movement etc etc etc...
Been glueing with Dap 100% silicone (aquarium safe, just because) for years with no issues, but, I'm open to the pros and cons discussion also.
As far as soft woods, Ruth says to use a 21/64th, I use a 9mm cause thats what I have, its about 1/32ond bigger, I don't tap soft wood, just screw it onto the mandrill and turn. Harder woods I tap.
As far as wonky wood in the chuck, I go for it, if I cannot get a hold that I'm comfortable with, I'll turn it between centers till I am. whether that's just round, or all the way to a tendon. I turned some branch wood bottle stoppers that I wanted to leave the bark on, so I started between centers, turned a 3/4 inch tenon and gripped that in the chuck where the woodworm screw goes, then drilled, tapped etc, worked like a champ.
cc
Nope, turning them just as Clifton described, at least in terms of the scroll chuck in headstock, drill bit coming from tailstock end via Jacobs chuck. Only difference is that I use Ruth Nile's technique of insetting the top of the stopper just a tad (more so than just a concave surface). Appreciate the time-saving suggestion of drilling from the headstock sans scroll chuck, though it's hard to imagine being so steady holding it that I get a perpendicular hole. Will try it on some scrap.
If you hold the blank in a chuck that is inserted in the tapped hole any turning you do will be concentric with that chuck or fixture and hence your finished stopper will be concentric (if you want that). Don't worry about squareness, just face off or dish the threaded end in the same setting and chuck holding fixture as the drilling so all is square.
I use the plastic stoppers that fit the wooden pin supplied with them. (the white or yellowish color ones). Except if possible (between centers) I turn a tenon that is the size of the supplied wooden pin, or slightly larger. Then I chuck up on the tenon and turn and finish the stopper. It is shorter, cheaper (more economical) and will hold some pressure.
Stu
In answer to the request for step-by-step instructions, one way to accomplish what you ask, albeit slowly, is as follows"
- Mount blank between centers
- Face off ends
- Make short tenon on one end
- Remount with tenon in scroll chuck
- Drill hole for mandrel
- Remount blank on mandrel
- Turn as usual
- Joined
- Aug 31, 2006
- Messages
- 317
- Likes
- 115
- Location
- Montgomery, TX
- Website
- www.gulfcoastwoodturners.org
General Rule
I believe that it is a best practice to use a flexible adhesive (E6000 comes to mind) when bonding flexible (wood) items to non-flexible (bottle stoppers, ice cream scoops, etc.) items. - John
I believe that it is a best practice to use a flexible adhesive (E6000 comes to mind) when bonding flexible (wood) items to non-flexible (bottle stoppers, ice cream scoops, etc.) items. - John
Jamie,
I don't think there is any problem with epoxy, as I recall I was having that internal conversation, nuking it out to the nth degree...A fairly heated discussion, till I finally said " just glue the gosh darn thing" or words to that effect...I think at the time I was thinking about the stopper going in and out of the fridgidaire, warm to cold, cold to warm, condensate, wood movement, metal movement, moisture movement etc etc etc...
Been glueing with Dap 100% silicone (aquarium safe, just because) for years with no issues, but, I'm open to the pros and cons discussion also.
As far as soft woods, Ruth says to use a 21/64th, I use a 9mm cause thats what I have, its about 1/32ond bigger, I don't tap soft wood, just screw it onto the mandrill and turn. Harder woods I tap.
As far as wonky wood in the chuck, I go for it, if I cannot get a hold that I'm comfortable with, I'll turn it between centers till I am. whether that's just round, or all the way to a tendon. I turned some branch wood bottle stoppers that I wanted to leave the bark on, so I started between centers, turned a 3/4 inch tenon and gripped that in the chuck where the woodworm screw goes, then drilled, tapped etc, worked like a champ.
cc
Not sure why I said epoxy -- I've been using Titebond II. Was probably preoccupied with a pie server kit I've been working on. Ruth's mandrel is a tap. I've had to be careful with the spalted woods, and recently went to a slightly smaller drill bit. Thanks for the description in your last sentence. Was that branch wood turned in the usual grain orientation for spindle work? You would have had the tenon on the top after drilling and tapping, right? I'd love to see a picture. Last month, I turned a stopper from a smallish branch of lilac. I've also cut a cherry blank "sideways" so that a little bump in the bark could be on the top of the stopper, that was fun.
I believe that it is a best practice to use a flexible adhesive (E6000 comes to mind) when bonding flexible (wood) items to non-flexible (bottle stoppers, ice cream scoops, etc.) items. - John
Ah! I have some E6000 (assuming it has a long shelf life), will try that on my pie server perhaps. The tang of the server is flat and somewhat thin, the hole it goes into is round of course, ferrule has a flat slot in it. Lots of feedback on the product page with people complaining about the design. Would be interesting to try E6000. I thought of packing the hole with sawdust to stabilize and adding epoxy, but that didn't feel like it would work.
If you hold the blank in a chuck that is inserted in the tapped hole any turning you do will be concentric with that chuck or fixture and hence your finished stopper will be concentric (if you want that). Don't worry about squareness, just face off or dish the threaded end in the same setting and chuck holding fixture as the drilling so all is square.
I use the plastic stoppers that fit the wooden pin supplied with them. (the white or yellowish color ones). Except if possible (between centers) I turn a tenon that is the size of the supplied wooden pin, or slightly larger. Then I chuck up on the tenon and turn and finish the stopper. It is shorter, cheaper (more economical) and will hold some pressure.
Stu
The problem I was having awhile back with stoppers was, I'd use Jacobs chuck to drill hole in blank being held by scroll chuck. But if the blank wasn't perfectly square at that end, the stopper wouldn't sit square to the hole (mandrel was, obviously, kittywampus also). Yesterday, I found my flat parting tool (as opposed to diamond-shaped), and I worked on squaring things off with that. See my next post for the "bad mandrel" and "ok mandrel" headaches with the pie server process.
Latest squareness headache...
Will preface by saying I'm going to visit my mentor this week, so will get help there, but this experience is the kind of thing that spoils my day. Am wanting to make 2 or 3 pie server handles (for the Craft Supplies kit). Made a practice one way back before the apple tree fell and steered me off course. Instructions for said pie server can be seen here. Little practice handle went fine, rather boring but fine. Then I screwed up the shop-made mandrel, so had to make another one. Proceeded to drill the hole in nicely squared cherry stock for the 7mm tenon to fit in. Oh cr@p, stock seriously not straight when I put it on the tenon. No way to turn it, it was so angled. Checked my drill press several times, seemed to be 90 degrees. Then I checked the mandrel (1st pic below), little 7mm tenon was far from parallel to lathe axis, so it was flinging the stock around in a circle. Cannot figure out why. So I decided just having the whole thing so long would exaggerate any flaw in drilling the hole or turning the tenon. Cut the whole thing down much smaller (2nd picture). I think this time, I'll drill the hole on the lathe, eliminate the drill press factor. Can't get to it until tomorrow night or Tuesday, we'll see how it goes.


Will preface by saying I'm going to visit my mentor this week, so will get help there, but this experience is the kind of thing that spoils my day. Am wanting to make 2 or 3 pie server handles (for the Craft Supplies kit). Made a practice one way back before the apple tree fell and steered me off course. Instructions for said pie server can be seen here. Little practice handle went fine, rather boring but fine. Then I screwed up the shop-made mandrel, so had to make another one. Proceeded to drill the hole in nicely squared cherry stock for the 7mm tenon to fit in. Oh cr@p, stock seriously not straight when I put it on the tenon. No way to turn it, it was so angled. Checked my drill press several times, seemed to be 90 degrees. Then I checked the mandrel (1st pic below), little 7mm tenon was far from parallel to lathe axis, so it was flinging the stock around in a circle. Cannot figure out why. So I decided just having the whole thing so long would exaggerate any flaw in drilling the hole or turning the tenon. Cut the whole thing down much smaller (2nd picture). I think this time, I'll drill the hole on the lathe, eliminate the drill press factor. Can't get to it until tomorrow night or Tuesday, we'll see how it goes.
Last edited:
odie
TOTW Team
- Joined
- Dec 22, 2006
- Messages
- 7,116
- Likes
- 9,812
Jamie.......question
From the time you turned your mandrel to the time you saw that it was not running true, did you remove and remount it in the chuck? For something that needs to run precisely true like this, it's almost never going to be perfectly true if there is a remount involved. Marking the position of the jaws on the mandrel stock will help, but still not perfectly true when remounting.
Your handle stock will probably not be drilled as true as you'd like, if you are using the DP to do it. As you are thinking, you'll probably have better results with the drilling of the handle stock in the lathe.
Probably would be best to drill all your handle stock prior to turning the mandrel.....or, you could make the mandrel mounted to a faceplate, and use the chuck for your handle drilling operations.
But......you know that I'm not much of a spindle turner, and others here may have better advice than what I can give on this subject.
ko
- Joined
- Jan 27, 2005
- Messages
- 12,897
- Likes
- 5,185
- Location
- Dalworthington Gardens, TX
- Website
- pbase.com
In addition to what Odie said, I would add that the boresight on the spindle and the boresight of the tailstock quill are never in perfect alignment. There will always be a tiny amount of radial offset as well as a tiny bit of angular difference. Hopefully, these errors are small enough to not matter for woodturning. This means that we have to do things that work around those problem areas. As Odie suggested, it is a good idea to not remove a blank from the chuck and then remount it. turning the drilled end slightly concave will also help to overcome small misalignment errors. tapping a hole for a loose fit is also better than a tight fit because it will allow things to move enough to get in alignment.
Titebond II is a wood glue and not really good for other materials. I haven't used Household Goop for this, but it works for just about everything that I have needed to stick together where the joint needed to have a slight amount of "give".
Titebond II is a wood glue and not really good for other materials. I haven't used Household Goop for this, but it works for just about everything that I have needed to stick together where the joint needed to have a slight amount of "give".
In addition to what Odie said, I would add that the boresight on the spindle and the boresight of the tailstock quill are never in perfect alignment. There will always be a tiny amount of radial offset as well as a tiny bit of angular difference. Hopefully, these errors are small enough to not matter for woodturning. This means that we have to do things that work around those problem areas. As Odie suggested, it is a good idea to not remove a blank from the chuck and then remount it. turning the drilled end slightly concave will also help to overcome small misalignment errors. tapping a hole for a loose fit is also better than a tight fit because it will allow things to move enough to get in alignment.
Titebond II is a wood glue and not really good for other materials. I haven't used Household Goop for this, but it works for just about everything that I have needed to stick together where the joint needed to have a slight amount of "give".
Thanks, Bill, I'll digest Paragraph 1 and go over it with Mr. Mentor -- some of it would work with stoppers, not so sure with the pie server handle. Don't want to beat it to death here. Re: adhesive, what kinds of joints would need "give"? Can't remember from whom I picked up the guidance on Titebond II, but for bottle stoppers, they had been using it for a long time and no problems. I had one stopper that got lost in the shop for 4 years, put together with TB-II, went through all the drastic humidity and temp changes that ruined my tools, and I had to destroy the wood top to get it off the threads (which were not rusted). These are Ruth Niles' hardware -- stainless steel and finely machined threads.
Jamie.......question
From the time you turned your mandrel to the time you saw that it was not running true, did you remove and remount it in the chuck? For something that needs to run precisely true like this, it's almost never going to be perfectly true if there is a remount involved. Marking the position of the jaws on the mandrel stock will help, but still not perfectly true when remounting.
Odie, I honestly can't remember! The stock was round to begin with (a leftover), so I may have mounted it in the chuck and turned the fat end first, then flipped it around and turned the front end with 7mm tenon. I'm pretty sure I didn't take it out of the chuck before mounting the handle-stock on it.
Your handle stock will probably not be drilled as true as you'd like, if you are using the DP to do it. As you are thinking, you'll probably have better results with the drilling of the handle stock in the lathe.
Probably would be best to drill all your handle stock prior to turning the mandrel.....or, you could make the mandrel mounted to a faceplate, and use the chuck for your handle drilling operations.
Thanks for those tips. Eventually, what I must have (if at all possible) is a mandrel that can be used and reused and always run (as) true (as possible). The faceplate mount sounds good. Whad'ya think about making the tenon with a piece of 7mm steel inset into the mandrel somehow?
But......you know that I'm not much of a spindle turner, and others here may have better advice than what I can give on this subject.
ko
Not a spindle turner, but a thinking turner!!
I always appreciate that!odie
TOTW Team
- Joined
- Dec 22, 2006
- Messages
- 7,116
- Likes
- 9,812
Jamie.....If you want a "forever" mandrel, I'd say your idea about using steel for the rod insert is a great idea. As long as a permanent mandrel is the goal, you also might want to use some hardwood to insert the steel rod into. Good luck with this, lady.......
ko
ko
and the winner is....
So I asked Ruth Niles what adhesive she prefers for wooden bottle stoppers, and it's Titebond II. "It has never failed." Most popular with her clients also. Good enough for me. She was probably the original source, but I'd just forgotten.
So I asked Ruth Niles what adhesive she prefers for wooden bottle stoppers, and it's Titebond II. "It has never failed." Most popular with her clients also. Good enough for me. She was probably the original source, but I'd just forgotten.
A brighter day...
Had my second mentor session today, the clouds have parted. Today, the mandrel was dispensed with, turning straight from the chuck with spigot jaws. Relief. Also got a feel for how the wine-glass stems will go. And I left with my 1" Rockwell HSS skew shaped to a radius and less aggressive bevel angle so I can learn a peeling cut. Really looking forward to learning that! That set of tools is turning out to be a bargain, only $40 for unused skew, bowl gouge, spindle gouge, parting tool and sumthin' else, all good quality HSS.Jamie.....If you want a "forever" mandrel, I'd say your idea about using steel for the rod insert is a great idea. As long as a permanent mandrel is the goal, you also might want to use some hardwood to insert the steel rod into. Good luck with this, lady.......
ko
- Joined
- Jan 27, 2005
- Messages
- 12,897
- Likes
- 5,185
- Location
- Dalworthington Gardens, TX
- Website
- pbase.com
Had my second mentor session today, the clouds have parted. Today, the mandrel was dispensed with, turning straight from the chuck with spigot jaws. Relief. Also got a feel for how the wine-glass stems will go. And I left with my 1" Rockwell HSS skew shaped to a radius and less aggressive bevel angle so I can learn a peeling cut. Really looking forward to learning that! That set of tools is turning out to be a bargain, only $40 for unused skew, bowl gouge, spindle gouge, parting tool and sumthin' else, all good quality HSS.
Great news all the way around. I had the feeling that you may have been overthinking things and creating extra work for yourself on a fairly simple task.
Great news all the way around. I had the feeling that you may have been overthinking things and creating extra work for yourself on a fairly simple task.
Thanks alot.
I was just following the directions and getting nowhere but frustrated. Eliminating the mandrel helped alot, and so does learning how to peel cut with the "new" skew, enabling me to get within 1/8" of the chuck, serious fun. Was still getting alot of chatter on a 7" spindle, because the tailstock doesn't line up well or easily, but I shimmed it a bit and have a technique to overcome that for the most part.