Oh no, another video that I need to update since I have learned a lot from when I first made it...
Odie, those arm rests are huge in reducing fatigue. I made a 2 section articulated arm using my inside Oneway bowl rest, a section of base ball bat blank for a knuckle, and some padded plywood for the second arm. One of the things about it I like best is that the pad totally supports the sander weight, so hold the drill on the arm rest and it is easy to spin/rotate the bowl with the other hand. This makes it a lot easier to see the abrasives cut and where trouble spots are.
Abrasives are a cutting tool. Of course they need to be sharp to cut. With Vince's blue discs, I use the 3 inch discs for anything I can fit them into as a 3 inch disc has more than twice the surface area of a 2 inch disc. I generally get at least one big bowl per set of discs before they go dull. They can feel dull to the touch, but if the dust is still flying, I keep cutting. Besides being sharp, to get the best cutting action, you need traction, and Vince started me down this path. You need slow bowl and drill speeds. Think of a dragster. They burn off their tires which generates a lot of smoke and heat, but they go no where, and if they spin out at the start they lose. Too fast of a speed on the pads throws off a lot of dust, but it doesn't cut as well as slower speeds, and if you put any pressure at all on it, you will heat check the wood. Oh yea, the drills burn out quicker too. I had the converter on my Beauty set to go down to almost zero before it stops, probably in the 15 to 20 rpm range. If it is any faster, I can't keep the abrasive on a spinning warped bowl. Drill never goes over about half speed which is around 600 rpm and slower for the polishing grits (above 320). If you are hand sanding and your hand is getting hot, you are using too much pressure, and/or spinning too fast. If you pad the abrasives so you don't feel the heat, then you are still going too hard and fast. Slow down, it cuts faster. The weight of the drill is more pressure than you need, which is another advantage of the arm rests, they take the weight off of your arms and back, and off the wood.
I don't like 80 grit, but some times it is a necessity. The bad thing about it is that the 80 grit scratches can be as difficult to remove as the tool marks. Some times it is a time saver to start at 80 just so you don't spend 2 or 3 times as long at 120 grit. My green turned bowls always seem to need a coarser starting grit than my dry turned bowls, and yes, I do a few of them. If I start at 80, my next step is 100, then 120, 180, 220, 320, and 400. It does help high light scratches from the previous grit if you change the part of the pad that you are using. Most of the time for me, that means on the outside of the bowl using the top of the pad with drill angled out, then using the bottom of the pad with the drill angled in, so the arcs vary from ( to ) except up and down, not sideways like this. Some times I can do the side ways one as well, but they tend to pull the drill up and down which is harder to control for me than up and down which pulls from side to side, hope that makes sense. I used to go a couple of grits and then hand sand with the spin, but can't do that with warped bowls...
I never blow pieces off. It sends more dust out into the shop. Just wiping them down with my hands is fine. I have never felt grit pieces from any abrasives stuck in the wood. In some closed forms, some can hand out inside, but they wipe out easily. I do wipe them down with my hands as well to force dust down into remaining scratches, which high lights them.
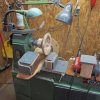
I prefer full spectrum 'therapy' type lamps, Blue Max lights by name, a 1500 watt floor lamp with adjustable brightness. Ott lamps are similar, and known to all the sewers, but not as bright. I have tried some of the LED lights and they work, but most are more spot lights, and not broad beam lights. I also think they need to work on their spectrum. Too white just doesn't do it. We have all taken a piece outside into direct sun light to inspect after we think it is 'finished' and get shocked, heavy sigh and maybe a few bad word, and then back inside to go back a couple of grits. Light spectrum is every bit as important as brightness.
Prescription glasses if your eyes are getting fuzzy, not the cheap reading glasses from the store. Huge difference in what you can see.
robo hippy