• We just finished moving the forums to a new hosting server. It looks like everything is functioning correctly but if you find a problem please report it in the Forum Technical Support Forum (click here) or email us at forum_moderator AT aawforum.org. Thanks!
  • Beware of Counterfeit Woodturning Tools (click here for details)
  • Johnathan Silwones is starting a new AAW chapter, Southern Alleghenies Woodturners, in Johnstown, PA. (click here for details)
  • Congratulations to Dave Roberts for "2 Hats" being selected as Turning of the Week for April 22, 2024 (click here for details)
  • Welcome new registering member. Your username must be your real First and Last name (for example: John Doe). "Screen names" and "handles" are not allowed and your registration will be deleted if you don't use your real name. Also, do not use all caps nor all lower case.

Lathe riser blocks?

Joined
Oct 14, 2006
Messages
57
Likes
0
Location
Renton, WA
Website
www.BillLuce.com
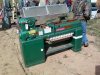
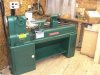
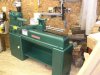
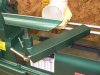
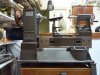
I have off and on wondered for a while about how common riser blocks have been to increase lathe swing. Anyone have any pics to share?

I know there used to be a 2 inch set available for the Woodfast years ago.

I kind of wish one of the tool vendors would take an interest in making like 1 or 1.5 inch riser blocks for the bigger OW. 26 vs 24 swing doesn't sound like much, but it actually is alot.

The headstock end could be aluminum, and the tailstock end steel. Naturally the clamping would have to be worked out on the tailstock and the toolrest a touch short. Done right, and it would be fully reversible to go back to normal swing.

Maybe some vendor will get a bug in their bonnet and see what they can work out?
 
Last edited:

Steve Worcester

Admin Emeritus
Joined
Apr 9, 2004
Messages
2,693
Likes
96
Location
Plano, Texas
Website
www.turningwood.com
the issue I see, especially with oneway where the two ends are machined to meet as perfectly as possible, is alignment.
I suppose if you used ground tolerance stock, at least the blocks would be the same thickness.
But with the tail stock, you would have to tap the bottom to allow the blocks to bolt on, or make it some kind of machined tray the tail stock sits into.

Local machinist might be your best bet
 

Max Taylor

In Memoriam
Joined
Dec 26, 2005
Messages
185
Likes
0
Location
Fort Worth, TX
riser blocks

As I see it, youare only adding more problems. You make it to handle bigger stock, then the motor is too weak. then if not enough space for a larger motor, what have you got? If the new alignment slips, more problems. If you want more capacity, get a larger lathe. Those engineers know what they are doing when they design motor, capacity, etc. to make the lathe.Just a thought or two. Max
 
Joined
Apr 25, 2004
Messages
165
Likes
3
Location
Milkyway
I have seen risers made out of wood. Instead of having someone make the risers for you out of steel and aluminum how about making the risers yourself?
 
Joined
Feb 21, 2006
Messages
22
Likes
50
Location
Maine
Bill,I have the outboard extension that goes on the head of the lathe,I have easily turned 48" diameter pieces on it....the only limiting factor is you cannot turn a very long piece..........with the outboard riser block,you have essentially another lathe....and the alignment kit is a must......it also works well for turning the spigots off large vessels as you can hold them on with the tailstock center and vacuum if you choose to.....worth a look for anyone wanting to turn large diameter pieces...................
 
Joined
Sep 10, 2010
Messages
148
Likes
0
Location
Stow,Ohio
All this talk of alignment and motors to small make me smile.The main large lathe before Oneway and the PM 3520a or b was the General 260 which almost all of had the 4" riser system. I have a friend with one that has the risers and it's a beauty to turn on. The building of risers I can't imagen being that bad for someone with good building skills.I've been thinking of making a set for the mini lathe to go from 10" to 14" thats only a riser of 2" and I think the rest of the lathe will handle it.
As always JMHO
 

john lucas

AAW Forum Expert
Joined
Apr 26, 2004
Messages
8,337
Likes
3,595
Location
Cookeville, TN
I made a set of wooden ones to give my 12" lathe a 16" swing. It worked but had a little more vibration. The same for the tailstock. I made longer bars for the tool rest but had to make some unusual ones to turn on the outer edge of a platter because the banjo would not slide far enough.
I now have some machining capabilities and have thought about raising my Nova Comet which has a 10" swing and making it 12 or 14. There are a lot of issues. The locking mechanism for the tailstock has to be added. The tool rest banjo may not be long enough. It's not hard to make the tool rest larger but is not easy to make the banjo longer.
Of course I would need a bigger motor and longer belt. Not to mention adding weight to the lathe.
Now I have a Powermatic 3520A. I plan to add bolt holes to the legs to lower the bed extension. They sell a tool rest extension but not something to raise the tailstock. Of course there isn't much room for the tailstock unless you changed to a longer bed instead of the short bed extension.
 
Joined
May 6, 2004
Messages
630
Likes
129
Location
Sonoma, CA
My older General 260 lathe came with riser blocks - I bought it second hand, but they appear to have come from General. Turns 20" diameter between centers.

Bill - I guess the question I have is - if you have a Oneway 2436 - and want to turn something larger than 24" diameter - why not just turn on the out board end of the lathe. Either get the Oneway setup or get/make a floor tool rest?
Hugh
 
Joined
Oct 14, 2006
Messages
57
Likes
0
Location
Renton, WA
Website
www.BillLuce.com
My older General 260 lathe came with riser blocks - I bought it second hand, but they appear to have come from General. Turns 20" diameter between centers.

Bill - I guess the question I have is - if you have a Oneway 2436 - and want to turn something larger than 24" diameter - why not just turn on the out board end of the lathe. Either get the Oneway setup or get/make a floor tool rest?
Hugh

My need for more swing is very specialized and only occasional. The pieces are not "round", so the total weight is less than a bowl or hollow vessel of that diameter. A say 24 inch diameter piece would only weigh a max of around #150 unhollowed.

I start virtually every piece I turn regardless of size or shape between centers, and these pieces are often taller than wide. So I need a tailstock, and at least around 30 inches of length between centers.

And I don't want it bad enough to take the time to figure out how to do it myself. Will be eyeing a lathe in St. Paul with more swing on a short list of lathes to really evaluate for my studio use, but it has other compromises in terms of a daily user that I need to really think about.

Just thought some riser blocks for occasional use might be just the ticket for this particular application.

In regard to floor rests, I have turned on free standing rests on large lumpy pieces in the past a little (outboard). I am relatively fearless when it comes to large lumpy pieces on the lathe, but I found the way the floor rest I used kind of rocked just a little when it grapped some wood when the lumps went around fairly terrifying. No control of my gouge, and with that size of lumpy wood it could really hurt.

In the end because of defects in the wood I turned it to where it would fit on 24 inches of swing with a real banjo. It was like heaven. (Kind of like a "thank god" hold in rock climbing).
 
Last edited:
Joined
Apr 25, 2004
Messages
165
Likes
3
Location
Milkyway
The Oneway large outboard setup is the way to go. The standard large outboard only gives about 17" between centers. But the folks at Oneway have made longer beds in the past. If your requirement was for 30" between centers Oneway might be able to provide you with a stable solution. The Oneway large outboard is a 48" swing or 40" over the banjo. This is a rock solid banjo and tool rest designed for turning large oddly shaped hunks of wood.
 
Joined
Oct 14, 2006
Messages
57
Likes
0
Location
Renton, WA
Website
www.BillLuce.com
The Oneway large outboard setup is the way to go. The standard large outboard only gives about 17" between centers. But the folks at Oneway have made longer beds in the past. If your requirement was for 30" between centers Oneway might be able to provide you with a stable solution. The Oneway large outboard is a 48" swing or 40" over the banjo. This is a rock solid banjo and tool rest designed for turning large oddly shaped hunks of wood.

I've borrowed a friends OW outboard setup in the past for a few weeks (on my lathe) and liked it okay - even tried to buy it from him but he spaced out and sold it to someone else.

I would need such a long version that it would 1) be really expensive and 2) takes up a lot of space both to use and store.

Since I don't do enough of these particular pieces, a custom OW outboard rig doesn't quite grab me as much as something more general purpose.

One thing I did like about the setup was by leaving the mounting plates between lathe and legs all the time, installing and removing the base (to store) was only a few minute job. And I agree the big banjo is much more stable than the stock one.

Something that I thought about in the past, too: If a person had two lathes, one with a sliding headstock, and enough room they could turn some things between lathes. Headstock almost to the end on the sliding headstock lathe (enough room for banjo to grab). And other lathe turned about with tailstock backwards (again enough room for banjo to grap). Would depend on the shape of the piece.

I don't have enough room to put two lathes in line like that, though.
 
Last edited:
Joined
Apr 29, 2004
Messages
576
Likes
2
Location
Hanover, VA
Website
www.abhats.com
I've never liked outboard setups and have tried several. Too much flex in tool rests or instability in tool rest stands is the main reason. When I started oval turning, I put 2" steel riser blocks under my Stubby's headstock to get some additional swing and they've been there ever since. I hadn't used the tail stock for a couple of years before, and haven't missed it since. I seriously doubt I'd ever turn anything 34" in diameter (haven't turned a full 30" diameter either). There's no difference in stability, no lack of power and nothing negative I've found about having them. If I ever want to, I've still the original four shorter bolts and can remove the blocks very easily.
 

Bill Boehme

Administrator
Staff member
Beta Tester
TOTW Team
Joined
Jan 27, 2005
Messages
12,899
Likes
5,188
Location
Dalworthington Gardens, TX
Website
pbase.com
I've borrowed a friends OW outboard setup in the past for a few weeks (on my lathe) and liked it okay - even tried to buy it from him but he spaced out and sold it to someone else.

I would need such a long version that it would 1) be really expensive and 2) takes up a lot of space both to use and store.

Since I don't do enough of these particular pieces, a custom OW outboard rig doesn't quite grab me as much as something more general purpose.

One thing I did like about the setup was by leaving the mounting plates between lathe and legs all the time, installing and removing the base (to store) was only a few minute job. And I agree the big banjo is much more stable than the stock one.

Something that I thought about in the past, too: If a person had two lathes, one with a sliding headstock, and enough room they could turn some things between lathes. Headstock almost to the end on the sliding headstock lathe (enough room for banjo to grab). And other lathe turned about with tailstock backwards (again enough room for banjo to grap). Would depend on the shape of the piece.

I don't have enough room to put two lathes in line like that, though.

I know someone who turned some very large architectural pieces between two Powermatic lathes bolted together. Since you are turning between centers, alignment of the two lathes does not need to be high precision -- just good enough to shine a light through all the holes from end to end. It would be important though to make certain that neigher lathe moves the slightest bit or else the piece will go flying. I have turned one piece with a scroll chuck on each end. On the tailstock end, the scroll chuck was attached to a Oneway live center. Since using scroll chucks on both ends means that the coupling is rigid, it means that the alignment has to be essentially perfect.
 
Joined
Dec 23, 2006
Messages
156
Likes
0
Location
Central Ohio
Alignment is not as difficult to achive as some would lead you to believe. Learn to use and read a dial indicator or laser alignment system and you are good to go. Depending on how large the piece is, a yard stick can bring you in close enough to eliminate most vibration.
 
Joined
Nov 9, 2010
Messages
9
Likes
0
Location
Western Maryland
Well, Bill, you asked about pics, so here are some. The story here is that I got a PM90 at auction for $300. I took it apart, sandblasted it, painted it, put a 2 hp 3 ph motor on, added a VFD, attached a FW/REV switch and POT, added a digital Tack, had a custom banjo made, AND put 3" risers on. The lathe came with a PM45 tailstock, which works fine. I have since acquired a PM90 tailstock, but need to get the riser made for that...no hurry, the 45 tailstock is useable.

The guy that made them for me is quite the handy fabricator. I don't think he is taking orders right now due to some much needed down time to catch up on things. But eventually, he might do more.

I also had to make the belt guard because, for obvious reasons, the old one didn't fit. I took it to a place to get it "lengthened". They said they could, but it would cost 200+. I made this for under $20 in wood...cherry actually, but that is just because that is what I had around.

BTW, alignment was not an issue.
 

Attachments

  • Photo0094 (Large).jpg
    Photo0094 (Large).jpg
    157.3 KB · Views: 141
  • PM90 finished 1 (Large).JPG
    PM90 finished 1 (Large).JPG
    118.5 KB · Views: 139
  • PM90 finished 3 (Large).JPG
    PM90 finished 3 (Large).JPG
    118.3 KB · Views: 140
  • PM90 new banjo (Large).JPG
    PM90 new banjo (Large).JPG
    122.5 KB · Views: 123
  • SANY0002 (Large).JPG
    SANY0002 (Large).JPG
    61.2 KB · Views: 121
Joined
Oct 14, 2006
Messages
57
Likes
0
Location
Renton, WA
Website
www.BillLuce.com
Well, Bill, you asked about pics, so here are some. The story here is that I got a PM90 at auction for $300. I took it apart, sandblasted it, painted it, put a 2 hp 3 ph motor on, added a VFD, attached a FW/REV switch and POT, added a digital Tack, had a custom banjo made, AND put 3" risers on. The lathe came with a PM45 tailstock, which works fine. I have since acquired a PM90 tailstock, but need to get the riser made for that...no hurry, the 45 tailstock is useable.

The guy that made them for me is quite the handy fabricator. I don't think he is taking orders right now due to some much needed down time to catch up on things. But eventually, he might do more.

I also had to make the belt guard because, for obvious reasons, the old one didn't fit. I took it to a place to get it "lengthened". They said they could, but it would cost 200+. I made this for under $20 in wood...cherry actually, but that is just because that is what I had around.

BTW, alignment was not an issue.

Mike, Great job! Thanks for the pics, Bill
 
Joined
Oct 31, 2006
Messages
32
Likes
0
Wood Riser Block Q. for Gynia

Gynia:

I like to do things myself if possible but have astoundingly little mechanical ability (I ask my wife to look at what I'm doing and she just sees immedaitely how I need to switch something up or down or sideways...)

Woodfast used to sell metal riser blocks--history. I wonder if you have ever done this in wood with a Woodfast from 16 to 18" swing. How do I attach block to head and tail stocks. I suppose I need to lengthen my belt and lift up the headstock which is not obvious--how it detaches from bed. It has been amazing that for fiteen years I keep cutting blanks that are an inch too wide but would fit the 18 inches well.

Thks,

Brad
 
Joined
Nov 9, 2010
Messages
9
Likes
0
Location
Western Maryland
gfwitma, I know this is a question for Gynia, but I would like to offer some advice. First of all, while a very dense wood may work for the headstock, if you use wood on the tailstock, you will likely need to replace it, or shim it eventually, as it will wear from sliding back and forth along the ways...that said, it can be done. When I was in the market, searching for risers for my PM90, I came across a couple of people that used wood for their risers. I believe one used locust and the other white oak. Yes, you will need a longer belt. Your belt cover will need attention, too...that is, if you decide you still need one. Some people that have done risers just leave it "open". As for attaching the headstock, it may be as simple as longer bolts with however your headstock is bolted down now. As for attaching the tailstock, the same is true, however, you need to make sure the tailstock and its riser move as one. So, drilling maybe 4 holes in the bottom of the tailstock and inserting pins that go into corresponding holes in the tailstock riser would work.

Hope that helps.
 
Joined
Sep 30, 2005
Messages
30
Likes
2
Location
Chicago, IL
Riser blocks that can be made by a woodworker

I've come a little late to this thread, so apologies if I am going off topic. For what it is worth, I recently put 2" riser blocks on my Stubby 750 and thought the details might be of some interest.

I originally thought about doing the headstock riser block with either Baltic-birch plywood or sealed MDF (so to avoid movement or moisture problems with standard lumber). I thought this would be fine for the headstock, but needed something more rugged for the tailstock. I looked into buying a replacement tailstock from another lathe manufacturer that I could adapt to the Stubby (the Stubby S1000 tailstock was incredibly expensive). Rikon, for example, sells their 20" swing Woodfast tailstock (2.5" bed gap?) separately for only $200. That was the cheapest I could find with a 20" swing. Nova sells a 16" swing (50mm gap) via Woodcraft for about $170. In the end, I didn't want to mess about with fixing the locking plate on the Rikon for the Stubby lathe's 50mm bed gap, so I decided to go with aluminum instead.

I am not a metal worker. I don't own a mini-mill or anything like that. But I have a 3HP table saw and a good quality non-ferrous metal Freud saw blade, so I approached this like the woodworker I am. The aircraft aluminum on the tailstock has no noticeable wear after 1 month of heavy use. I probably could have saved money and used MDF on the headstock, but as the aluminum is milled to very precise dimensions, making both out of 2" aluminum bar meant that the riser heights corresponded within a few thousandths of an inch. No runout that I can tell.

If you go the aluminum route, be very careful with the table saw operations. You need to nibble away at the aluminum for long cuts, although 2"x2" cross cuts seems to be easy enough (just go slow), use a full face shield and use hold downs were possible. One last thing -- your shop will have shining bits everywhere when you are done. Even now, after dozens floor cleanups, I can still find little glitter specks of aluminum here and there.

I did the whole project in two days, including the paint job afterwards. Some photos of this riser-block project are posted in my photo album. I've attached a single photo here to give you an idea.

I found it very hard to get information on riser blocks when I undertook this project. Hope this is helpful to someone. Email me and I'll try to answer any questions that you might have (sources of aluminum, etc.)
 

Attachments

  • Stubby+850(1).jpg
    Stubby+850(1).jpg
    160.4 KB · Views: 110
Last edited:
Joined
Sep 30, 2005
Messages
30
Likes
2
Location
Chicago, IL
Riser blocks that can be made by a woodworker - PHOTOS

I'm not sure my photo album on this site is properly configured, so I'm attaching the photos here.

Tailstock photo: You can see how I used three rows of 2x2 aluminum bar. The middle square has to be milled down to 50mm (in my case, with lots of nibbles from a table saw); I also inserted 2 thin strips of aluminum around the middle square to push the width on each side out to 2-1/8 inches and to provide a slight relief between the bed and riser block. M6-1 screws hold everything together.

Headstock photo: The headstock riser block has two 50mm dados (approx 1/4 inch deep) cut exactly opposite to each other. A 1/2 inch thick, 50mm wide aluminum bar sits in the base slot and serves as a key to line everything up. I pinned the aluminum bars together with brass rod. The raised headstock lines up as both tongues of the headstock slot perfectly into the bed gaps. I think this will let you get left-right alignment easily, even if there is some slop in headstock riser block. Up-down alignment comes easily by using aircraft aluminum that has been milled to 2 inches, plus/minus a hundredth of an inch. If your lathe was in alignment before, it will be in alignment after you install the riser blocks (excepting a hundredth of an inch).
 

Attachments

  • tailstock.jpg
    tailstock.jpg
    38.2 KB · Views: 111
  • headstock.jpg
    headstock.jpg
    40.2 KB · Views: 105
  • all-done.jpg
    all-done.jpg
    43.6 KB · Views: 109
Joined
Oct 14, 2006
Messages
57
Likes
0
Location
Renton, WA
Website
www.BillLuce.com
I'm not sure my photo album on this site is properly configured, so I'm attaching the photos here.

Tailstock photo: You can see how I used three rows of 2x2 aluminum bar. The middle square has to be milled down to 50mm (in my case, with lots of nibbles from a table saw); I also inserted 2 thin strips of aluminum around the middle square to push the width on each side out to 2-1/8 inches and to provide a slight relief between the bed and riser block. M6-1 screws hold everything together.

Headstock photo: The headstock riser block has two 50mm dados (approx 1/4 inch deep) cut exactly opposite to each other. A 1/2 inch thick, 50mm wide aluminum bar sits in the base slot and serves as a key to line everything up. I pinned the aluminum bars together with brass rod. The raised headstock lines up as both tongues of the headstock slot perfectly into the bed gaps. I think this will let you get left-right alignment easily, even if there is some slop in headstock riser block. Up-down alignment comes easily by using aircraft aluminum that has been milled to 2 inches, plus/minus a hundredth of an inch. If your lathe was in alignment before, it will be in alignment after you install the riser blocks (excepting a hundredth of an inch).

Thanks for sharing.
 
Joined
Sep 30, 2005
Messages
30
Likes
2
Location
Chicago, IL
The aluminum sandwich I made fits very snuggly and has cross bolts which pull the pieces together. This effectively clamps the blocks onto the tailstock "tenon". I was going to tap a few screws to go into the cast iron tailstock from underneath, but didn't see the need.

Lars

The picture in my photo album on this site may make this clearer.

http://www.aawforum.org/vbforum/album.php?albumid=28&pictureid=147


Lars,

Did you attach the tailstock to the riser other than with the cam bolt? If so, how?

Thanks,

Matt
 
Last edited:
Back
Top