But I was quite pleased once I'd figured it out!
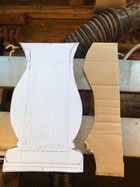
I have quite a good eye for what looks "right" but sometimes find selecting the turning actions to produce the result a challenge. Consequently I usually draw out the shape on graph paper and cut out a template-sometimes the "positive", sometimes the negative". Pinned behind the workpiece I can see what I'm trying to achieve. Results vary.....
I also saw a demonstration of the shadow/sillouette method. With the light behind me over my shoulder I aligned the light to the paper template which was pinned to the board on the lathe bed. I calculated the conversion factor. It was a bit hit and miss, particularly as I keep getting my head in the way of the light.
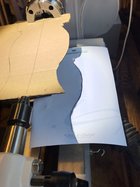
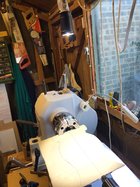
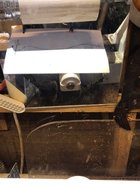
It then dawned on me that if the light was directly above the work it would cast the shadow and the conversion factor would be taken care of automatically. Cutting the template out of cardboard allowed me to align it between the centres, resting in the jaws of the chuck and the revolving tail centre. The template cast a nice shadow on the paper that I could draw round with a thick pencil. However once the prepared blank was put in the chuck it obscured the markings. So I added a mirror behind the workpiece which shows the shape as the gouge cuts in relation to the pencil line. The paper does get covered in shavings but a small brush gets rid of them. (Using the dust extraction system did not work well....!) The last pic is what is shown in the mirror.
Obviously with more practice there will be less need for the system but as a means of producing what I intended without "design modifications" it seems to work.


