• We just finished moving the forums to a new hosting server. It looks like everything is functioning correctly but if you find a problem please report it in the Forum Technical Support Forum (click here) or email us at forum_moderator AT aawforum.org. Thanks!
  • Beware of Counterfeit Woodturning Tools (click here for details)
  • Johnathan Silwones is starting a new AAW chapter, Southern Alleghenies Woodturners, in Johnstown, PA. (click here for details)
  • Congratulations to Dave Roberts for "2 Hats" being selected as Turning of the Week for April 22, 2024 (click here for details)
  • Welcome new registering member. Your username must be your real First and Last name (for example: John Doe). "Screen names" and "handles" are not allowed and your registration will be deleted if you don't use your real name. Also, do not use all caps nor all lower case.

Torn End Grain

Joined
Aug 15, 2006
Messages
2
Likes
0
Please help!!!!!!!!!!! No matter what I do I continually have torn end grain in bowls that I am turning. It doesnt' seem to matter what the wood is, what gouge I use, shear scraping, praying, begging, or pleading it still tears out and all I do is sand and sand some more. Yes the tools are sharp. Any suggestions???????????/ :mad:
 
Joined
May 16, 2005
Messages
3,540
Likes
15
Mostly about tool control. Though it will bring down the wrath, one of the worst things to happen to turners has been the ability to machine a flute cheaply into a cylinder of steel. We've tried all kinds of compensatory tactics with the new tools, but what I've done is go back to the way things were before the revolution, supporting my gouge nearly horizontal and close, so that it takes the narrowest part of its cut as close to perpendicular to the fiber as possible. A constant bevel angle is a great asset in this kind of tool control, as it can be used to keep the tool from rolling and doing what it's named after. Here's some video for you of a semifinal cut. http://s108.photobucket.com/albums/n28/MichaelMouse/?action=view&current=CherryPeelIn.flv

It's very different from a hogging cut, which is designed to get the material out of the way quickly. http://s108.photobucket.com/albums/n28/MichaelMouse/?action=view&current=HollowTwo001.flv

If you'd like some stills of the gouge positions, give a hollar. It's my way, and I've always figured that with only mediocre ability, if I can do something, anyone should be able to do the same.
 
Joined
Apr 25, 2004
Messages
124
Likes
0
Location
Atlanta, Georgia
MM, I watched the video. Amazing. I would make that cut in a quarter of your time, which means I am impatient. What I was not clear on is how the tool's orientation. Can you help me? Thanks for posting your work. It gives me permission to be a little more slow in my passes.
David
 

john lucas

AAW Forum Expert
Joined
Apr 26, 2004
Messages
8,337
Likes
3,595
Location
Cookeville, TN
When turners come to my shop the first thing I notice is they all force the cut. You can easily push the tool into the wood faster than it wants to cut. If you lighten up the pressure and try to "feel" how the wood is cutting you will be on your way to reducing endgrain tearout. There are many other things that can help but I find a freshly sharpened tool and followed by a couple of really light passes with as little forward pressure as you can will go a long way toward reducing tear out.
I thought I was pretty light on the tools but I've been playing with the Stewart Batty grind on one of my gouges. It's supposed to work on very spalted and punky wood. It's ground at 40 degrees and you need a light touch. I'm getting better and can do most woods with a really clear finish but on really punky wood I still get a smidgeon of tearout. So I need to do more of what I recommend, practice, practice, practice.
 
Joined
May 16, 2005
Messages
3,540
Likes
15
PapaDoc said:
MM, I watched the video. Amazing. I would make that cut in a quarter of your time, which means I am impatient. What I was not clear on is how the tool's orientation. Can you help me? Thanks for posting your work. It gives me permission to be a little more slow in my passes.
David

There's actually about an eighth of an inch coming off on that pass, as you can see from the ridge. The final pass will be less than half that depth. Since I'm cutting at 680 and never bother going faster, it takes time to let the wood come to the tool. The tool is a forged gouge, looks like a half-incher. It's ground constant bevel angle and slightly curved at the nose. I enjoy time spent at my lathe, so even when hogging I am in no geat rush. If it takes me a half hour to rough out a piece, including many stops for examining shape and figure, it's time spent in a place I enjoy at a task I enjoy. Sanding is another matter. Care on the final pass is worth two grits!

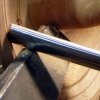
Best I can give you for gouge position is up, left and back until you get the shaving you want. Tilt the nose up until it's just below centerline, lean the gouge slightly left as you enter with the lower corner to start the shaving and determine depth. Take the trailing edge back as you flatten the angle after entry to determine breadth. Gouge one-hundred says have the edge as close to parallel to the shape as possible as it exits the cut for smoothness. Since you're beginning as a scrape, proceding through a peel and finally a cut in the portion of the gouge that's engaged, there's a bit of everything.

More at http://preview.mmouse8.photosite.com/Album10/
 

Attachments

  • 4-Bevel-Reference-In.jpg
    4-Bevel-Reference-In.jpg
    38.8 KB · Views: 142
Joined
May 29, 2004
Messages
995
Likes
2
Location
billerica, ma
My location question was based around the standard recommendation to contact your nearest AAW woodturning club and find out about members close to you. Chances are you can get some hands-on mentoring in no time at all. I've found that this is always a hugely helpful step, since some cuts are just better demonstrated with your hands on the tools.

Dietrich
 
Back
Top