I got a couple of larg-ish platter blanks trued up and ready to turn. They eare from a large dry crotch that I've had sitting around for some years. Problem is there's the changing grain running across them. I don't seem to be able to get the tear out under control no matter how sharp the gouge is nor how I angle it. I tried a burr on a really sharp honkin big Doug Thompson scraper it sort of helps but not enough to get me out of massive sanding and I'd like some crisp lines. Won't get crisp with sanding.

-
We just finished moving the forums to a new hosting server. It looks like everything is functioning correctly but if you find a problem please report it in the Forum Technical Support Forum (click here) or email us at forum_moderator AT aawforum.org. Thanks! -
Beware of Counterfeit Woodturning Tools (click here for details) -
Johnathan Silwones is starting a new AAW chapter, Southern Alleghenies Woodturners, in Johnstown, PA. (click here for details) -
Congratulations to Dave Roberts for "2 Hats" being selected as Turning of the Week for April 22, 2024 (click here for details) -
Welcome new registering member. Your username must be your real First and Last name (for example: John Doe). "Screen names" and "handles" are not allowed and your registration will be deleted if you don't use your real name. Also, do not use all caps nor all lower case.
You are using an out of date browser. It may not display this or other websites correctly.
You should upgrade or use an alternative browser.
You should upgrade or use an alternative browser.
dry elm and tear out
- Thread starter Raul McCai
- Start date
If high shear angle, and very sharp tools (600 to 1000 grit hone) don't help, then I will wet the wood. Spray or damp rag to get it wet. let sit 60 seconds or so, then very light cuts to turn the wet wood away. If tear out is really bad, then it make take a couple of wettings. Some use sanding sealer, some use oil finishes, maybe a couple of other possibilities. When all else fails, the 80 grit gouge.... The NRS or standard scrapers won't do it here.
robo hippy
robo hippy
Hadn't thought about wetting the wood. I've done that with the jointer and planer with limited success in figured apple and wild grained maple the Shellix cutterblock and a 4' wide sander solved that for me.
I'll try water and see what transpires. thanks.
I've read about people soaking their dry wood, what do you think of that? Won't take as long for it to dry out again because the cells won't be loaded up like green wood.
I'll try water and see what transpires. thanks.
I've read about people soaking their dry wood, what do you think of that? Won't take as long for it to dry out again because the cells won't be loaded up like green wood.
shellac or lacker scrape and repeat, should help
- Joined
- Apr 27, 2004
- Messages
- 8,638
- Likes
- 4,979
- Location
- Lakeland, Florida
- Website
- www.hockenberywoodturning.com
I got a couple of larg-ish platter blanks trued up and ready to turn. They eare from a large dry crotch that I've had sitting around for some years. Problem is there's the changing grain running across them. I don't seem to be able to get the tear out under control no matter how sharp the gouge is nor how I angle it. I tried a burr on a really sharp honkin big Doug Thompson scraper it sort of helps but not enough to get me out of massive sanding and I'd like some crisp lines. Won't get crisp with sanding.
Crotch grain can be problematic and fibers running the wrong way can be lifted and torn rather than cut. Light cuts with a sharp gouge will minimize the tear out.
The final surface will often have to be made with shear scraping.
When you get within a 1/4 inch of the desired surface make 1/8"cut and two 1/16" cuts with the gouge then shear scrap. A couple of 1/64" cuts are good but those are pretty advanced. The edge of the scraper is straight at the surface so no fibers are lifted.
On a near flat surface the al Stirt style scraper works well. This a square nose scraper ground with a slight radius to the left side. When used at a 45 degree angle it makes a shear scrape at the contact point. This will not remove much wood so the goug does most of the work the use the scraper to fix the tiny tear out left,from the fine gouge cuts. This scraper is excellent on concave and flat surfaces.
It is essential to ride the bevel with the gouge. A pull cut can often be used on parts or the platter surface. A pull cut will often cut the twist grain cleaner than a push cut.
Attachments
Last edited:

- Joined
- Apr 27, 2004
- Messages
- 8,638
- Likes
- 4,979
- Location
- Lakeland, Florida
- Website
- www.hockenberywoodturning.com
Tool is close to level and rolled about 45 degrees and then the scraping edge engages the wood. The scraping is done by pulling the toolmtoward you.
You can find a shear scraping video by @john lucas using the AAW video search site.
Go to. http://aawvideosource.org/
Then set pick "techniques" and "scraping" in the category and keyword boxes and click the search button.
You will see this:

Click the link for the shear scraping video and fast forward to 5:56 you will see
howmjohn used the jordan scraper. The Al Stirt scraper is used in a similar way.
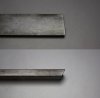
Need a radius scraper on a flat surface.
The video
View: https://www.youtube.com/watch?v=7oeiVQLeOd4
You can find a shear scraping video by @john lucas using the AAW video search site.
Go to. http://aawvideosource.org/
Then set pick "techniques" and "scraping" in the category and keyword boxes and click the search button.
You will see this:
Click the link for the shear scraping video and fast forward to 5:56 you will see
howmjohn used the jordan scraper. The Al Stirt scraper is used in a similar way.
Need a radius scraper on a flat surface.
The video
Last edited:
thank you for that Had some one told me to stand the scraper on it's corner and risk getting it slammed down and caught, I'd have thought them daft.
Now I think I can get 'r dun.
Now I think I can get 'r dun.
I finally got my Thompson heavy duty NR scraper to work well for me. In my case I don't think I was presenting it at the best angle. On a Oak bowl I had some tear-out mostly on the end grain. I used a pencil to mark the tear-out to see if I was making progress or just making new tear-out marks. It's not dry Elm crotch wood, but it was hard as Oak. ")
 Ready for sanding.
Ready for sanding.With shear scraping, the higher the shear angle, the cleaner the cut. I round over the edges of my scrapers. For the outside of a bowl, I use a swept back type scraper with a long wing, drop the handle, and do push/pull cuts. Since the cut is so light, you can go either direction. For the inside of the bowl I use a ) shaped nose. Important here to note that you DROP/LOWER the handle. The reason for this is that you will then only be able to use the cutting edge on the bottom half of the tool. If you hold the tool level, and work above the center of the round nose, the tool is not balanced, and you will get a nasty catch. This is almost identical to what happens with a skew chisel if you work on the high side of the tool and come up off the bevel.
The NRS does have its place, which I consider to be best for end grain on boxes and vessels, and for sweeping across the bottom of the bowl. For the sides of a bowl, a shear scrape is at least as good, and in most instances better. With the NRS, flat on the tool rest, it is still scraping and will lift/pull the fibers as you cut since there is no shear angle. With the high shear angle, the cut is much more gentle, and I get a cleaner surface. With a shear scrape, I find it a bit more difficult to sweep across the bottom of a bowl and eliminate the ripples than doing it with the NRS. When sweeping across the bottom, since you are not going down through the fibers, a scraping cut is generally fairly clean. Also, the finer the burr is, the cleaner the cut. 180 grit burr is good for most situations. For really difficult pieces, then I always head to the 600 or 1000 grit wheel burrs.
robo hippy
Well that turning the shear scraper up on its edge really makes a huge difference~!!! Thanks for that. I treated the scraper like it was a hand held furniture scraper and took my burnishing tool to it. So now the plan is to rough it trying not to get tear out too deep to remove.
I'm thinking of grinding a little flat or radius along the bottom edge/corner along the length of the scraper so it won't try to dig into the tool rest. I can't see how this might handicap it for other use.
I'm thinking of grinding a little flat or radius along the bottom edge/corner along the length of the scraper so it won't try to dig into the tool rest. I can't see how this might handicap it for other use.
- Joined
- Apr 27, 2004
- Messages
- 8,638
- Likes
- 4,979
- Location
- Lakeland, Florida
- Website
- www.hockenberywoodturning.com
I'm thinking of grinding a little flat or radius along the bottom edge/corner along the length of the scraper so it won't try to dig into the tool rest. I can't see how this might handicap it for other use.
Definitely want to have a rounded edge on the tool rest. Since the angle changes a rounded edge is better than a flat. Grind a radius.
Last edited:
- Joined
- Jan 27, 2005
- Messages
- 12,898
- Likes
- 5,188
- Location
- Dalworthington Gardens, TX
- Website
- pbase.com
Definitely want to have a rounded edge on the tool rest. Since thenangle changesmamroinded edgemis better than a flat. Grind a radius.
Yeah, what Al says.
Don't you just love those mobile devices.
Whenyouareonthebudgetphoneprogramyoudon'tusespacesbetweenwords.
- Joined
- Apr 27, 2004
- Messages
- 8,638
- Likes
- 4,979
- Location
- Lakeland, Florida
- Website
- www.hockenberywoodturning.com
One of my Mymproblemsmismtheymputmthe " m" key tomclosemtomthe "space bar"Whenyouareonthebudgetphoneprogramyoudon'tusespacesbetweenwords.
john lucas
AAW Forum Expert
thanks for posting my Video Al. I was reading the response and thought, I need to post that, but then as I read further you did. I have been playing with getting cleaner cuts for quite a few years now. It's usually a combination of things.
1. Dont force the gouge to cut. Slow down your feed rate and try to feel the cut and watch the curls. No curls, the tool isn't sharp enough, the edge angle is too blunt, the angle the wood comes across the edge is too blunt, your forcing the cut. There are other factors of course and I'll get to that.
2. Tool too blunt. I'm using that term to discuss the actual sharpening angle. A 55 degree tip angle will not cut as cleanly as a 45 degree angle. A more acute edge angle will cut cleaner but on certain areas of the bowl you may not be able to use a really sharp angle and still rub the bevel. That's where I like the Hunter tools. On one like the Hunter #5 you can rub the bevel with the tool held almost straight out because the outside angle of the cutter is about 82 degrees. the sharpness angle of the cutter is about 30 degrees so you get a very clean cut if you use it like a bevel rubbing tool.
3. Blunt angle coming across the edge. You and Reed have already mentioned that. I'll use the scraper as a description. If you hold the scraper flat the wood is coming across the edge at about 90 degrees which is very blunt. Usually cuts very fast such as when Reed roughs out a bowl, but it leaves a less than perfect finish. When you tilt the angle of the scraper the wood crosses the cutting edge at more of a shear angle and tends to cut cleaner. The steeper it is the cleaner it cuts but the slower it cuts. 45 degrees is a good happy medium but I often use it a little steeper. The same is true with a bevel rubbing cut. It's easiest to describe with a wide spindle gouge. When the wood comes across it close to 90 degrees it's a very fast wood removing tool but the cuts aren't very clean. Tilt it so the wood comes across at a more shear angle and you get a much cleaner cut. A bowl gouge will do that same thing but of course the tip is a little more complicated than a smooth fingernail grind on a spindle gouge so you have to be very careful how you roll the tool to get the wood to come across that tip at a more shear angle. a pull cut with the handle very low also creates this steep shear angle and consequently a very clean cut. This is especially true on some U shaped gouges because the wings tend to get thin and consequently they have a very acute sharpening angle.
4.Use a lubricant. sometimes wetting the wood will work. Sometimes I use wax. If it's just minor tearout problems a combination of the above + the wax will often do the job.
5. Firm up the fibers. Use thin CA for small areas, thinned lacquer for larger. coat it well and let it cure. This stiffens the fibers and makes them cut easier. Be careful with the thin CA it can run and stain light colored woods. Lacquer also tends to clog sandpaper so I usually reserve these two techniques for serious problems.
6. Usually on bowls and my mirrors this problem occurs 180 degrees apart. There are usually 2 areas that show the tearout. One is usually worse than the other so I've found that if I run the bowl in the opposite direction and cut on the far side it will usually still tearout in the same places but often reduces the tearout so that both are less than before. Sometimes it just changes which one is the worse and not worth the effort. Only takes a couple of light passes to find out.
I hope this helps. I"m sure others have discovered things that work for them. I don't mind sanding at all. It takes the bowl to the next level and really makes a nice piece. If I have to start with 100 grit I will because getting rid of any tearout is absolutely necessary. However as you mentioned before, sanding with course grits makes it very hard to keep crisp edges and on highly figured woods can create lumps from the harder winter grain softer summer grain aspect of the wood. So ideally I cut as clean as possible so I start sanding with the finer grits. On my hand mirrors I rarely have to go lower than 180 and usually start with 220. The shapes tend to lend themselves to cleaner cutting and they are all dry wood. On green wood bowls it's very easy to have to start with courser grits. I usually only do natural edge green bowls to finish in one setting so those are the ones where I really have to use all my skills to get clean cuts. Power sanding with course grits on natural edge bowls leads to thin leading edges very easily so I usually sand those with the power off and of course try my best to get clean cuts to begin with.
- Joined
- Apr 27, 2004
- Messages
- 8,638
- Likes
- 4,979
- Location
- Lakeland, Florida
- Website
- www.hockenberywoodturning.com
@john lucas Your video is the one that pops up from searching withthanks for posting my Video Al. I was reading the response and thought, I need to post that, but then as I read further you did.
aawvideosource.org
The videos linked to from there have been peer reviewed by AAW volunteers.
The comittee has done a great job of selecting videos that show sound practices.
You and Reed have quite a few each. Kudos to both.
Some videos on YouTube show poor and unsafe methods.
Using the AAW search engine eliminates getting bad information.
Al
Some videos on YouTube show poor and unsafe methods.
Using the AAW search engine eliminates getting bad information.
I saw the Titan Magma machine listed in the Marketplace section and since never hearing of it before, I googled it and found the website. Pretty cool machine for heavy application with a pretty nice Wow Factor. They have a series of 5 or 6 short videos from some type of symposium with a fair number of famous turners being interviewed. Striking is the fact I didn't see one face shield being used, people standing in the line of fire etc. etc. etc. You can see them at this link:
http://www.magma-titan.com/woodturning-lathes-magma-black-line-titan.html
Safety issues not withstanding, not a bad way to burn up 30 minutes of video time.
Safety and the measures taken has gone through a constant evolution over the years.
What was considered safe ten years ago is no longer even considered these days.
What was considered safe ten years ago is no longer even considered these days.
Use a lubricant. sometimes wetting the wood will work. Sometimes I use wax. If it's just minor tearout problems a combination of the above + the wax will often do the job.
Wax. just plain old paraffin or butchers wax? How about BLO?
well this is the first of two platter discs I have. It's also the one with all the serious defects in the wood; checks filled with glue, knots, yadda yadda. I figured I'd use it to learn how to to it for the second go round.
So thanks to you guys I got the bottom all done nicely and finish sanded.
I flip it and put it on my new 144 mm jaws ( learn that VicMarc Uses Imperial Inch Standard threads on their chucks) and get 'r going.
Tried out my new Hook tool. It's no golden magic pill. Doesn't cut much better than a gouge on the wide open surface of the platter. Might be good for deeper stuff.
Anyway I gotta get creative because while depthing the platter ( wanted to make it thin), I over did it.
It's now a Dieter's platter with a see-through feature in the bottom in the middle.
Have some goofy ideas. Dunno perzakly what I'll do for it.
Things I've considered
1) a column of some sort sticking up from the middle upon which to put a bunch of bananas.
2) just a disc insert n the middle
3) Embrace it, and glue a sphere of some contrasting wood in the middle. Or just leave it loose.
Any ideas?
You might turn a piece of stone/acrylic/burl/etc. and glue it into the void.
You could also incorporate the foot of the plate into the repair.
You could also turn a second tier plate with the foot of the top plate fitting into the void of the bottom plate.
You could also incorporate the foot of the plate into the repair.
You could also turn a second tier plate with the foot of the top plate fitting into the void of the bottom plate.
- Joined
- Jan 27, 2005
- Messages
- 12,898
- Likes
- 5,188
- Location
- Dalworthington Gardens, TX
- Website
- pbase.com
Call it Designer Firewood.
Call it Designer Firewood.
Like this:
Now here's the stupid part. I showed this to some one who was instantly sold and wanted to know how to order it
Here it is with no finish


- Joined
- Jan 27, 2005
- Messages
- 12,898
- Likes
- 5,188
- Location
- Dalworthington Gardens, TX
- Website
- pbase.com
We're in the wrong business.
- Joined
- Jan 27, 2005
- Messages
- 12,898
- Likes
- 5,188
- Location
- Dalworthington Gardens, TX
- Website
- pbase.com
Here it is with no finish . . . . .
Putting an insert into the hole is easy. I've done it intentionally. Turn a rabbet (AKA a rebate in the UK) on the bottom side of the opening and then turn a matching piece to fit the opening with a zero clearance (but not tight) fit and glue with epoxy. The reason for using epoxy is that it will not bleed and stain surround the wood like other types of glue will. Make sure that the insert stands proud on the inside so that it can be turned down to match existing wood. If you want to be bold try something like an insert from a piece of contrasting burl such as redwood and then cut a hole in it with a rabbet just as before so that it will become a thin frame for another insert such as end grain black palm.
- Joined
- Apr 27, 2004
- Messages
- 8,638
- Likes
- 4,979
- Location
- Lakeland, Florida
- Website
- www.hockenberywoodturning.com
Wooden sinks are getting popular.
Epoxy finish ..
Epoxy finish ..
- Joined
- Jan 27, 2005
- Messages
- 12,898
- Likes
- 5,188
- Location
- Dalworthington Gardens, TX
- Website
- pbase.com
Wooden sinks are getting popular.
Epoxy finish ..
Funny that you should mention that. Here is something that I did sometime last year as a joke after not paying attention to how much I was dishing out the concave part of the foot. Without thinking about the thickness, I was going for a nice pleasing curve inside the foot when suddenly there was a tiny peephole. Nothing to do then except go for a design change.
It got a few chuckles at the next club meeting. It's a good way to quickly wash out your Wheaties bowl.
Things weren't exactly off to a great start when a serious flaw showed up in this piece of claro walnut for which I paid actual folding money. By the time that I recognized that the pretty figure was actually the foreshadowing of a gap, the shape was pretty much committed. Being borderline phrugal, I wasn't about to discard it.
I realize that the turquoise Inlace isn't exactly a great design statement, but the rubber stopper somehow seems to complement it as things were basically down the drain anyway.
- Joined
- Apr 27, 2004
- Messages
- 8,638
- Likes
- 4,979
- Location
- Lakeland, Florida
- Website
- www.hockenberywoodturning.com
I realize that the turquoise Inlace isn't exactly a great design statement, but the rubber stopper somehow seems to complement it as things were basically down the drain anyway.
I would upgrade to a brass stopper in antique bronze.
I'm going to embrace the hole. I'll put an ebony ring around it & the ring will cup any number of ceramic bowls for things like dip.
This way it wasn't error it was design.
This way it wasn't error it was design.
I know the feeling.Being borderline phrugal, I wasn't about to discard it.
- Joined
- Jan 27, 2005
- Messages
- 12,898
- Likes
- 5,188
- Location
- Dalworthington Gardens, TX
- Website
- pbase.com
I would upgrade to a brass stopper in antique bronze.
I knew that I should have consulted you. My plain rubber stopper is so pedestrian ... so washed up ...
I rather like itMy plain rubber stopper is so pedestrian ... so washed up ...