• We just finished moving the forums to a new hosting server. It looks like everything is functioning correctly but if you find a problem please report it in the Forum Technical Support Forum (click here) or email us at forum_moderator AT aawforum.org. Thanks!
  • Beware of Counterfeit Woodturning Tools (click here for details)
  • Johnathan Silwones is starting a new AAW chapter, Southern Alleghenies Woodturners, in Johnstown, PA. (click here for details)
  • Congratulations to Dave Roberts for "2 Hats" being selected as Turning of the Week for April 22, 2024 (click here for details)
  • Welcome new registering member. Your username must be your real First and Last name (for example: John Doe). "Screen names" and "handles" are not allowed and your registration will be deleted if you don't use your real name. Also, do not use all caps nor all lower case.

Follow Along: Ash 3-Limb Crotch - Hollow Form

Dave Landers

Beta Tester
Joined
Dec 1, 2014
Messages
811
Likes
2,510
Location
Estes Park, CO
Website
dlwoodturning.com
I picked up this crotch from the club's wood lot.
Looks to me like there might be a hollow form in there. I decided I'd do it "whole" rather than trying to remove any of the 4 piths, just turn it around the piths.
This may not work out - it's going to have cracks and etc, so might end up as artisanal firewood...IMG_8771.JPG

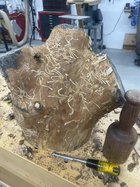
Bark was really loose, so I chipped it all off before doing anything else.
IMG_8772.JPG
 

Dave Landers

Beta Tester
Joined
Dec 1, 2014
Messages
811
Likes
2,510
Location
Estes Park, CO
Website
dlwoodturning.com
I thought it was sorta round, so tried to mount it on the lathe. Aargh - way too awkward and heavy. Need to cut it down some.

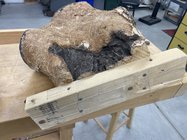
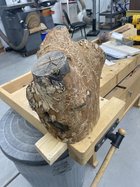
Screwed on a 2x4 so I'd have a place to clamp it and do some trimming.
IMG_8774.JPG
IMG_8775.JPG

Cutting inside with my small electric chainsaw - but I still geared up in my full chainsaw PPE: Long sleeve shirt, gloves, chaps, safety glasses, helmet with wire shield. Skipped the ears, as the electric saw is quiet.
Cut carefully with the piece securely clamped in the bench vice. Got rid of most of the extra chunks.

IMG_8776.JPG
 

Dave Landers

Beta Tester
Joined
Dec 1, 2014
Messages
811
Likes
2,510
Location
Estes Park, CO
Website
dlwoodturning.com
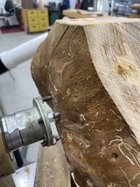
Still pretty unwieldy on the lathe. Got it mounted - decided I didn't need to be too picky for this blank, just got it mounted without fiddling with exact centers / orientation etc.
IMG_8778.JPG
That's my home-made drive center. A 3" faceplate with 5 sharpened bolts (center plus 4). I adjusted the bolts so I got the center one and a decent bite for 3 of the other 4.

Still way too unbalanced. I could have banged the corners off with my gouge, but it would have beat me up, and I was still mostly kitted-up with PPE.
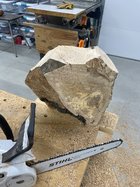
So I locked the headstock, moved the banjo out of the way, put the chaps and helmet back on, and knocked off some of the biggest offenders with the chainsaw. Not sure I recommend this for anyone else. This piece was big enough and all the lathe bits were out of the way.
IMG_8777.JPG
I had marked a very-rough circle with a marker - trimmed off some. Again, the headstock was locked (with the indexing holes so I could make vertical cuts).

Still not round, but better.
 

Dave Landers

Beta Tester
Joined
Dec 1, 2014
Messages
811
Likes
2,510
Location
Estes Park, CO
Website
dlwoodturning.com
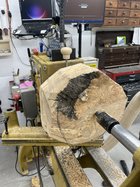
Got the outside diameter round. For this, I made push cuts with my bowl gouge, cutting mostly with the nose.
The tool is level on the tool rest, so all the impact from the wood corners goes down into the tool rest instead of my arms/body.
Cutting from the headstock side, I'm "right handed" (left hand on the tool shaft at the tool rest, right hand holding the handle next to my body. When cutting from the tailstock side, I'm "left handed". This is so I stand on the safer side of the tool handle, getting as far out of the line of fire as I can.

Also, when cutting on the tail side, I move my controls there so I don't have to reach around the piece to turn the lathe off.

IMG_8779.JPG

Some nice figure and color there. Also lots of worm holes (ugh!).
 

Dave Landers

Beta Tester
Joined
Dec 1, 2014
Messages
811
Likes
2,510
Location
Estes Park, CO
Website
dlwoodturning.com
So I put a tenon on the tailstock end. Went with my 5" jaws (this piece is going to end up around 9" diameter).
As I was marking for the tenon, I realized that the grain and figure wanted this to be the top of the hollow form.
IMG_8780.JPG
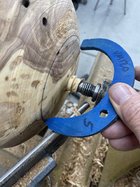
That blue thing is one of my tenon sizing gauges. The tip-to-corner distance is what I want for my tenons. Tip-to-other-corner is for when I want a recess. I mark a "guess" with a pencil, then check with the gauge and refine my mark. Usually just takes 2 tries to get the right size, and I don't have sharp caliper points to worry about.

Anyway, I went ahead and put a tenon on this end (top), mounted that in the chuck and put the "real" tenon on the bottom.
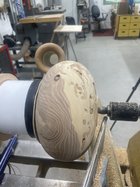
IMG_8781.JPG
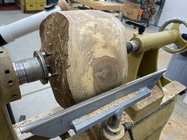
And in the chuck ready to shape the outside
IMG_8782.JPG
 

Dave Landers

Beta Tester
Joined
Dec 1, 2014
Messages
811
Likes
2,510
Location
Estes Park, CO
Website
dlwoodturning.com
Got the outside done. Here's some vids of the cutting:

Shearing pull cut along the top. I am using a gouge with long side-wing (pretty close to Ellsworth grind). I drop the handle way down and cut with the side wing, a bevel-rubbing cut.


Push cut to start establishing the curve on the back (bottom) side


I refine the bottom shape with a push cut, on from the back side. I'm cutting from the outside diameter towards the bottom, and holding the gouge "left handed" because i can see the curve developing better, as I am basically looking down the bevel. I can see the curve better than when cutting from the bottom to the outer diameter.
Works whether I'm cutting on the top or bottom (head or tailstock side).
I often do the same on the outside of bowls, even tho it's cutting "the wrong way" because getting that form is important. Once that shape is correct, I can refine or fix any torn grain without undoing the shape.


Shearing pull cut on the bottom.
 

Dave Landers

Beta Tester
Joined
Dec 1, 2014
Messages
811
Likes
2,510
Location
Estes Park, CO
Website
dlwoodturning.com
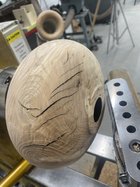
Outside is done. (well as much as I can with the chuck there).
IMG_8783.JPG
Lots of cracks and worm holes and pith. This will be a "rustic" piece if it survives.
I often sand the outside of a hollow form at this point, but this piece seems like it might still be a bit damp, so I'm going to wait.
Got other things to get done today, so the hollowing might wait till tomorrow.
I will probably check on the blank later and decide if I'm going to leave it as-is or wrap it in plastic wrap to slow excessive drying. I can do that in this dry climate without worrying about mold.
 

Dave Landers

Beta Tester
Joined
Dec 1, 2014
Messages
811
Likes
2,510
Location
Estes Park, CO
Website
dlwoodturning.com
Back in the shop this morning and it's time for some hollowing.
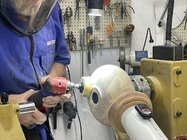
I start by truing up the top around where the opening will be using a 3/8" spindle gouge.
IMG_8788.JPG
When I get to the center, I turn the corner and make a starter hole for my depth drill. You can actually drill pretty well with a spindle gouge, once you get a hole started. It does take some practice.
IMG_8790.JPG
And my drill is 3/8" so the starter hole from my 3/8 gouge is just right to start the drill at the exact center.

I recently got a gun drill - this is the first decent-sized hollow form I've used it on yet. Yay!
I sight down the bottom side of the form and align the drill with where I want the inside-bottom of the hollowing. Following the curve with my eye, I figure the face of the chuck jaws will make a good target for the outside bottom. So I back off about 1/4" and set the drill end there. Then I adjust the marker thingy that Trent Bosch supplies with his gun drills. Set it to the top face of the form.
Before I had a gun drill, I used a long electricians/aircraft drill bit with a knob handle epoxied to the end. I set the depth with an O-ring (Sharpie before I found the right size O-ring).
IMG_8793.JPG
Turn on the air (the gun drill has a hole all the way thru so you can blow out the chips as you drill.
IMG_8796.JPG
 

Dave Landers

Beta Tester
Joined
Dec 1, 2014
Messages
811
Likes
2,510
Location
Estes Park, CO
Website
dlwoodturning.com
Next step is start the hollowing. I'm not wanting this piece to have a tiny opening - something around maybe 1.5" (we'll see). I'll keep it on the small side and enlarge it later until it looks right.
I start with a straight tool and begin hollowing out a cylinder, maybe 1" diameter.
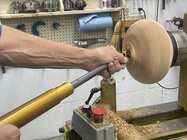
I find the hole with the tip of my tool, rock my body so the tool cuts from center-out. Rock back to the hole and advance the cutter just a bit. So the motion is me rocking back-and-forth, and each pass I advance the tool. The tool is cutting with the side of the cutter (I'm using HSS tips), I'm not stabbing with the tip.
I hold the tool handle in my right hand, and my forearm lays on the handle. The end of the handle and my elbow are tucked into my side.
My left hand holds the tool shaft, and is against the tool rest. This creates a fulcrum for the back-and-forth rocking, and is my depth gauge - to advance the tool I just loosen my grip a bit and let the tool inch forward.
IMG_8798.JPG
I want that cylinder to go all the way to the bottom of the depth hole, and make a flat bottom there. The foot on the outside will be relatively flat, so having a flat bottom on the inside that's about that diameter makes sense. The corner of that bottom cylinder is what I'm going to aim for when shaping the inside bottom curve.

Anyway, I find that when I get about half way down I need to stop and widen the top of the cylinder - give the chips somewhere to go before I can finish the bottom half of the cylinder.

And the chips! This piece is pretty mixed-grain-orientation (the grain is going every which way). But it's predominantly radial orientation (aka cross-grain, like you'd usually mount a bowl). That means I get more shavings than dust (axial / end-grain hollow forms you get more dust). The shavings can be difficult to clear out. With a smaller opening, I often have to just rake them out. But with this larger opening, I can vacuum.
IMG_8801.JPG
You can also see I've stuck a light on my tool rest - helps a bit to see inside.
 

Dave Landers

Beta Tester
Joined
Dec 1, 2014
Messages
811
Likes
2,510
Location
Estes Park, CO
Website
dlwoodturning.com
I work with the straight tool as much as I can. Widening out that cylinder, trying to mimic the outside curve. But I can't get very far.
Well, a shape like this I could do a lot of the bottom half. But I don't want that thin with the top side thick - I want to keep structural support at the bottom while I work on the top.

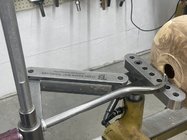
Once I've done what I can with the straight tool, it's time for a curved-neck tool. At this point I bring out my stabilizer (I use Trent Bosch's hollowing tools and stabilizer). I like this one because I hold and maneuver the tool exactly the same way as when I'm hollowing without the stabilizer. So the body motion / muscle memory is the same with or without the stabilizer.

Here's the curved tool (HSS tip) in the stabilizer:
IMG_8804.JPG

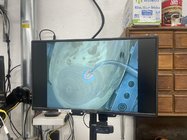
I have a camera on my stabilizer. Don't really need it yet (the walls are pretty thick and I have no risk of breaking thru). But it's there so I'm going to use it.
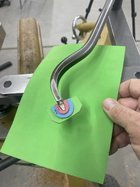
Trent's camera system hooks to a simple monitor and you trace the tool on the monitor with a wet-erase marker. Simple. But I already have a computer and video production software (vMix) that I use for IRDs. So I've hooked my camera into that and use "weatherman technology" (green screen). I made little distance gauges from craft foam. The red is about 3/16" from the tool tip, and the blue about 3/8". So if I cut till the blue outline matches the outside of my hollow form, I get a 3/8" wall.IMG_8806.JPG
Do some computer magic, and I get this on my monitor:

IMG_8808.JPG
I have no hang-ups about using technology in my shop. Whatever makes sense to help me realize my vision / idea into reality is OK by me.
 

Dave Landers

Beta Tester
Joined
Dec 1, 2014
Messages
811
Likes
2,510
Location
Estes Park, CO
Website
dlwoodturning.com
Here's what hollowing looks like on my monitor. I'm still controlling the tool. I still use the same body motion I would without the camera or the stabilizer. The camera just lets me focus on making the thing.
Note at the end those shavings. That is about all I can do before the shavings become a problem. Maybe a little more, but not too much. They will bind up the tool and you can break the hollow form - done that. (Long, wet shavings are a bigger problem than dry dust). So they have to get cleared before that happens.
One strategy I use (when I can) is to work on the larger diameter till the chips build up, then move to work on the top or bottom (smaller diameter - the chips are still going to be flung to the outside).

After things are good with that HSS cutter, I switch to a tear-drop cutter which is good for smoothing the surface.
(Could have cut longer here, but I was aiming for a short vid)
 

Dave Landers

Beta Tester
Joined
Dec 1, 2014
Messages
811
Likes
2,510
Location
Estes Park, CO
Website
dlwoodturning.com
Sanded it. Started at 120 and got rid of tool marks, then kept going to 400. I got lucky and the piece stayed pretty round. Probably should have sanded yesterday right after turning, but I felt it was too wet. I'm ok with luck.
IMG_8813.JPG
Running the lathe slow (around 50 ~ 100 RPM) and the drill at about half-speed.

I think the 400-grit surface is going to contrast well with the otherwise "rustic" nature of this one (cracks and worm holes).
This is from before I sanded, but you can see the "rustic"
IMG_8811.JPG
 

Michael Anderson

Super Moderator
Staff member
TOTW Team
Joined
Aug 22, 2022
Messages
1,363
Likes
3,933
Location
Chattanooga, TN
Thanks for sharing Dave! I enjoyed reading about your process. A bunch of useful tools as well—that tenon marker is cool! You have one for each of your jaws?
 
Joined
Nov 3, 2008
Messages
8
Likes
8
I thought it was sorta round, so tried to mount it on the lathe. Aargh - way too awkward and heavy. Need to cut it down some.

Screwed on a 2x4 so I'd have a place to clamp it and do some trimming.
View attachment 60467
View attachment 60468

Cutting inside with my small electric chainsaw - but I still geared up in my full chainsaw PPE: Long sleeve shirt, gloves, chaps, safety glasses, helmet with wire shield. Skipped the ears, as the electric saw is quiet.
Cut carefully with the piece securely clamped in the bench vice. Got rid of most of the extra chunks.

View attachment 60469
There it is! Tacking a 2x4 for stability. Light bulb goes off!!
Thank you for posting this.
 
Joined
Nov 18, 2012
Messages
660
Likes
1,868
Location
Torrance, CA
Nice follow along Dave! I love the action videos of using the hollowing set up; heck, the turning of the form as well! I might have to visit the Trent Bosch booth in Portland, haha!! I’m looking forward to more posts on this vessel!!
 

Dave Landers

Beta Tester
Joined
Dec 1, 2014
Messages
811
Likes
2,510
Location
Estes Park, CO
Website
dlwoodturning.com
Thanks for sharing Dave! I enjoyed reading about your process. A bunch of useful tools as well—that tenon marker is cool! You have one for each of your jaws?
Yes, one for each jaw set. To make them, I turned a scrap piece and refined a tenon/recess till I was happy. Then I made the gauge to match (vs. using any published sizes). That way it matches the way I use it and the way I make tenons. I wrote the dimensions on it so I can remake it if I break it.
Blue so I can find it in the shavings (I have yet to find a blue tree).
 
Joined
Jan 3, 2015
Messages
137
Likes
66
Location
Western Ma.
Great follow a long project. Craft foam cutouts for thickness is a really good idea. Any more info on how you use the vmix program?
 

Dave Landers

Beta Tester
Joined
Dec 1, 2014
Messages
811
Likes
2,510
Location
Estes Park, CO
Website
dlwoodturning.com
Great follow a long project. Craft foam cutouts for thickness is a really good idea. Any more info on how you use the vmix program?
Summary version: I got an AV-to-USB capture thing, appropriate adapters and power brick to hook the camera into the computer, add to vMix as an input. Another input that is set to an image file (screen cap done by shortcut), with color key for the green, and alpha like 60% or something so it's a bit transparent. The shortcut takes a screen cap of the camera and overlays it on top of the camera.
 

Dave Landers

Beta Tester
Joined
Dec 1, 2014
Messages
811
Likes
2,510
Location
Estes Park, CO
Website
dlwoodturning.com
Had some time to get into the shop this morning. We go down the canyon to pick up a new puppy in a bit, so I don't have all day.
Anyway...

Mounted the piece between centers. I'm using one of my vacuum chucks as a friction chuck. The Rubber Chucky rings around the PVC are way too stiff and firm - they will mark the piece, so I have to pad them with craft foam (do the same when using vacuum cause the stiff rings won't hold a vacuum either - but they're way better than taping craft foam round the PVC). Tailstock is in the mark from when I made the tenon.
IMG_8816.JPG
Thumb is there to center the hollow form. The bottom is centered in the live center, but the top in the chuck - not so much.
So I rest my thumb on the tool rest and rotate the piece by hand. Push the high spots down (if you got a 1/8" variance between high and low, move the piece 1/16" to balance it).
There are 2 places I care about balance - around the circumference of the already-turned bit (so I can match the curve), and the foot where the tenon was (so it'll sit straight). Often it's a compromise.

You can see, in the above photo, a pencil line. I marked that while I had the camera setup - it's the interior bottom. Looking at that, I figure if I leave the tenon face (where my thumb is) I'll have a good wall thickness. I do want a foot, so I'm going to aim that at not-quite the bottom of the tenon. So I have some wood to make a foot.

Next, I've turned the bottom, left the foot (haven't done the inside of the foot yet). Working to match a continuous curve from what I've already turned to the foot. I've made the foot about the same diameter as the ring feature on the top - I think in general that makes for a well-balanced piece (no matter what shape you make, it's nice if the bottom and top are in harmony).
IMG_8817.JPG
You might be able to see in that photo that there's a bit of a discontinuity some places - I didn't get it exactly centered, so there's a small step at one place around the piece where the curve doesn't match up. No problem, it'll sand out.
 
Last edited:

Dave Landers

Beta Tester
Joined
Dec 1, 2014
Messages
811
Likes
2,510
Location
Estes Park, CO
Website
dlwoodturning.com
I next move on to sanding the form. Again, 120 ... 400. Get rid of all tool marks and smooth out that transition discontinuity with the 120. As I move up the grits, I overlap more and more into the area I sanded yesterday. By the time I get to 400, I'm re-sanding most of the way around the outside.
IMG_8818.JPG
After that's sanded, I move on to the inside of the foot. Not much room in there, so it's careful work with a 3/8 bowl gouge and a small round-nose scraper. Try not to run your bowl gouge into the live center! (no I didn't do that.... this time). That nub where the live center is will get sanded off.
I might normally use the vacuum chuck - use painters tape and plastic wrap to deal with the holes and cracks. But this piece is way too "rustic" for that. Those worm holes in the bottom can't be covered (cause I want to turn there) and they'll leak too much. So the nub has to get sanded off.
 

Dave Landers

Beta Tester
Joined
Dec 1, 2014
Messages
811
Likes
2,510
Location
Estes Park, CO
Website
dlwoodturning.com
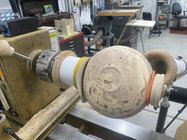
For sanding the bottom, I need to secure the thing somehow. So I mount it between centers - sideways (sorta like you might turn a sphere).
IMG_8821.JPG
A different vacuum chuck w/foam. And a cup-like thing in the live center (and more foam). It's a block of wood with a 3/4"-10 nut epoxied in to screw on my live center. Locked the headstock with the lathe's indexer.
Piece is held stable and I can get that nub gone with 80 grit, then 120 ... 400 inside the foot.

While it was held there, I started picking at some of the looser frass (worm poo) with a dental tool. Didn't do too much cause I have a different method... those worms usually pack it in tight, some of this was uncharacteristically loose.
IMG_8822.JPG
That's probably all I can get done today...
 

Dave Landers

Beta Tester
Joined
Dec 1, 2014
Messages
811
Likes
2,510
Location
Estes Park, CO
Website
dlwoodturning.com
Frass day(s)
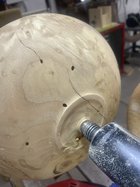
I use a dremel flex shaft with a small ball burr to dig out the frass.
Didn't get good focus, but you get the idea.
IMG_8827.JPG


I've tried lots of things for removing frass. Dental picks. Football inflater with a sharpened end, with compressed air. That works fairly well - the sharp end of the inflater digs the stuff out and the air blows out the debris.
But my current thing is the burr. The frass is usually compacted in the holes, and this requires less digging and scraping.
I work the ball into the worm hole, and basically just feel my way around. I can usually tell when I hit a wood-wall vs the frass. So it's usually a circular motion hunting for the sides of the hole.

Moved my dust collector inlet from the lathe to my finishing table.IMG_8831.JPG

Trying something new - I marked off an area with tape to help me focus. With a piece like this with so many worm holes, I tend to jump around to random holes and that makes it harder to track what's done and what's not. The focus area seems to help.

IMG_8832.JPG

Not sure how long this frass removal will take, as I can only do about 30 min before I start getting bored and tired and sloppy. so it'll take several sessions.... I'll update when I get finished with the frass (or if something interesting happens).
 

Dave Landers

Beta Tester
Joined
Dec 1, 2014
Messages
811
Likes
2,510
Location
Estes Park, CO
Website
dlwoodturning.com
Got in a couple more frass sessions yesterday, finished it up this morning. The tape marking "focus areas" worked really well for me. going to remember that, especially on something like this.

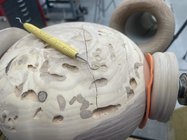
There were a few places where the ball burr went walkabout, so I did an inspection, marked those spots.
IMG_8834.JPG
Went back to the lathe, hit those spots with 180. Then redid the whole thing with 220...400.
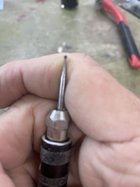
So I think it's done except for finish. So I signed it (small ball-end pyrography tip).
IMG_8838.JPG
 

Dave Landers

Beta Tester
Joined
Dec 1, 2014
Messages
811
Likes
2,510
Location
Estes Park, CO
Website
dlwoodturning.com
Some thoughts at this point...

I can never sell a piece like this for anything close to the time I have in it. It's cleaning the frass that takes way too much time. I often abandon a piece with so much worm activity, but this looked cool enough to persist.

Using the dremel and burr really speeds up the frass-cleaning process. But the burr does cut into the wood a bit and leaves something less than purely worm-made. For just a few holes, I think picking out the frass better respects the worm's contribution to our collaboration.

I did not get all the holes, there are still a few (mostly tiny ones) that I didn't clean out. And I didn't even attempt the frass-pits I can see inside the hollow form.

There are some pretty significant cracks. Most of them are not threatening the structural integrity of the piece. But a couple long ones across the bottom might. Time will tell...

Sometimes, I'll fill cracks with epoxy (I usually color it - most often black w/a drop of india ink). I could fill some of the cracks, but many of them cross worm holes, and I'd get epoxy in the holes and make a mess. So I figure better to do none than some.

I often will reinforce cracks with pewa (butterflies). But not on this piece - similar reasons to the epoxy. Too many, crossing worm holes, etc. Wouldn't look right I don't think.
 

Dave Landers

Beta Tester
Joined
Dec 1, 2014
Messages
811
Likes
2,510
Location
Estes Park, CO
Website
dlwoodturning.com
I'm now thinking about finish. As I've said, this piece is "rustic" (holes, cracks, piths, knots). So I don't want anything that clashes with that - so no built-up lacquer buffed to a high gloss or anything approaching that. I want it to still look and feel like wood.
I usually really like walnut oil on ash. It does yellow it a bit, but the color is warm and pleasing to me.

But I'm thinking I want something a tiny bit more "structural". OK, so no finish (short of epoxy or CA) is going to deal with the cracks, but I'd like something that might hold onto the frass I left behind. At least something that'll do a bit more than oil.

So I went with Osmo Poly-X Natural. It's easy to apply and should be tough (it's a finish for wood floors). And it doesn't really change the look of the wood much at all.


An aside about finishing hollow forms:
A finishing challenge is the inside.
Solvent-based finishes like lacquer or shellac can be poured in, rolled around, and wiped off (assuming you can get your finger etc in to wipe up the excess). But then you have to do something about the odor - I usually hook up a fish tank air pump and let it circulate air around inside for a few days. Even then it may still smell.
Things like walnut oil (and friends) can also be poured in and wiped off (again assuming you can). And the aroma is not such a problem (I still may fish-pump it unless I wiped it really good).
Any finish you pour on a piece like this one... well, it will come out all the holes and you get a real mess.
Osmo is thicker (doesn't run) and takes a tiny amount (so nothing to run even if it would) - and it's easy wipe-on, wipe-off.


Back to this one... I wiped Osmo inside the hollow form as best I could -made a brush from a folded bit of paper towel in some forceps. And did some with a paper towel wrapped around my finger. Didn't get the whole inside, but got what I could. Another wipe with a clean towel to remove excess.

Next, wiped the outside with Osmo on a paper towel. The bug holes really ripped up the towel, had to change a few times.
Next, I used a small brush to get finish in the worm holes.
Blew out excess with compressed air, then wiped the excess off the surface.
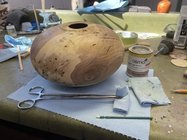
IMG_8842.JPG
I'll do another coat later today... then get some photos to close this out.
 
Joined
Jun 2, 2021
Messages
177
Likes
287
Location
Kingsville, ON
Awesome to see your process Dave and decisions regrading some of the challenges along the way with this project. Turned out to be a great piece and well worth it IMO.
 
Joined
Jun 5, 2023
Messages
121
Likes
693
Location
Portage, MI
I have been following this process from the start Dave. Looks like a lot of effort but the result looks worth it.
 

Dave Landers

Beta Tester
Joined
Dec 1, 2014
Messages
811
Likes
2,510
Location
Estes Park, CO
Website
dlwoodturning.com
Photos.

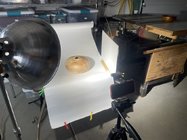
First, here's my photo setup
IMG_8852.JPG
Nothing fancy - temporary setup. A small folding table. Some white paper backdrop - came in an unwieldy 4' roll I recently cut it down to about 2' wide. It's on some conduit pipe sitting on 2 cheap stands that came with 2 cheap lights. I have a basic light hood from the hardware store that I've jerry-rigged to another light stand. It's got a 5000K don't-remember-the-wattage LED spotlight in it. A piece of white foam poster board siting in a chunk of wood with a dado. That gives me reflected light onto the unlit side of the piece. I use my phone camera on a cheap tripod that came with a phone holder. And the tripod also came with a bluetooth shutter trigger which is great so I don't bump the camera trying to push the go-button. I also turn off the overhead shop lights so I get the shadow I want from the spot.

A couple shots. Was in a bit of a hurry. Now that I've seen them on the computer, I will probably go back and re-do them cause I don't quite like the shadows. But they're ok for "rustic" :)
IMG_8847.jpegIMG_8846.jpeg


Thanks for following along!
 
Joined
Feb 26, 2019
Messages
1,825
Likes
1,423
Location
Lebanon, Missouri
Thanks Dave, great follow along! A couple of things for you to ponder:

Finish - one that will provide some improved structural integrity - plain ole poly thinned 1:1. I use it inside and out, doing both at the same time. Pour in, use a 1” foam brush on the outside. Keep wet for ~ 20-30 min to soak in, let it start to just thicken and set a bit, then buff off with a blue shop towel. Use air for any cracks/holes so it doesnt pool, and the air can help it “set” so it doesnt bleed out. I use semi gloss so any negative grain is not glossy. It can be left semi gloss or buffed to gloss level desired. Its plastic when it cures, and stiffens things up well.

Vacuum chips - until recently I was doing the same as you - tape a piece of tube to the larger vac hose. I use 1/2” cpvc and pvc pipes(they are different in actual size), and bought and turned a couple of fittings, then the light came on - just turn a transition piece out of wood. Used the closest forstner bit to drill a hole for ech side, then tapered for fit, on both ends. Now I can swap tubes as needed, and the (c)pvc pipe can be bent with a heat gun. The curved tubes really help with hf’s shaped like the one you made here.

1709495715528.jpeg
 
Back
Top