I am turning a walnut bowl. The grain keeps raising up in funny ways. I have tried a scraper and other than extensive sanding, how do I deal with this. Someone suggested spraying the bowl with a finish to raise the grain. Help would be apprciated.

-
It's time to cast your vote in the March 2026 Turning Challenge. (click here for details) -
Congratulations to Chris Lawrence for "Dragon's Grip" being selected as Turning of the Week for March 30, 2026 (click here for details) -
Welcome new registering member. Your username must be your real First and Last name (for example: John Doe). "Screen names" and "handles" are not allowed and your registration will be deleted if you don't use your real name. Also, do not use all caps nor all lower case.
You are using an out of date browser. It may not display this or other websites correctly.
You should upgrade or use an alternative browser.
You should upgrade or use an alternative browser.
Those Funny End Grain Fuzzies
- Thread starter loberg
- Start date
Odie
Panning for Montana gold, with Betsy, the mule!
I am turning a walnut bowl. The grain keeps raising up in funny ways. I have tried a scraper and other than extensive sanding, how do I deal with this. Someone suggested spraying the bowl with a finish to raise the grain. Help would be apprciated.
It is possible your walnut bowl blank still has some excess moisture content to it.
I'm not sure what you do and don't know about turning, so if my post is too basic for you, please forgive my oversight.
Many/most bowl blanks have moisture content that is above what is known as "stable". It sounds like yours might. The solution is to "rough" your bowl to a general shape and allow it to dry naturally. There are many ways of accomplishing this, but my method is to coat the roughed bowl with a wax coating to slow down the drying process. This is to prevent too fast drying and thus, prevent cracking. I use a moisture meter to get a general idea of the moisture content, and then rely on regular weighings to determine when the bowl has "stabilized".
Once it's stabilized, the roughed bowl is then ready for final finishing.....and, you shouldn't see the end grain getting "fuzzy".
otis of cologne
This is a piece of walnut from a gun stock company here in CA. It is dry. I think what I'm experiencing is some kind of burl with grain running all over. I am new to turning but have a lot of experience with woodworking. I will try to get a photo and post.
- Joined
- May 16, 2005
- Messages
- 3,540
- Likes
- 22
This is a piece of walnut from a gun stock company here in CA. It is dry. I think what I'm experiencing is some kind of burl with grain running all over. I am new to turning but have a lot of experience with woodworking. I will try to get a photo and post.
Unless you stored it in the same controlled environment as they did, it could be anywhere now, though odds favor the strange figure and your tool technique as the culprits. Your objective is to cut across the fiber with the minimum lift required to keep the shaving running. That's tough to do when things run in several different directions.
Two schools of thought. You've heard one. Consolidate the surface area with some shellac or lacquer so you don't pull individual fibers, but work on the corporate greater group. Second is diametrically opposite, and involves lubricating and softening the surface so that the tool doesn't drag and severs the individual fibers rather than pulls them. Water,oils and waxes are often recommended. I think the real answer is to cut thin and narrow with a freshly sharp tool and coat nothing.
The shaving is your teacher. You want one which has a tapered trailing edge. When you get it to a a twisted shaving with one smooth and one ragged transparent feather edge, you're in tall cotton.
- Joined
- Mar 13, 2005
- Messages
- 231
- Likes
- 2
- Location
- Newville, PA (south of Harrisburg)
- Website
- www.torne-lignum.com
loberg,
I know how frustrating that can be and walnut (especially black walnut) does that quite a bit. Michael's suggestion of a really sharp tool, light wispy cuts with the bowl gouge on a 90 degree angle (scraping mode) is the best way to address this issue. I also apply Johnson's paste wax (floor wax) which raises the grain but doesn't soak into the wood. This works nicely for me.
Good luck,
Ruth
black walnut
I too have been frustrated with Bk walnut. I have turned 3 large barked edge bowls in the last 3 months, and have every one split in the sapwood. The last one I turned/sharpened gouges at the end, put in wet shavings/ grocery bag, and even coated sapwood prior with thin super glue. Within 3 days it too split. Since it is natural edge I took to final thickness at one go, and had to use the 80 grit gouge for the furry places!!! spent near 3 hours sanding the sucker yesterday. I too use Johnson's paste wax, but it doesn;t seem to work all the time. Gretch
I too have been frustrated with Bk walnut. I have turned 3 large barked edge bowls in the last 3 months, and have every one split in the sapwood. The last one I turned/sharpened gouges at the end, put in wet shavings/ grocery bag, and even coated sapwood prior with thin super glue. Within 3 days it too split. Since it is natural edge I took to final thickness at one go, and had to use the 80 grit gouge for the furry places!!! spent near 3 hours sanding the sucker yesterday. I too use Johnson's paste wax, but it doesn;t seem to work all the time. Gretch
Before I read you posts I tried to lightly scrape the bowl to cut just the fuzzies. Mistake!!! Now it looks like I will have to shave the bowl. I will try the very sharp (have a wolverine) gouge at 90 degrees. I am now contiplating selling my MGBGT to purchase a VERY good lathe. This stuff is adictive and there is no grease involved.
Steve Worcester
Admin Emeritus
Sharp tools, move the tool slowly, rubbing the bevel.
A great exercise would be to take a pine blank, get it round. Get your favorite gouge sharpened up and take passes trying different feed speeds, gouge angles, etc. all while rubbing the bevel. (Of course you can't rub the bevel with a shear cut/scrape).
You will be amazed how different the surface will look with minor adjustments.
I had a nice piece of Koa once that did what your piece is doing. I got the inside (it is always the inside, and not the outside for some reason) wet with water, and took very light cuts. It took a couple of times doing this to get the fuzzies out. When you get it wet, this is no problem because you cut off the wet part. A scraping cut tears more than a shear (angled cut), and you can shear with a scraper, just get it up on the edge, rather than flat on the tool rest. I don't like a scraper out on the edge of a bowl because of vibration, which can cause a catch and destroy your bowl. You can use your hand as a steady rest, with only gentle pressure. If you press too hard, you can cause vibration as well. Sharp tools of course.
robo hippy
robo hippy
- Joined
- May 16, 2005
- Messages
- 3,540
- Likes
- 22
I do not advocate scraping, because I stink at it, and I don't use a bowl gouge for final cuts, preferring the control I get from a forged pattern. It allows you to skew the gouge by dropping the handle, same as on a spindle cut, thus making the final separation at as close to 90 degrees to the grain as possible on a conventionally-grained bowl.
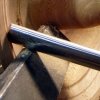
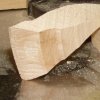
How broad you begin the cut is a matter of what you're trying to do, as you can see from the first picture below. What the shape of the cut does is shown in the second. The dynamic view is available as well. http://s108.photobucket.com/albums/n28/MichaelMouse/?action=view¤t=CherryPeelIn.flv You can see from the modest upward arc how the shavings are redirected as they cross the bottom of the flute.
How broad you begin the cut is a matter of what you're trying to do, as you can see from the first picture below. What the shape of the cut does is shown in the second. The dynamic view is available as well. http://s108.photobucket.com/albums/n28/MichaelMouse/?action=view¤t=CherryPeelIn.flv You can see from the modest upward arc how the shavings are redirected as they cross the bottom of the flute.
Attachments
A sharp tool helps. I like to sand to 220 then put a light cut perhaps a 3/4 pound cut of shellac on. After about 20 minutes start sanding from 220 and up to wherever you like to go. It also helps to sand in forward then reverse. I forgot where I learned that but I make a practice of it.
I will be trying many of these methods soon. Thanks for all the help so far.
Bruce
Bruce
That's a very interesting demonstration MM. Thanks.
And a milled bowl gouge with cutting edge at 45 degrees or greater wouldn't perform as well?
Your forged gouge looks very similar to a roughing gouge, on the photobucket video. More 'open' flute?
And a milled bowl gouge with cutting edge at 45 degrees or greater wouldn't perform as well?
Your forged gouge looks very similar to a roughing gouge, on the photobucket video. More 'open' flute?
- Joined
- May 16, 2005
- Messages
- 3,540
- Likes
- 22
And a milled bowl gouge with cutting edge at 45 degrees or greater wouldn't perform as well?
Your forged gouge looks very similar to a roughing gouge, on the photobucket video. More 'open' flute?
As you can see, I'm cutting over the bed. Can't get that angle with a "bowl" gouge without hitting the bed or the banjo. Not to mention that trying involves an angle greater than 45 degrees to the horizontal, where the tool rest becomes more of a tool "lean," with loss of control. I'm moving L to R with a skew angle like this \ as well twisting the top of the curve into the curve of the bowl on a similar angle.
The forged is the same for the last thousand years, save the one in the stills is HSS, the one in the cutting video is carbon steel.
This is a nice gouge for working where there's room, because it has the consistent section for forged folks and the drawn wings for the others. http://s108.photobucket.com/albums/n28/MichaelMouse/?action=view¤t=35mmGougeRounding.flv