I'd appreciate a pointer to a how-to video that discusses fixes to holes/voids/cracks in vessels (epoxy, etc.). In general, I am not a big fixer along these lines because I always seem to spend way too much time tinkering with my simple fixes plus I usually end up tossing the item because I tend to view it as damaged even after I make a decent shot at a fix. However, I've got some wood that is just too pretty to toss without taking another look at the repair options. Thanks in advance.
-
February 2026 Turning Challenge: Cookie Jar! (click here for details) -
Congratulations to Matt Carvalho for "Red Mallee Folded Form" being selected as Turning of the Week for February 9, 2026 (click here for details) -
AAW Symposium demonstrators announced - If the 2026 AAW International Woodturning Symposium is not on your calendar, now is the time to register. And there are discounts available if you sign up early, by Feb. 28. Early Bird pricing gives you the best rate for our 40th Anniversary Symposium in Raleigh, North Carolina, June 4–7, 2026. (There are discounts for AAW chapter members too) For more information vist the discussion thread here or the AAW registration page
-
Welcome new registering member. Your username must be your real First and Last name (for example: John Doe). "Screen names" and "handles" are not allowed and your registration will be deleted if you don't use your real name. Also, do not use all caps nor all lower case.
You are using an out of date browser. It may not display this or other websites correctly.
You should upgrade or use an alternative browser.
You should upgrade or use an alternative browser.
Void Fixes
- Thread starter Donovan Bailey
- Start date
- Joined
- Apr 27, 2004
- Messages
- 9,313
- Likes
- 6,096
- Location
- Lakeland, Florida
- Website
- www.hockenberywoodturning.com
Al,
Your mastery makes it look like any of us could do it (though I know it isn't true for me). That is beautiful work !
Kind regards,
Rich
Your mastery makes it look like any of us could do it (though I know it isn't true for me). That is beautiful work !
Kind regards,
Rich
I'd appreciate a pointer to a how-to video that discusses fixes to holes/voids/cracks in vessels (epoxy, etc.).
One of my most frequently used “fixes” is using epoxy mixed with used, dried coffee grounds. It works really well with bark inclusions as the grounds have the right color and mottling.
I'm going to try the epoxy/coffee grounds approach - a thickner / filler with a deep dark brown would be useful. I have been using WEST G-Flex tinted to dark brown or Aero Marine tinted and thickened with colloidal silica.
But to Donavan's issue, I'm in Al's camp - I look for voids/bark inclusions - makes a piece interesting.
And self-bailing is a real plus.

But to Donavan's issue, I'm in Al's camp - I look for voids/bark inclusions - makes a piece interesting.
And self-bailing is a real plus.

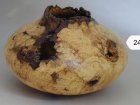
I have developed a method of filling large voids that came as an offshoot of Stephen Hatchers demo at the 2011 Symposium in St.Paul. The method he used to inlay designs into his work involved under cutting the surface about 1/16" deep and then filling with crushed stone. I tried some designs of my own with a fair amount of success but then I moved on to some projects with natural voids. I tried the epoxy route sealing the back side of the void then putting masking tape dams around the area but that was very time consuming and wastfull of the stone inlay. The previous experience with undercutting led me to use epoxy putty as a fill for the void, then turning the the surface even with the surrounding wood, then undercutting with a Dremal tool and finally filling with crushed stone and thin CA.

Beautiful work. Thanks for the tip.I have developed a method of filling large voids that came as an offshoot of Stephen Hatchers demo at the 2011 Symposium in St.Paul. The method he used to inlay designs into his work involved under cutting the surface about 1/16" deep and then filling with crushed stone. I tried some designs of my own with a fair amount of success but then I moved on to some projects with natural voids. I tried the epoxy route sealing the back side of the void then putting masking tape dams around the area but that was very time consuming and wastfull of the stone inlay. The previous experience with undercutting led me to use epoxy putty as a fill for the void, then turning the the surface even with the surrounding wood, then undercutting with a Dremal tool and finally filling with crushed stone and thin CA.View attachment 27939
The previous experience with undercutting led me to use epoxy putty as a fill for the void, then turning the the surface even with the surrounding wood,
Don, what brand of epoxy putty are you using?
I buy it at my local hardware store or big box store I think the brand is PC something. It comes in stick form with the hardener surrounding and all you have to do is cut off the desired amount and knead it to a uniform color, then apply it to the void. The putty comes in various colors for use from patching mufflers to filling voids in wood. The one that specifically says for filling wood is a light tan color but I have used other colors without any problems.Don, what brand of epoxy putty are you using?


