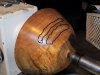
They're places where you've picked up and bent the grain - note that they're uphill with normal rotation - and then compressed and heated in while sanding to that baby bottom smoothness. Often they won't show until you put the first seal on, and the difference in reflectivity is revealed. Heel bruises are generally darker than the background, resulting from burnishing pressure.
For now I'd suggest you wet the surface well with water and sand them out with as little pressure and resulting heat as you're able after they dry. The water will break the hardening and cause the fibers to straighten a bit. One way to check the piece for such surprises is to set up with water between 220 and 320, noticing any differences in reflection. Other is to wipe with mineral spirits to reveal, which doesn't give you the benefit of breaking any case-hardening you may have created by heat.
Ultimate answer is to control the gouge so you're cutting across the grain rather than across and up. I like flat form gouges for this task, because you can take advantage of the form of the gouge to feather the final release cut while maintaining the angle of the tool handle at less than 30 degrees from the horizontal so the rest takes the pressure, rather than you. Better control that way.
The piece isn't fully round save near the base in the video I'm going to reference, but you can see and hear how the gouge is cutting across a narrow face - the ridge is visible in the early cut - producing a shaving which is thin and ragged on the inside of the twist as it feathers off. The cut is slightly above centerline to take advantage of the curvature of the piece in avoiding a catch, and the gouge is tilted to present a (/) skewed aspect both along the direction of travel, and perpendicular to it. Notice the shavings alter direction only slightly from that they possessed when they were part of the piece, travelling only down or slightly out after following the inside curvature of the gouge. If the shavings start flying up, you're ripping. If they turn to dust, you're in for a new angle or a new edge, because you want a continuous shaving.
http://s108.photobucket.com/albums/...t=CherryPeelOut.flv&refPage=&imgAnch=imgAnch5
On the inside, cutting the same way but slightly below the centerline gives you all the benefits of a flat gouge. Note once again that the only lift in the shaving is that given by the inside of the gouge. You stand upright and follow the cut with tactile feedback and visual on the opposite side. On less open forms it'll be all you have, because the shavings will heap up on your hand.
http://s108.photobucket.com/albums/n28/MichaelMouse/?action=view¤t=CherryPeelIn.flv