Lots of ways to get drier air out the end of the hose. Putting a separator close to the outlet is a good idea. Running hard lines (steel or copper) with a few strategically-placed drops can helps, too. You can even build a "drying rack" with a circuit of pipe that allows the condensation to fall out of the air before it reaches the outlet. I used a combination of all three things, plus a desiccant cartridge dryer near the outlet.
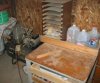
Here's the drying rack. It's 3/4" pipe. The air enters at the valve on the right (to the left of the shop rooster), then it zigs and zags up and down the loops and exits at the top, where you see a temporarily-mounted pressure gauge. (This pic was taken before I ran the overhead pipe.) The vertical drops at the bottoms of the loops capture condensed moisture, and that moisture is vented out the horizontal pipe at the bottom. There are check valves on each of these legs to allow only one-way flow out these drop legs. (A more thorough discussion and debate about the design is over on the Hotrodders.com forum
here. The final results proved the naysayers wrong.)
View attachment 3373
A shot of the check valves...
View attachment 3375
Here's the drying rack hiding behind the clamp rack that covers it...
View attachment 3376
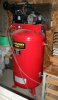
And a shot with the compressor and overhead piping in place. Although it's not real apparent in this pic, there's a 3/4" hose connection between the compressor and the drying rack...
View attachment 3377
And at the air station next to the lathe (and also my finish spraying area), I've got a variety of regulators, separators, the desiccant dryer, and a good old-fashioned moisture drop (the ball valve at the lower left corner). BTW, the desiccant dryer lists for about $900 as I recall...I bought it barely used on eBay for about $50. The red hose on the left is the flex line that connects the air station (which is attached to the side of a rolling cabinet) to the rigid overhead air lines. The little filter.separators on the right are from Harbor Freight. They are junk and I don't recommend them. I've removed one completely because it wouldn't open up to full pressure. I use that line for my blow nozzle. The other regulator leaks when it's in use, but it still holds the correct pressure. Someday I'll replace them, but it's not a priority right now. (The one that's there works fine for my pneumatic sander, and I have another regulator on my spray gun, as well as a "master" regulator near the compressor.)
View attachment 3374
My system is overkill for most turning needs, but when I got my compressor I figured it'd be a waste to have a good compressor with a bad air delivery system, so I spent the extra bucks to do it up nice. The end result is that I get very dry air out of the hose. Hopefully this'll give you a few ideas to work with.

")