• Beware of Counterfeit Woodturning Tools (click here for details)
  • Johnathan Silwones is starting a new AAW chapter, Southern Alleghenies Woodturners, in Johnstown, PA. (click here for details)
  • Congratulations to Peter Jacobson for "Red Winged Burl Bowl" being selected as Turning of the Week for April 29, 2024 (click here for details)
  • Welcome new registering member. Your username must be your real First and Last name (for example: John Doe). "Screen names" and "handles" are not allowed and your registration will be deleted if you don't use your real name. Also, do not use all caps nor all lower case.

Bowl from a board (BFAB) beginners tips

Joined
Mar 22, 2023
Messages
154
Likes
330
Location
Strasburg, VA
Bowl from a board (BFAB) tips

Many folks are very well aware of the BFAB way of making bowl blanks but some of us relatively new wood turners are not and might benefit from these notes. This way of making a bowl is actually fairly old. Previously it was primarily done on a scroll saw or a bandsaw but the rings can be cut from a board very effectively on a wood lathe.

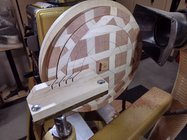
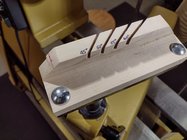
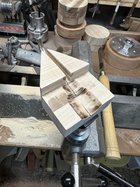
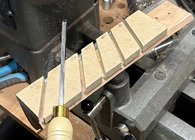
I’ve only been doing BFABs for a couple weeks, after stumbling on some videos on YouTube describing the technique. I made a jig to hold the parting tool at 45, 50, 55, 60, 65, and 70 degrees from the face of the board from a piece of cherry and MDF and mounted it to my 12” tool rest with wood screws through the tool rest.
IMG_9459.jpeg
A couple things I’ve noted in watching videos and experimenting.

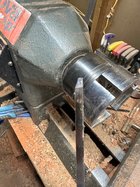
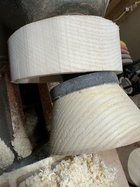
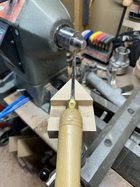
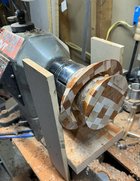
It helps to make a wooden cradle for over the lathe bed behind the board being cut so that when the ring separates from the board on the spindle it can’t get badly dinged up or broken on the bed of the lathe or the chuck.
IMG_9805.jpeg

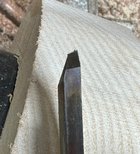
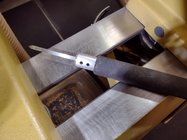
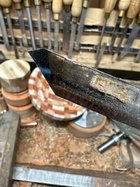
There’s no need to buy a thin parting tool. An extra standard parting tool can be modified on the slow speed grinder so the tip is narrower and more parallel with the surface of the board. This makes a cleaner cut when the parting tool cuts through the back of the board. I use the skew attachment on my Wolverine sharpening jig to grind the angle of the tip so its more parallel with the board surface, the cutting point is above the middle of the parting tool, and the bottom half of the shaft longitudinally is thinner than the top half. This greatly reduces and almost eliminates the chance of a standard parting tool binding up in the cut.
IMG_9815.jpegIMG_9817.jpeg
 
Last edited:
Joined
Mar 22, 2023
Messages
154
Likes
330
Location
Strasburg, VA
The surface of each side of the rings needs to be flat to be glued. I bought an 18”x12” polyethylene cutting bound on Amazon for $8 and cut a 12” disk from it and mounted that on a 3” faceplate. I picked up a 10 count pack of self adhesive sanding disks on Amazon for $20. So for $28 I have a 12” sanding disk I can mount on my lathe to flatten the surfaces of each ring.
IMG_9671.jpeg

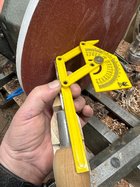
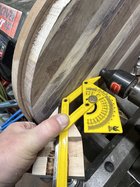
There’s no need for wooden cutouts to determine the angle of the cut from the face of the board. A cheap plastic protractor like in the last photo can be used. (I had made a thin parting tool from a metal parting tool blade and a second parting tool jig for it mounted on a Nova modular tool rest shaft and box rest. Unfortunately both broke so I’m back to using my original jig.)

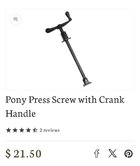
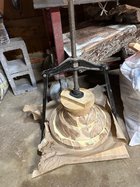
A clamp to tightly hold the rings during glue up can be made from a veneer press screw mounted in a wooden frame. In my case I found a fruit press on Marketplace for $25 so I used that. I’m ordering two of the veneer press screws so I can make two more clamps as I let the glue ups sit overnight before I turn the blank.
IMG_9766.jpegIMG_9749.jpeg
When doing the glue up, a couple grains of salt spread around the glue can help keep the rings from slipping out of place. When I haven’t done this I’ve regretted it because the rings always slide around when pressure is applied with the clamp.
 
Joined
Mar 22, 2023
Messages
154
Likes
330
Location
Strasburg, VA
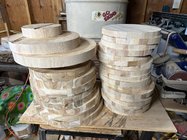
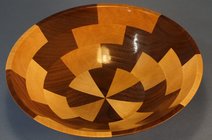
I searched Marketplace for ads for butcher block countertops locally and found two small operations willing to sell me their cut offs at a reasonable price. So I have about 45 round pieces of acacia, hard maple, birch and various hardwood butcher block to make these bowls.
IMG_9789.jpeg
I just like the appearance of these bowls when made from butcher block but they can be made from any boards.

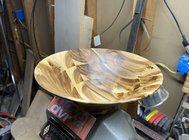
Acacia butcher block:
IMG_9759.jpeg

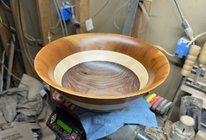
Mahogany on top, hard maple butcher block in the middle, walnut on the bottom:
IMG_9599.jpegI’m disabled following multiple strokes. I’ve had a great physical recovery but my strength and stamina is lousy, even now eight years later, so using a chainsaw to prepare blanks has become too much of an effort for me. Plus I do not have/ cannot afford a bowl coring system and hate wasting all the wood from hollowing out a typical bowl blank. Comparatively there’s little waste with BFAB.

So going forward I’m going to be relying mainly on this BFAB method.
 
Joined
Nov 22, 2009
Messages
233
Likes
167
Location
Midland, MI
Brian, nice write up. Thanks. I especially like the tips on sharpening/modifying the parting tool.

Someone demoed bowl from a board at my turning club. An eye opener for me was when he used different angles for different rings - shallower near the outside, steeper near the center. That allows making a more natural, curved profile than I had seen in other BfaB's that were made with single angle like with a Ring Master for example.

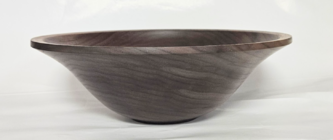
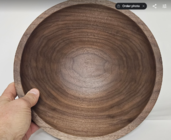
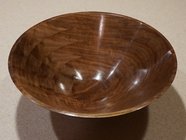
Here's a walnut bowl I made after the demo, about 11" diameter, 3.5" high. I didn't have a press, so just used weights from an unused barbell for the glue up. I drew a reference line on the board before cutting the rings which helped with lining things up for the glue up.

1712241963586.png

1712242097790.png
 
Joined
Mar 22, 2023
Messages
154
Likes
330
Location
Strasburg, VA
An eye opener for me was when he used different angles for different rings - shallower near the outside, steeper near the center. That allows making a more natural, curved profile than I had seen in other BfaB's that were made with single angle like with a Ring Master for example.
I’ve started doing this too. Different combinations of angles can create concave or convex sides or combinations of them both as you said.

I picked up most of these ideas from ThePapa1947’s YouTube channel. He talks about combining angles to create different wall profiles.

I had an extended Messenger conversation with him last night. He was a bit skeptical that a standard parting tool could be used for rings, especially smaller ones, without significant binding and tear out, and asked me to send him a video of cutting a small one. But this grind makes all the difference, especially thinning down the bottom half of the tool shaft lengthwise

This was the result, using some scrap maple, with my 3” face plate visible at the base of the cut:

IMG_9864.jpeg
IMG_9874.jpeg
 
Last edited:
Joined
Mar 22, 2023
Messages
154
Likes
330
Location
Strasburg, VA
Here's a walnut bowl I made after the demo, about 11" diameter, 3.5" high. I didn't have a press, so just used weights from an unused barbell for the glue up. I drew a reference line on the board before cutting the rings which helped with lining things up for the glue up.
Very nice!

Initially I used a cinder block with two car batteries on top of it.

The idea to draw the reference line prior to your glue up is brilliant and makes perfect sense.

One question though - I sand all my rings on a 12” sanding disk to flatten / roughen them a bit prior to glue up. My reference line would be sanded off. Is this an issue for you?
 
Last edited:
Joined
Nov 22, 2009
Messages
233
Likes
167
Location
Midland, MI
One question though - I sand all my rings on a 12” sanding disk to flatten / roughen a bit them prior to glue up. My reference line would be sanded off. Is this an issue for you?
I've got a drum sander. I ran the board through it to get it flat and well sanded before cutting the rings and didn't do any sanding after cutting the rings. So the reference line was not affected. Forgot to mention, I also stacked the rings with no glue, got them well aligned and drew pencil marks (circular) around each of the rings on the ring below it in the stack. That made it easier to get everything lined up during the glue up.

I can't take any credit for the techniques. They were all shown by Pete Vandermeer, the guy from our club who did the demo.
 
Last edited:
Joined
Mar 22, 2023
Messages
154
Likes
330
Location
Strasburg, VA
Forgot to mention, I also stacked the rings with no glue, got them well aligned and drew pencil marks (circular) around each of the rings on the ring below it in the stack. That made it easier to get everything lined up during the glue up.
Yes, I do this too. But I appreciate the reference line tip.

I would love to have a drum sander. I usually run my boards through a 13” planer prior to cutting the rings but some of my board glue ups are too wide for that and I have to use the 12” disk sander.
 
Last edited:
Joined
Mar 22, 2023
Messages
154
Likes
330
Location
Strasburg, VA
Thanks! I downloaded your pdf and read through it. The illustrations of drawing out the board thickness, the desired shape and the angles required was quite helpful.

Plus using the piece of MDF to “hold” the board while cutting the rings is simply brilliant. It will eliminate some difficulties I was experiencing with mounting the board to a glue block for cutting.

How do you subsequently “part” the finished bowl from the MDF? I have a contractor’s grade hot glue gun that uses 1/2” glue sticks from Home Depot and it does not dissolve in denatured alcohol.
 
Last edited:
Joined
Mar 12, 2017
Messages
85
Likes
152
Location
Sweden
Thanks! I downloaded your pdf and read through it. The illustrations of drawing out the board thickness, the desired shape and the angles required was quite helpful.

Plus using the piece of MDF to “hold” the board while cutting the rings is simply brilliant. It will eliminate some difficulties I was experiencing with mounting the board to a glue block for cutting.

How do you subsequently “part” the finished bowl from the MDF? I have a contractor’s grade hot glue gun that uses 1/2” glue sticks from Home Depot and it does not dissolve in denatured alcohol.
Either you can turn it off with tailstock support or use denaturated alcohol. The glue does not dissolve in alcohol, but the grip is very low, so it it easy to bend apart (with my sticks). Also I only put small dabs of hot melt glue on.
 
Joined
Aug 16, 2022
Messages
280
Likes
638
Location
Butler, PA
Very nice!

Initially I used a cinder block with two car batteries on top of it.

The idea to draw the reference line prior to your glue up is brilliant and makes perfect sense.

One question though - I sand all my rings on a 12” sanding disk to flatten / roughen them a bit prior to glue up. My reference line would be sanded off. Is this an issue for you?
The way I do the reference line is draw a straight line across the top of the board before you cut it. After you cut it extend the line from the top to the angled part of the cut of each section on the inside and outside before you sand it then you still have a line to draw on the top flat sanded section if needed or you can use them as is to align the grain. If you look at Lennart's pdf closely you can see a white line on the inside of his glued up bowl. This is what I'm trying to describe.
 
Joined
Feb 21, 2011
Messages
325
Likes
290
Location
Elkhart, IN
Website
www.riccsdesigns.com
Brian, nice write up. Thanks. I especially like the tips on sharpening/modifying the parting tool.

Someone demoed bowl from a board at my turning club. An eye opener for me was when he used different angles for different rings - shallower near the outside, steeper near the center. That allows making a more natural, curved profile than I had seen in other BfaB's that were made with single angle like with a Ring Master for example.

Here's a walnut bowl I made after the demo, about 11" diameter, 3.5" high. I didn't have a press, so just used weights from an unused barbell for the glue up. I drew a reference line on the board before cutting the rings which helped with lining things up for the glue up.

View attachment 62325

View attachment 62326
Great job Dave! I was on the zoom side of the meeting too. haven't tried it yet but now I need to.
 
Joined
Oct 15, 2015
Messages
163
Likes
289
Location
Smithville, MO
This is an interesting post. I am guessing that a oneway bowl coring jig could be used in the same way as your parting tool jig. I have never heard of someone using it like that but It makes sense that it would work.
 
Joined
Nov 4, 2011
Messages
498
Likes
749
Location
Bay Settlement, WI
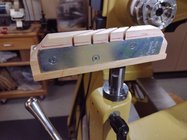
I use a set of jigs similar to Brian Kopp's. The backside of my angle jig is reinforced with a strip of steel to support the parting tool, and I am using a Sorby 1/16" Micro Parting Tool in a shop-made aluminum handle. The angle jig is bolted to a Woodcut Irons Tool Gate Rest.

I tried using a plywood disk behind the blank, attached with double-face tape. I wasn't happy with the results (tape would come loose) so I'll be trying a solution like Brian Kopp's.

BFB-01.jpg BFB-02.jpg BFB-03.jpg BFB-04.jpg
 
Last edited:
Joined
Mar 22, 2023
Messages
154
Likes
330
Location
Strasburg, VA
I did make a new jig for my modified Benjamin’s Best parting tool today. It’s hard maple mounted on a Nova modular tool rest and short box rest.

IMG_9920.jpegIMG_9919.jpeg

So I’m just using a cheap plastic compass to set the ring cut angles now. IMG_9935.jpeg

I did try mounting a round piece of MDF on a faceplate, and putting the board on that with the tail stock pulled up tightly against it to cut out the rings.

It actually worked very well, and it just started spinning on the MDF backing if I applied to much pressure with the parting tool during the cut. That eliminated all chatter during the cut, and the ring once parted has nowhere to go so less chance of it getting dinged up or broken and no need for a wooden cradle over the bed.

It’s considerably slower but that’s not a disadvantage considering the pluses.
 
Joined
Mar 12, 2017
Messages
85
Likes
152
Location
Sweden
I don´t feel the need for any jig. I made a short video showing how I cut the rings manually on the lathe by just aiming after an adjustable bevel, takes less than a minute per ring including setting the adjustable bevel. I have since realized that the supporting board quickly gets too many cuts when the tool go through the board, so I now put a waste piece of mdf between the support and board.

View: https://www.youtube.com/watch?v=Olz24sre01I
 
Joined
Mar 22, 2023
Messages
154
Likes
330
Location
Strasburg, VA
I don´t feel the need for any jig. I made a short video showing how I cut the rings manually on the lathe by just aiming after an adjustable bevel, takes less than a minute per ring including setting the adjustable bevel. I have since realized that the supporting board quickly gets too many cuts when the tool go through the board, so I now put a waste piece of mdf between the support and board.

View: https://www.youtube.com/watch?v=Olz24sre01I
Us novices can certainly use the help of a jig. I wouldn’t want to try this freehand.

I’ll try to MDF waste block, thanks.
 
Back
Top