• Beware of Counterfeit Woodturning Tools (click here for details)
  • Johnathan Silwones is starting a new AAW chapter, Southern Alleghenies Woodturners, in Johnstown, PA. (click here for details)
  • Congratulations to Peter Jacobson for "Red Winged Burl Bowl" being selected as Turning of the Week for April 29, 2024 (click here for details)
  • Welcome new registering member. Your username must be your real First and Last name (for example: John Doe). "Screen names" and "handles" are not allowed and your registration will be deleted if you don't use your real name. Also, do not use all caps nor all lower case.

Trouble with getting inside of bowl flat

Joined
May 4, 2012
Messages
34
Likes
3
Location
Baldwin, Maeyland
I posted this question before but it didn't go through.

I have used a bottom bowl gauge, regular bowl gauge, and scrappers but always seem to end up with lumps on the inside bottom with a slight domed center.
I know I am doing something wrong but are unable to correct it. Any help or suggestions you can give, will be greatly appreciated.

Thanks,
Jerry
 

odie

TOTW Team
Joined
Dec 22, 2006
Messages
7,123
Likes
9,887
Location
Panning for Montana gold, with Betsy, the mule!
I posted this question before but it didn't go through.

I have used a bottom bowl gauge, regular bowl gauge, and scrappers but always seem to end up with lumps on the inside bottom with a slight domed center.
I know I am doing something wrong but are unable to correct it. Any help or suggestions you can give, will be greatly appreciated.

Thanks,
Jerry

Funny that you'd ask this question just now, because I'm running a related thread about the differences in a NR scraper and standard scraper right now.......and, this is exactly where the NR scraper excels for my bowls. Use the NR scraper after the gouge work, and your sanding experience will be greatly improved, because you won't have to rely on sanding to even the surface.

If you haven't been using NR scrapers for smoothing/evening out the surface of bowl interiors, you should give them a try.

-o-
 

hockenbery

Forum MVP
Beta Tester
TOTW Team
Joined
Apr 27, 2004
Messages
8,652
Likes
5,010
Location
Lakeland, Florida
Website
www.hockenberywoodturning.com
Hard to see how you used the tool.

My guess is you are coming off the bevel.
Bumps and washboard feel usually comes from a sequence-
You come off the bevel and cut with the tip which the follows the bevel cutting too deeply.( a valley)
The brain senses this and adjusts the cut to the right depth then you come off the bevel cutting deeper ( a bump)

A long bevel on a curve can have the heel contact push the tool off the bevel.
Also makes move bevel drag making tool control more challenging.

I grind the heel off. This makes a short bevel that has less drag and no heel to push the tool into a deeper cut
Easier to stay on the bevel.
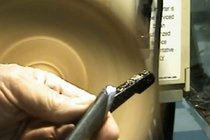
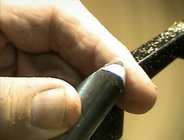
IMG_8463.jpeg. IMG_8467.jpeg

If you get a bump in the bottom just cut that area.
 
Joined
May 4, 2010
Messages
2,451
Likes
1,879
Location
Bozeman, MT
This would be an ideal question for someone from your local club. they could watch you turn the inside and identify the potential corrections.
 
Joined
Jul 27, 2020
Messages
303
Likes
1,217
Location
Durham, NC
We progress from coarse tools to remove large amounts of wood, to finer in a process of refinement, starting with chainsaw and ending with 600 grit paper (or your chosen endpoint).
For most of us, achieving a single curve, rim to rim, or a flat bottom without deviation with a gouge is near impossible. I keep working toward that goal, but is more aspirational than realistic at this point.
So, going to the next tool, less wood removed, but with greater control, a NRS. With it, you can remove wood just where needed. No requirement to start here and end there. Small sections can be addressed.
Then the problem becomes about your sensitivity. You can’t fix it if you don’t notice it. So, use that raking light while turning. Do your best to really tune in. Use the scraper till the surface is a flat and smooth as can be done with that tool. Then go finer, to sandpaper. I sand holding paper, and also power sand, first hand held, then power, same grit. I would start with 120. Your fingers are great at feeling some of the undulations, and the power sanding (mostly perpendicular to hand held) will help show the low spots. Keep doing this through grits, always working toward smoother and flatter.
You have the tools already, and you know how to use them. So, just like refining the surface, you need to work on constant refinement of your eyes, fingers and head.

Also, don’t do flat bottoms (also applies to the exterior). Curves are more attractive and a bit easier to deal with.

Marc
 

Randy Anderson

Beta Tester
Beta Tester
Joined
May 25, 2019
Messages
848
Likes
1,272
Location
Eads, TN
Website
www.etsy.com
Something I got from my local mentor years ago is to treat every cut from rim to bottom on your bowls as if it's a final cut. Obviously not meaning when doing the initial bulk removal but don't be sloppy or rough on the last 5-6 passes then expect to make one or two final perfect passes from rim to center and have them clean it all up and come out smooth with no undulations. Better to deal with ripples with the room to make a number of passes than only one or two left to finish.

The practice of making quite a few pretend final passes until you get to the actual final gives you a feel for the curve, how the center wood cuts respond, where you need to pay attention to the transition, etc. I know I slow way down on the last inch or so in the bottom to let the tool cut (the wood is moving much slower) and to not have my gouge tip pull up and out near the end and leave a mound. Also helps reduce those pesky divits from the grain ripping at the very end.

And, as others have said, the NR scraper is your best friend for the final smoothing.
 
Back
Top