• We just finished moving the forums to a new hosting server. It looks like everything is functioning correctly but if you find a problem please report it in the Forum Technical Support Forum (click here) or email us at forum_moderator AT aawforum.org. Thanks!
  • Beware of Counterfeit Woodturning Tools (click here for details)
  • Johnathan Silwones is starting a new AAW chapter, Southern Alleghenies Woodturners, in Johnstown, PA. (click here for details)
  • Congratulations to Peter Jacobson for "Red Winged Burl Bowl" being selected as Turning of the Week for April 29, 2024 (click here for details)
  • Welcome new registering member. Your username must be your real First and Last name (for example: John Doe). "Screen names" and "handles" are not allowed and your registration will be deleted if you don't use your real name. Also, do not use all caps nor all lower case.

Vibration Troubles turning 4x4x11 Vase

Joined
Jun 6, 2018
Messages
1,958
Likes
1,004
Location
La Grange, IL
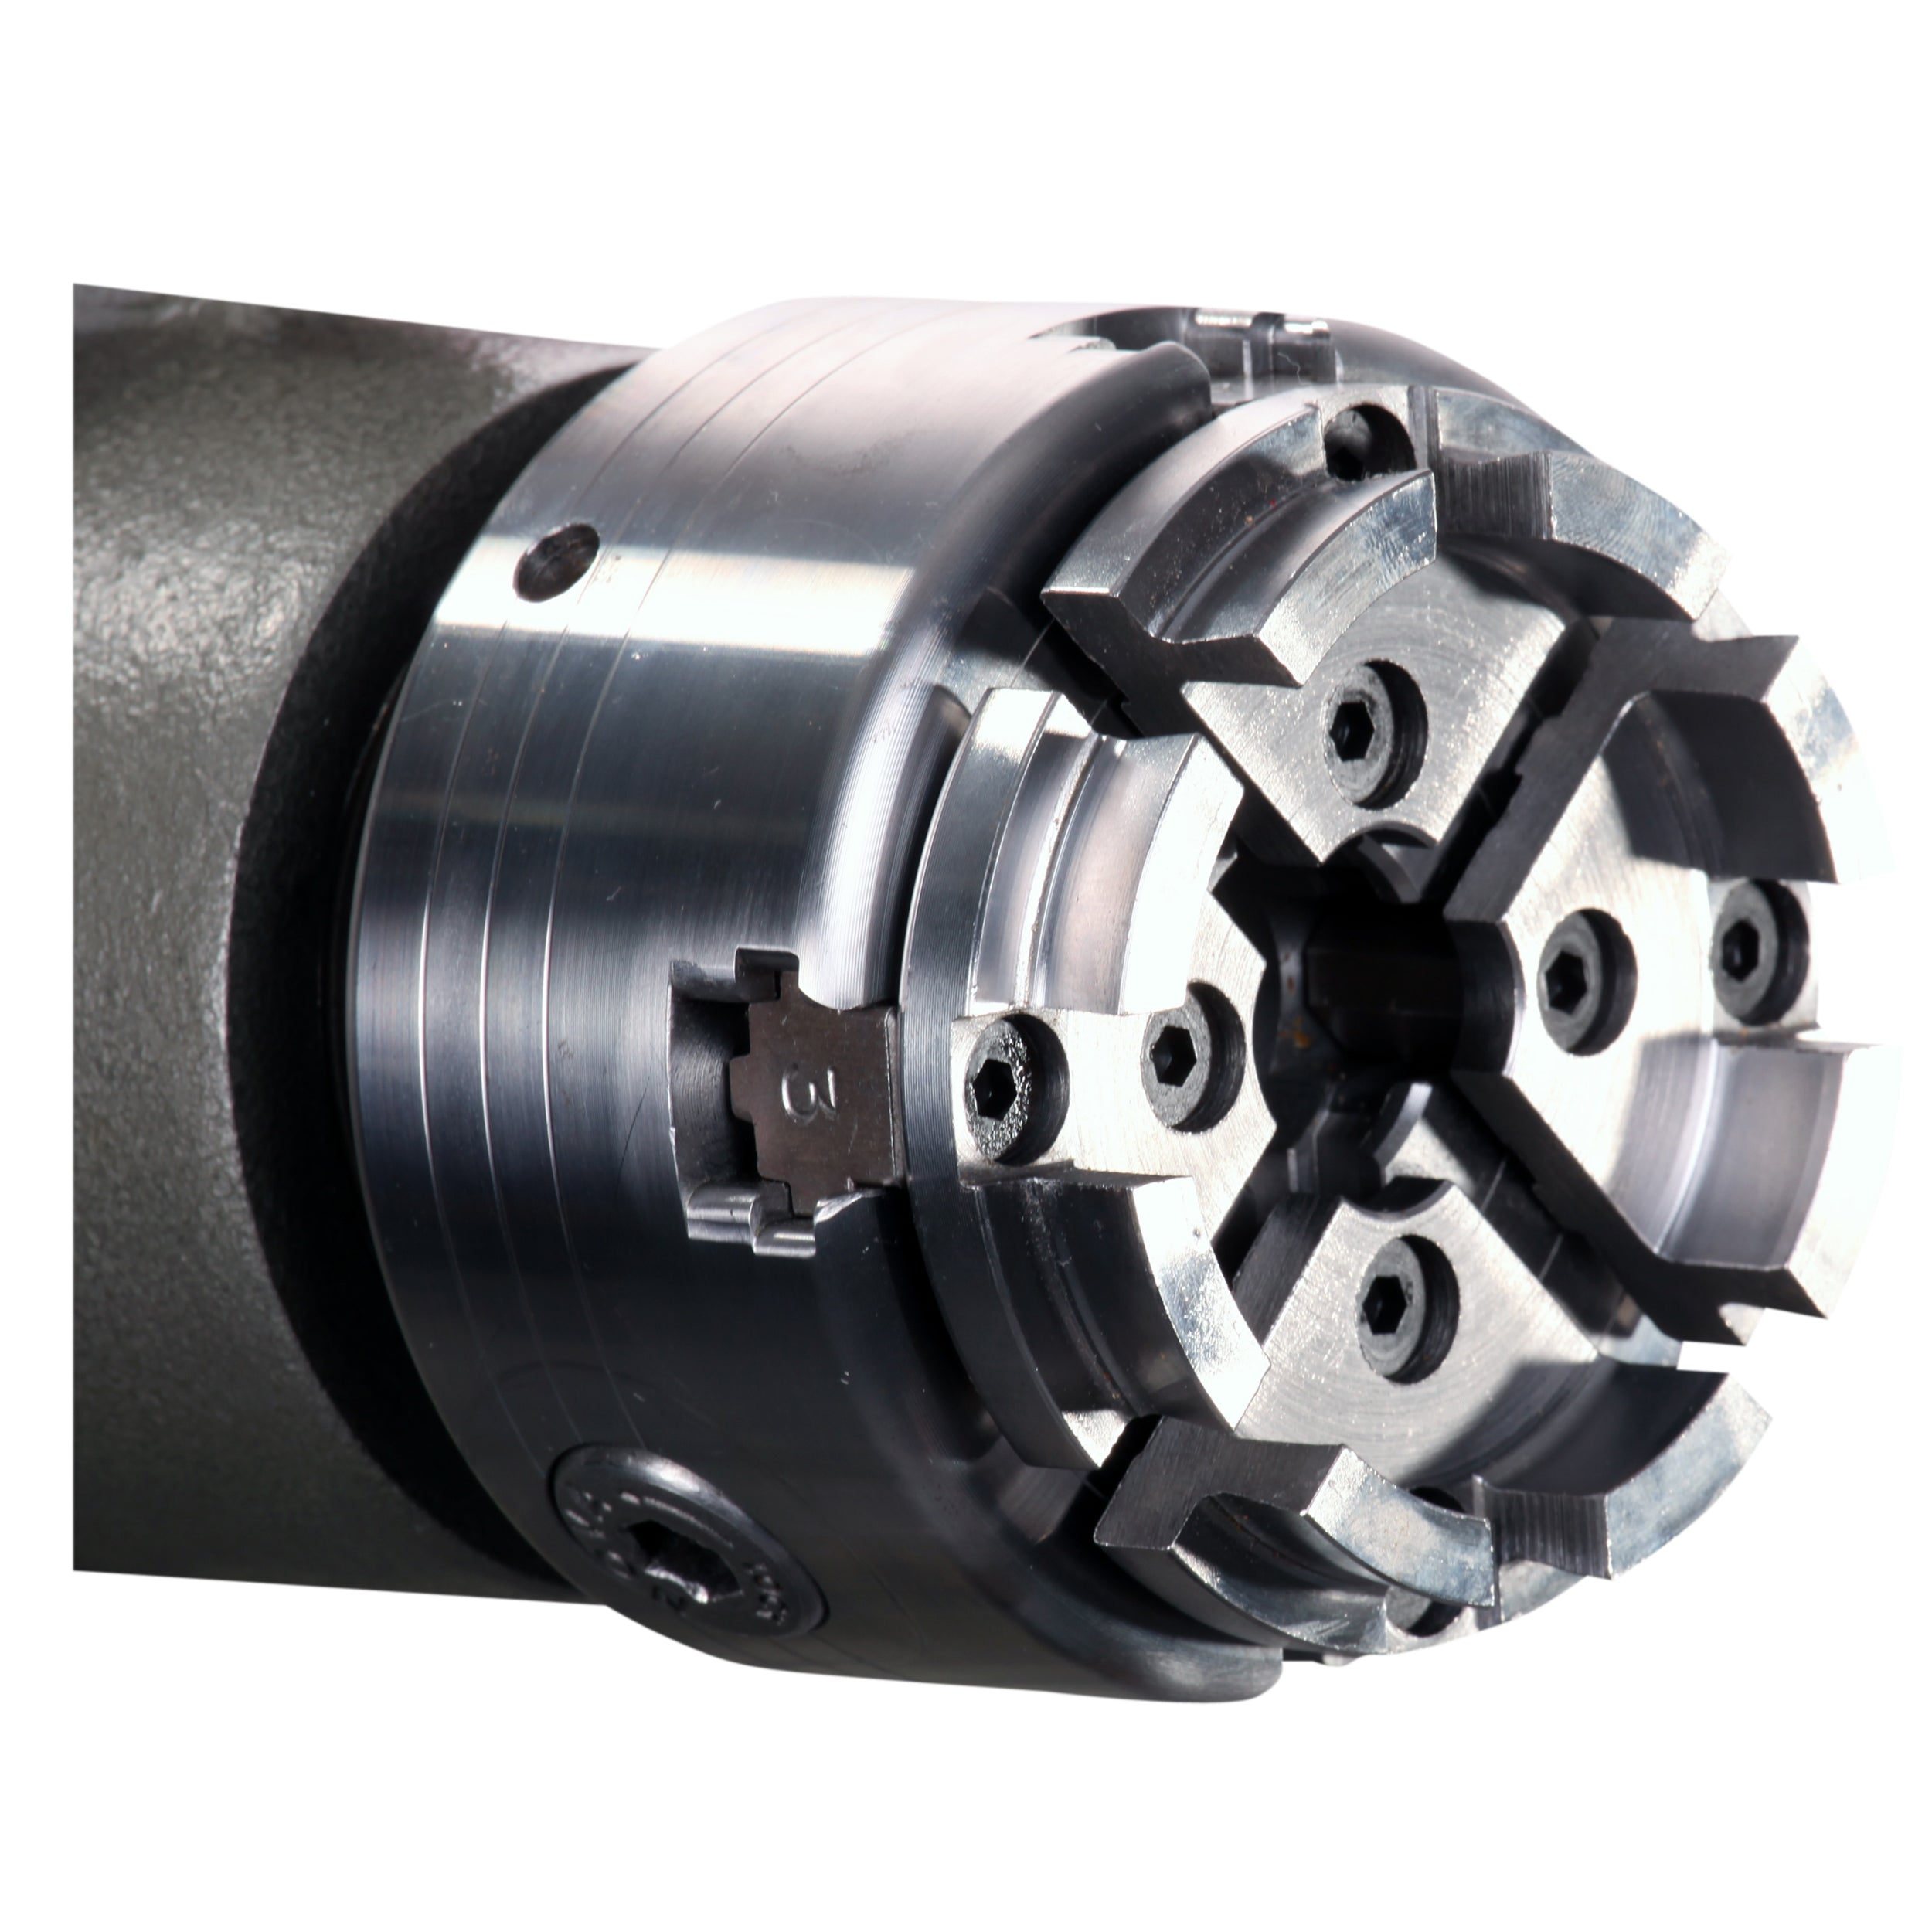
They also have 75mm heavy bowl jaws.
I wouldn't encourage you to buy these particular jaws. The jaw sizes usually go as the OD with the jaws fully closed. The inside diameter is then reduced by the thickness of the jaws themselves. So fully closed the Nova 50 mm has a 50 mm OD and a 41 mm ID.

The jaws on the 75 have been made extremely thick such that the closed ID is only 46 mm. Personally I can't see any reason for this jaw profile.

I would direct you to look at the 70 mm jaws first, then the 100 mm jaws.
 
Joined
Jul 30, 2021
Messages
101
Likes
33
Location
Aurora, CO
I wouldn't encourage you to buy these particular jaws. The jaw sizes usually go as the OD with the jaws fully closed. The inside diameter is then reduced by the thickness of the jaws themselves. So fully closed the Nova 50 mm has a 50 mm OD and a 41 mm ID.

The jaws on the 75 have been made extremely thick such that the closed ID is only 46 mm. Personally I can't see any reason for this jaw profile.

I would direct you to look at the 70 mm jaws first, then the 100 mm jaws.
Yeah, I noticed that when I was looking at them earlier...the 75mm are THICK.

These are the deep gripper 100mm jaws:


Or would you recommend I look at some other 100mm jaws?
 
Joined
Jun 6, 2018
Messages
1,958
Likes
1,004
Location
La Grange, IL
Nova and Record Power are interchangeable. Their jaw lines overlap considerably, but there are some differences, so look at both.

For example I like the RP 35 mm standard profile jaws for smaller pieces, but it's not available from Nova.

Nova makes a standard profile 100 mm jaw set, which is what I was referring to. I am not sure what advantage that "deep" profile has, but maybe for you it makes sense.

I was primarily suggesting that the 70's are a useful size. I use them much more than the 100's.
 
Joined
Jul 30, 2021
Messages
101
Likes
33
Location
Aurora, CO
Nova and Record Power are interchangeable. Their jaw lines overlap considerably, but there are some differences, so look at both.

For example I like the RP 35 mm standard profile jaws for smaller pieces, but it's not available from Nova.

Nova makes a standard profile 100 mm jaw set, which is what I was referring to. I am not sure what advantage that "deep" profile has, but maybe for you it makes sense.

I was primarily suggesting that the 70's are a useful size. I use them much more than the 100's.

I was kind of thinking, for long blanks, even with a steady rest, a longer tenon might help provide additional stability...but, I honestly don't have enough experience there to know.
 
Joined
Jul 30, 2021
Messages
101
Likes
33
Location
Aurora, CO
Nova and Record Power are interchangeable. Their jaw lines overlap considerably, but there are some differences, so look at both.

For example I like the RP 35 mm standard profile jaws for smaller pieces, but it's not available from Nova.

Nova makes a standard profile 100 mm jaw set, which is what I was referring to. I am not sure what advantage that "deep" profile has, but maybe for you it makes sense.

I was primarily suggesting that the 70's are a useful size. I use them much more than the 100's.
Maybe I'm being thrown by how these look, is this what you are referring to:


I guess its the upper screw slots that make these look a bit unusual...the screws apparently need to thread in dead center to the jaws, so the jaws have been split.
 
Joined
Jun 6, 2018
Messages
1,958
Likes
1,004
Location
La Grange, IL
I was kind of thinking, for long blanks, even with a steady rest, a longer tenon might help provide additional stability...but, I honestly don't have enough experience there to know.
I have never used them, but no, I don't think a longer tenon will provide more stability. Imagine the chuck sitting on a bench, with jaws up. Talking tenons, typically the jaws contact the work piece along the top surface of the jaw profile and on the inside of the jaw contour, which may be dovetail, or in the case of Nova/RP, bird beak. The tenon itself need only be 1/4" long, and you absolutely don't want the tenon to bottom out in the jaws. All of the hold is created by the 1/4" surface at the top and 1/4" surface on the inside of the jaws. If the tenon were longer (but did not bottom out), it would have contact with the sides of the jaws, but these are smooth and contact here would keep the dovetail for getting a good hold. Also at a certain point the wood itself becomes the weak link and the tenon breaks because of an internal defect, etc.

That was probably clear as mud. I think others can explain it better.

Maybe I'm being thrown by how these look, is this what you are referring to:


I guess its the upper screw slots that make these look a bit unusual...the screws apparently need to thread in dead center to the jaws, so the jaws have been split.
Yup, that's just the compromise to get two screws into the jaws. Works to your advantage if the tenon is larger than the perfect circle as you have 16 corners digging in rather than just 8.
 
Joined
Feb 26, 2019
Messages
1,825
Likes
1,423
Location
Lebanon, Missouri
@Jon Rista I have the Savannah double brg live center with cones. It has served me well. I also have the 3/4-10 threaded robust drive center with the threaded bowl drive collar. The Savannah stuff required a little thread clean up to fit the robust threads but the cones now fit fine.

Earlier you mentioned the laser for hollowing. I have one with my Jamieson system - much better than calipers, not nearly as good as a camera system. The camera can use the laser mount. Dont buy a hollowing camera system, piece together your own. Plenty of folks here have done so pretty cheaply (mine was $65 and I had a pc video monitor already). I realize its a lot to throw out there. Take a little time to understand the different hollowing systems as well as different methods for a camera set up.
 
Joined
Jul 30, 2021
Messages
101
Likes
33
Location
Aurora, CO
I have never used them, but no, I don't think a longer tenon will provide more stability. Imagine the chuck sitting on a bench, with jaws up. Talking tenons, typically the jaws contact the work piece along the top surface of the jaw profile and on the inside of the jaw contour, which may be dovetail, or in the case of Nova/RP, bird beak. The tenon itself need only be 1/4" long, and you absolutely don't want the tenon to bottom out in the jaws. All of the hold is created by the 1/4" surface at the top and 1/4" surface on the inside of the jaws. If the tenon were longer (but did not bottom out), it would have contact with the sides of the jaws, but these are smooth and contact here would keep the dovetail for getting a good hold. Also at a certain point the wood itself becomes the weak link and the tenon breaks because of an internal defect, etc.

That was probably clear as mud. I think others can explain it better.


Yup, that's just the compromise to get two screws into the jaws. Works to your advantage if the tenon is larger than the perfect circle as you have 16 corners digging in rather than just 8.

Thanks, Mark. Your explanation makes sense. I'm pretty technical, software engineer and electronics tinkerer and I mess around with machines often enough. ;) I haven't actually seen the design of the deep jaws, so I couldn't say if they are dovetailed deeper or anything like that, but geerally speaking, I think I agree with you, no need for anything deeper than the Nova jaws.
 
Joined
Jul 30, 2021
Messages
101
Likes
33
Location
Aurora, CO
@Jon Rista I have the Savannah double brg live center with cones. It has served me well. I also have the 3/4-10 threaded robust drive center with the threaded bowl drive collar. The Savannah stuff required a little thread clean up to fit the robust threads but the cones now fit fine.

Earlier you mentioned the laser for hollowing. I have one with my Jamieson system - much better than calipers, not nearly as good as a camera system. The camera can use the laser mount. Dont buy a hollowing camera system, piece together your own. Plenty of folks here have done so pretty cheaply (mine was $65 and I had a pc video monitor already). I realize its a lot to throw out there. Take a little time to understand the different hollowing systems as well as different methods for a camera set up.

So, with a video system...is there some kind of dot or crosshair that indicates where the tool is on the inside relative to the outside?

I haven't come across any video systems yet. I do a lot with photography, and have tinkered with electronics with things like arduino and rpi plenty, so I could probably rig up something if I needed to.
 

Bill Boehme

Administrator
Staff member
Beta Tester
TOTW Team
Joined
Jan 27, 2005
Messages
12,899
Likes
5,188
Location
Dalworthington Gardens, TX
Website
pbase.com
I've never heard of the EWT live center, but it appears to be way overpriced. My favorite is the Robust live center: http://www.turnrobust.com/product/live-center-and-cone-set-combo/

I also have two Oneway live centers. The Oneway live centers are priced comparable to the Robust live center. I doubt that the EWT is any better than the other two. There are several Pacific Rim knockoffs, but I don't know anything about them.

Anyway, I would recommend getting one of these live centers. They are so versatile that your old live center is liable to become as lonly as the Maytag repairman.
 
Joined
Feb 16, 2008
Messages
125
Likes
79
Location
Norristown, pa
Not sure this will work, but if I understand, you can mount this so that the outside turns true? Assuming that, plug the hole in the top with a turned dowel glued in to fill the hole. Now use a larger bit that will make a hole that will be centered.
 
Joined
Mar 19, 2016
Messages
1,188
Likes
1,283
Location
Haubstadt, Indiana
I don’t know if I can add to the above comments. Do you have the Nova 50 mm jaws that have the lip at the end (birds beak)? and did you cut your tenon straight (not dovetail)?

As far as the Sorby tool I never could master it.
 
Joined
Jul 30, 2021
Messages
101
Likes
33
Location
Aurora, CO
Not sure this will work, but if I understand, you can mount this so that the outside turns true? Assuming that, plug the hole in the top with a turned dowel glued in to fill the hole. Now use a larger bit that will make a hole that will be centered.
This is an intriguing idea... I'm going out to the workshop now to see what I can do... I'll let you guys know how it goes.
 
Joined
Jul 5, 2015
Messages
316
Likes
2,839
Location
Strongsville, Ohio
Here are some thoughts:
1. You questioned the type of wood (sycamore) at one point. My experience is that sycamore is one of the easier woods to hollow: a little on the soft side
2. Faceplates go a long way towards making life easier until you master the techniques of hollowing.
3. The Sorby hollow master is a good tool, it will get you at least 8 inches deep. My only issue with that tool is the HSS bit --- it has a half round shape that makes it a pain to sharpen, and a pain to replace. Standard 3/4 inch bars from Trent Bosch or John Jordan will go slightly deeper without vibration, and have more convenient cutting bits.
 
Joined
Feb 26, 2019
Messages
1,825
Likes
1,423
Location
Lebanon, Missouri
So, with a video system...is there some kind of dot or crosshair that indicates where the tool is on the inside relative to the outside?

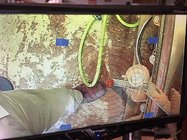
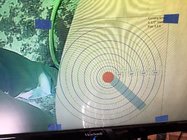
Several ways of doing it. Some draw the tool on the screen or clear transparency sheet, maybe add lines for wall thickness. If you use a pc and the software that is popular (can't remember the name), you can grab a screen shot and place it into the live view. I made a "target" and printed it on a transparency sheet, which is taped to the screen. My setup runs the camera output to a signal conditioner to the monitor, no pc in the system. IMO the camera system is far superior to a laser, and is a must have in this day of cheap electronics - its too easy and too cheap not to do it.

1630719590193.jpeg 1630719671621.jpeg
 
Joined
Jul 30, 2021
Messages
101
Likes
33
Location
Aurora, CO
Here are some thoughts:
1. You questioned the type of wood (sycamore) at one point. My experience is that sycamore is one of the easier woods to hollow: a little on the soft side
2. Faceplates go a long way towards making life easier until you master the techniques of hollowing.
3. The Sorby hollow master is a good tool, it will get you at least 8 inches deep. My only issue with that tool is the HSS bit --- it has a half round shape that makes it a pain to sharpen, and a pain to replace. Standard 3/4 inch bars from Trent Bosch or John Jordan will go slightly deeper without vibration, and have more convenient cutting bits.

Thanks for the thoughts, Michael.

Yeah, I am curious about the sycamore... It did seem to cut nicely on the outside...but the endgrain on both ends seems to be harder to cut. I had plenty of vibration turning off the tenon.

Now, regarding the tenon...its off completely right now...and, I never even thought of using a face plate. Given the large chunk of waste wood on the bottom here, that could really be a good solution at this point. I have a bunch of face plates of different sizes, so I should be able to find one that fits nicely.

Regarding sharpening the HSS bit on the hollow master...I thought the instructions said to simply put the flat face down on a honing plate and hone it. Which seems easy enough, I've done that with normal EWT cutting bits once I've dulled all around them.
 
Joined
Jul 30, 2021
Messages
101
Likes
33
Location
Aurora, CO
Several ways of doing it. Some draw the tool on the screen or clear transparency sheet, maybe add lines for wall thickness. If you use a pc and the software that is popular (can't remember the name), you can grab a screen shot and place it into the live view. I made a "target" and printed it on a transparency sheet, which is taped to the screen. My setup runs the camera output to a signal conditioner to the monitor, no pc in the system. IMO the camera system is far superior to a laser, and is a must have in this day of cheap electronics - its too easy and too cheap not to do it.

View attachment 40268 View attachment 40269

Thanks for the demonstration. Seems easy enough to put something like that together. Well, system first! Gotta figure out which one I want to get here. :p
 
Joined
Feb 26, 2019
Messages
1,825
Likes
1,423
Location
Lebanon, Missouri
@Jon Rista some considerations for researching hollowing systems

> sounds like you will do a range of hf sizes, perhaps getting ~15” deep or more. You will need a range of bar lengths/dia. Deeper hf’s will need 1-1/8” or more dia. For smaller forms you wont want a ~ 1-1/4” top hole, so a smaller bar is needed. I use a 1/2”, 3/4”, and 1-1/8” dia, depending on depth/reach off of the tool rest (large dia require a lot of reach).

> must have an offset to the cutter to get to the inside shoulder and the reach to larger ID’s of a form. Either a bent bar or an offset tip/holder (Jamieson).

> look at total cost of a system for the range of sizes you want to make. Additional boring bars (length/dia, different cutter offsets) and adapters to mount them add up quickly.

> articulated (joints) or captive. Articulated can be more size/shape constrained, but are more compact. Can be difficult to get the cutter to just the right spot, especially forms with flatter shoulders. I was also a bit concerned about the pinch points created by the joints. Captive takes more storage room. Any system needs a large range of motion in the horizontal plane, to get offset cutters through the hole and then reach corners of “hi shoulders” of forms.

> lathe size - a short bed lathe lends more to articulated, larger swing/larger dia work lends more to captive, as does deep (more than ~ 15-16”). There are methods to mount captive systems to short beds.

> cutters - I have both carbide (hunter 6mm cupped) and hss 3/16” square (easy to sharpen, cheap). I prefer hss for most of the cutting, and use the carbide to smooth up the ID if needed. The cupped carbide cutter chatters more in tougher grain/knots, requires more angle adjustments (Jamieson tool holder) and gets grabby at times.
 
Joined
Jun 6, 2018
Messages
1,958
Likes
1,004
Location
La Grange, IL
Articulated can be more size/shape constrained
As an articulated user I would have said it's the other way around, the captive bar has the more constrained range of motion. :) But it depends on what you are doing. Not everyone who is making a hollow form is hollowing the same form. If you want to go deep, though, the captive systems tend to have more reach.
I was also a bit concerned about the pinch points created by the joints.
I haven't found this to be a problem with the one I use. (In fact, I don't think it has ever happened). But that may reflect how I'm using it.
 
Joined
Jul 30, 2021
Messages
101
Likes
33
Location
Aurora, CO
I want to thank everyone who has responded, and I think there is still valuable discussion to be had regarding hollowing systems. So I don't want to shut down any of that discussion.

That said, I think I have to call it quits on this piece. I took the faceplate approach, which I think was a superb idea. It works, and it minimized the out of true situation nicely (maybe about a millimeter out of true at the top of the vase). I was able to true up the outside easily...in fact, I had to do it three times. There is something up with this piece of wood that is making hollowing all but impossible. It is a very very dry piece of wood, and maybe that has made it harder, tougher to work the end grain...not sure. Suffice it to say, though, I went through the process of truing up the outside and then trying to hollow the inside several times, and every time it vibrates significantly and then the whole thing end up out of alignment. I'm thinking the vibrations must be harmonizing with things, causing shifts in the chuck or faceplate, or something. I've got them both screwed onto the spindle as tightly as possible, but that doesn't seem to matter (and I even find that the set screws of the faceplate are looser than I initially tighten them after trying to hollow the vessel.)

I'm at my wits end with this piece, and think I just need to set it aside. I've never had so much trouble with a piece of wood before. It cuts so nicely on the outside, but just won't behave on the endgrain. I tried every tool I have, and they all vibrate enough to throw the piece untrue. I have 5 more blanks this size, one more Sycamore, then some maple, walnut and...oh, I forget the other type of wood. Anyway, I have more vases to make. I also received my first bulk pen order from a customer, and I have to get started on that here anyway.
 
Joined
Jun 6, 2018
Messages
1,958
Likes
1,004
Location
La Grange, IL
Maybe you should check that your lathe is running true. Does it vibrate when nothing is mounted? Check with an empty chuck mounted. Is there runnout?
 
Joined
Jul 30, 2021
Messages
101
Likes
33
Location
Aurora, CO
@Jon Rista some considerations for researching hollowing systems

> sounds like you will do a range of hf sizes, perhaps getting ~15” deep or more. You will need a range of bar lengths/dia. Deeper hf’s will need 1-1/8” or more dia. For smaller forms you wont want a ~ 1-1/4” top hole, so a smaller bar is needed. I use a 1/2”, 3/4”, and 1-1/8” dia, depending on depth/reach off of the tool rest (large dia require a lot of reach).

> must have an offset to the cutter to get to the inside shoulder and the reach to larger ID’s of a form. Either a bent bar or an offset tip/holder (Jamieson).

> look at total cost of a system for the range of sizes you want to make. Additional boring bars (length/dia, different cutter offsets) and adapters to mount them add up quickly.

> articulated (joints) or captive. Articulated can be more size/shape constrained, but are more compact. Can be difficult to get the cutter to just the right spot, especially forms with flatter shoulders. I was also a bit concerned about the pinch points created by the joints. Captive takes more storage room. Any system needs a large range of motion in the horizontal plane, to get offset cutters through the hole and then reach corners of “hi shoulders” of forms.

> lathe size - a short bed lathe lends more to articulated, larger swing/larger dia work lends more to captive, as does deep (more than ~ 15-16”). There are methods to mount captive systems to short beds.

> cutters - I have both carbide (hunter 6mm cupped) and hss 3/16” square (easy to sharpen, cheap). I prefer hss for most of the cutting, and use the carbide to smooth up the ID if needed. The cupped carbide cutter chatters more in tougher grain/knots, requires more angle adjustments (Jamieson tool holder) and gets grabby at times.
Thank you for the info, Doug.

So, I have two lathes, a Wen 14x20" and a Laguna 15x24". Is the laguna long enough for these systems? It also has bed extensions and whatnot, so I can certainly extend the bed if I need to.

I did try out the Sorby Hollow Master, and I may return it. I was a hundred bucks, and it either doesn't cut at all, or it grabs significantly and even with the flattended bottom of the bar, it still twists. I can't foresee myself having enough strength to keep it from doing that. The Jamieson system seems to be designed to hold the tool flat for you. The Carter system seems to rely on a flat bar as well...and, I'm not sure that I'd be able to hold the handle tight enough to prevent twisting with that either. I found the OneWay system, which seems to be similar to the Jamieson, and also this, which is an articulating system:


I'm curious, has anyone used the simple hollowing system? How strong is that articulating arm?
 
Joined
Jul 30, 2021
Messages
101
Likes
33
Location
Aurora, CO
Maybe you should check that your lathe is running true. Does it vibrate when nothing is mounted? Check with an empty chuck mounted. Is there runnout?
So, no vibrations with nothing mounted, or with just the chuck mounted. Just eyeballing it, there does not appear to be an appreciable amount of runout...

I had a dial indicator on order, but it seems it was never shipped. So, I cannot actually measure whatever runout exists right now. I don't think its enough to cause the problem I'm facing, especially given I seem to be able to turn the outside just fine without any issues. If there was vibration in the machine, I suspect I'd have experienced that turning the outside. Once the outside is turned down to true again, I cannot hear or observe any wobbling or fuzziness along edges that might indicate less than perfect rotation.
 
Joined
Jun 6, 2018
Messages
1,958
Likes
1,004
Location
La Grange, IL
I'm curious, has anyone used the simple hollowing system? How strong is that articulating arm?

Yes, that is the hollowing rig that I have. The articulating arm is robust, certainly I have never come close to bending it. Keep in mind that down force is going to be resisted by the tool rest and twisting force is going to be resisted first by the set screws in the receiver.

It is an extremely versatile rig and I use it for more than hollowing. The rig is sold with a 1/2" receiver, but I have the optional 5/8" receiver. The company sells a line of carbide tools with a 1/2" square shaft that extend about 9" beyond the receiver. I think the most you could reasonably extend these tools beyond the tool rest is 6", maybe as much as 8" if it is a very light cut. I have a few 5/8" tools, but non are that long and in any case I don't do and am not experienced with deep hollowing, e.g. over 6 inches, so I can't advise you on how the SHS would perform on a 12" vessel with a 5/8" tool.

As an aside I want to point out something important just in case you were not aware. With swan neck tools, such as the EWT hollowers, the curved part of the shaft is never to contact the tool rest. Only the straight part of the shaft should be placed on the tool rest. The cutters of these tools are lined up with the straight shaft so that the moving work piece contacting the side of the cutter can only cause a small twisting force. If the the curved part of the shaft is placed on the tool rest the moving work piece now acts through a lever arm on the tool and the twisting force quickly becomes irresistible. I am not familiar with the Sorby tool you mentioned, but tool rest position may have been a factor in your experience with it. What I've said about tool rest position goes for any of the hollowing rigs, too, by the way.

I should also mention that the Carter system is a captured bar, so there is a roller (or something) pressing the tool down onto it's flat underside and it is not up to the operator to do this or resist twisting. I can't give you a complete list of all the hollowing systems out there, but there's gotta be at least 8 different models out there and I wouldn't be surprised if there were more. Carter, Clark (Spin Doctor) and Lyle Jamieson are captured bar, but I think there are others. The Simple Hollowing System and the Elbow are articulated arms. Trent Bosch takes an approach that is sort of a hybrid. Gee that's six right there off the top of my head. And there's the Hope articulated arm in Britain, but I don't think they will ship to the States. Make sure you check pages two and three when you do an internet search. A that some companies are no longer with us. Monster and Cobra were two articulated devices and those companies are out of business, though you might see something used.
 
Joined
Mar 19, 2016
Messages
1,188
Likes
1,283
Location
Haubstadt, Indiana
I still believe it is the tenon causing the problem. The tenon for the Nova 50mm jaws needs to be cut straight. There are some that believe you need to make a cut for the “beak” at the top, but IMO it is not necessary and not recommended by Nova for those jaws. At this point I believe as previously suggested that you remove that tenon. and put a faceplate on the piece. That will tell you if the chuck or tenon. was the problem. As far as truing the outside without any problem I suspect you are applying less side force cutting the outside verses scraping the inside. If you do use a faceplate, take a picture of your tenon before you remove it.
 
Joined
Feb 6, 2010
Messages
2,981
Likes
1,956
Location
Brandon, MS
You might also look at Tim Yoder's Elbo system. I have the original and he has just released a larger smoother system. Saw it at SWAT and it is nice. The original mounts to tailstock spindle and the new has a separate mount. Not sure the deepest I have hollowed but at least 9 inches. At that depth with 3/4 bar is some chatter so a friend made a 1 inch for me and it is smooth.m The new Elbo is not on the website unless he added today.
 

Bill Boehme

Administrator
Staff member
Beta Tester
TOTW Team
Joined
Jan 27, 2005
Messages
12,899
Likes
5,188
Location
Dalworthington Gardens, TX
Website
pbase.com
Jon, if the piece of wood came from a limb, it very likely would have internal stresses that would be the explanation for why it has been distorting. Limb wood, especially if it is close to the trunk, has to support a considerable cantilevered load. The result is that the upper half of the limb has internal tension stress which is balanced by compression in the lower half and gravity so that everything is in equilibrium when the tree is standing. When a piece of the limb is mounted on a lathe and wood is being removed, the internal stresses are no longer in equilibrium. The result is that the wood will move either by bending or splitting to relieve some of the internal stresses. Wood that has high internal tension and compression stresses is known as reaction wood.
 
Joined
Nov 4, 2011
Messages
498
Likes
749
Location
Bay Settlement, WI

I'm curious, has anyone used the simple hollowing system? How strong is that articulating arm?

I have the Harrison Simple Hollowing System ... very happy with it. Never had an issue with the articulating arm. Deepest I have ever gone with it was about 9 inches, and that was pushing it.
 
Joined
Feb 6, 2010
Messages
2,981
Likes
1,956
Location
Brandon, MS
A bed mount is definitely preferable to a tailstock mount, IMO. @Gerald Lawrence , since it's not on the website can you describe the improvements?
The square jointed bar is heavier and the bearings in the joints are no longer roller compression bearings. He told me what the bearings are but I was not highly interested so did not register on that. The bolts are flush with the square bar vs standing over bar in older version. There is a handle (like Trent's system) behind the boring bar which makes it act like a gouge handle. The action is sooo smooth it does not even feel like it is moving. Thew mount is available in two sizes and I think it was 14 to 16 inch and 18 and up. Mount is made very solid with two locking knobs . Overall this is heavy duty hollowing. I think the bar is 3/4 but not sure.
 
Joined
Jul 30, 2021
Messages
101
Likes
33
Location
Aurora, CO
I still believe it is the tenon causing the problem. The tenon for the Nova 50mm jaws needs to be cut straight. There are some that believe you need to make a cut for the “beak” at the top, but IMO it is not necessary and not recommended by Nova for those jaws. At this point I believe as previously suggested that you remove that tenon. and put a faceplate on the piece. That will tell you if the chuck or tenon. was the problem. As far as truing the outside without any problem I suspect you are applying less side force cutting the outside verses scraping the inside. If you do use a faceplate, take a picture of your tenon before you remove it.

I did remove the tenon, and I did put on a faceplate, mentioned earlier in the thread. I didn't grab any pictures before I did, sorry. The faceplate actually got the piece fairly close to true, but when I tried to start hollowing again, things shifted and it was out of true again. I re-trued the outside two more times, before finally deciding to give up on the piece. FWIW, I wasn't actually scraping the inside...I never got that far. I was just trying to shape the top, which is pure endgrain. I was using a spindle gouge, so making cuts, rather than scrapes...

The wood feels very, very hard, especially on the end grain. I don't normally turn stuff as hard as this feels, except maybe ebony, but ebony is just a different kind of wood. It cuts/scrapes differently, and its wonderful to work with.

Anyway. I did try the recommendation of using a faceplate, and I like the idea overall. I think the vibrations are harmonizing with the metals of the lathe, chuck, faceplate, and causing screws and set screws and whatnot to shift in those harmonics... At least, that's the best explanation I've got. When things vibrate, it sounds like a hum...which in my experience, usually means something is vibrating at a harmonic.
 
Joined
Jul 30, 2021
Messages
101
Likes
33
Location
Aurora, CO
Jon, if the piece of wood came from a limb, it very likely would have internal stresses that would be the explanation for why it has been distorting. Limb wood, especially if it is close to the trunk, has to support a considerable cantilevered load. The result is that the upper half of the limb has internal tension stress which is balanced by compression in the lower half and gravity so that everything is in equilibrium when the tree is standing. When a piece of the limb is mounted on a lathe and wood is being removed, the internal stresses are no longer in equilibrium. The result is that the wood will move either by bending or splitting to relieve some of the internal stresses. Wood that has high internal tension and compression stresses is known as reaction wood.
Hmm, honestly, I am not really sure where it came from... The grain seems fairly evenly spaced though...I am not recalling seeing compression in the grain patterns. I'll have to look at the piece again tomorrow though to be sure.

The thing is, things shift only when there are vibrations. If I'm cutting without vibrations, then things are fine. The piece gets out of true when it vibrates, and it vibrates with a bit of a hum. I've definitely seen what release of wood tension can do...I've been turning small, cylindrical boxes this year as well, and run into that problem (thought it was drying, but after research it seems its more often the release of tension.) I've had to start working with that release of tension to get the boxes with properly fitting lids and the like, but mostly turning until I've hollowed, then after the wood moves I finish up the walls on both the inside and outside, etc. etc. That was what I thought this was originally, but, I haven't actually hollowed the piece yet...outside of about an inch or so deep 3/8th inch forstner hole I started. Without any real hollowing, I'm a bit doubtful that there has been much release of tension...I don't think that really happens significantly until you hollow out the fibers that are pulling everything together, right?

And since the piece only gets out of true after its vibrated strongly...and has done that numerous times now, I think the evidence (loosening screws, hum during vibration, etc.) is pointing to the vibration as a source of the problem.
 
Joined
Jul 30, 2021
Messages
101
Likes
33
Location
Aurora, CO
@Jon Rista some considerations for researching hollowing systems

> sounds like you will do a range of hf sizes, perhaps getting ~15” deep or more. You will need a range of bar lengths/dia. Deeper hf’s will need 1-1/8” or more dia. For smaller forms you wont want a ~ 1-1/4” top hole, so a smaller bar is needed. I use a 1/2”, 3/4”, and 1-1/8” dia, depending on depth/reach off of the tool rest (large dia require a lot of reach).

> must have an offset to the cutter to get to the inside shoulder and the reach to larger ID’s of a form. Either a bent bar or an offset tip/holder (Jamieson).

> look at total cost of a system for the range of sizes you want to make. Additional boring bars (length/dia, different cutter offsets) and adapters to mount them add up quickly.

> articulated (joints) or captive. Articulated can be more size/shape constrained, but are more compact. Can be difficult to get the cutter to just the right spot, especially forms with flatter shoulders. I was also a bit concerned about the pinch points created by the joints. Captive takes more storage room. Any system needs a large range of motion in the horizontal plane, to get offset cutters through the hole and then reach corners of “hi shoulders” of forms.

> lathe size - a short bed lathe lends more to articulated, larger swing/larger dia work lends more to captive, as does deep (more than ~ 15-16”). There are methods to mount captive systems to short beds.

> cutters - I have both carbide (hunter 6mm cupped) and hss 3/16” square (easy to sharpen, cheap). I prefer hss for most of the cutting, and use the carbide to smooth up the ID if needed. The cupped carbide cutter chatters more in tougher grain/knots, requires more angle adjustments (Jamieson tool holder) and gets grabby at times.

Yes, that is the hollowing rig that I have. The articulating arm is robust, certainly I have never come close to bending it. Keep in mind that down force is going to be resisted by the tool rest and twisting force is going to be resisted first by the set screws in the receiver.

It is an extremely versatile rig and I use it for more than hollowing. The rig is sold with a 1/2" receiver, but I have the optional 5/8" receiver. The company sells a line of carbide tools with a 1/2" square shaft that extend about 9" beyond the receiver. I think the most you could reasonably extend these tools beyond the tool rest is 6", maybe as much as 8" if it is a very light cut. I have a few 5/8" tools, but non are that long and in any case I don't do and am not experienced with deep hollowing, e.g. over 6 inches, so I can't advise you on how the SHS would perform on a 12" vessel with a 5/8" tool.

As an aside I want to point out something important just in case you were not aware. With swan neck tools, such as the EWT hollowers, the curved part of the shaft is never to contact the tool rest. Only the straight part of the shaft should be placed on the tool rest. The cutters of these tools are lined up with the straight shaft so that the moving work piece contacting the side of the cutter can only cause a small twisting force. If the the curved part of the shaft is placed on the tool rest the moving work piece now acts through a lever arm on the tool and the twisting force quickly becomes irresistible. I am not familiar with the Sorby tool you mentioned, but tool rest position may have been a factor in your experience with it. What I've said about tool rest position goes for any of the hollowing rigs, too, by the way.

I should also mention that the Carter system is a captured bar, so there is a roller (or something) pressing the tool down onto it's flat underside and it is not up to the operator to do this or resist twisting. I can't give you a complete list of all the hollowing systems out there, but there's gotta be at least 8 different models out there and I wouldn't be surprised if there were more. Carter, Clark (Spin Doctor) and Lyle Jamieson are captured bar, but I think there are others. The Simple Hollowing System and the Elbow are articulated arms. Trent Bosch takes an approach that is sort of a hybrid. Gee that's six right there off the top of my head. And there's the Hope articulated arm in Britain, but I don't think they will ship to the States. Make sure you check pages two and three when you do an internet search. A that some companies are no longer with us. Monster and Cobra were two articulated devices and those companies are out of business, though you might see something used.

So...since you guys have come at the hollowing system from different angles...

Looking at the Simple articulating system, vs. the Jamieson system...there are different kinds of cutters. The Simple seems to use carbide tips that look a lot like EWT carbide tips. The Jamieson system on the other hand, seems to use a cutter more like what the Sorby Hollow Master had. The Jamieson system also seems to use a cutter like Ellsworth himself uses, based on his book on hollowing that I have been reading through lately.

I've used the EWT tools, and their cutters work ok, but I am not sure if they are optimal. When hollowing with their three internal hollowing tools (strait, slight swan, greater swan), their cutters seem to chatter a lot, and have a tendency to tear at the wood. I've never quite liked that. One of the things I was hoping for with the Sorby was that its cutter, being more like what Ellsworth swears by for his amazing hollow forms. The hollow master had a rounded, rather than square cutter, and I am wondering if that may be part of why I couldn't quite get it to work. I did try it both "forward" (cutting towards me on the rounded edge) and "backward" (cutting away from me on the square back edge), and cutting away from me actually did work, it was just taking very thing layers off (which I am wondering if it was just due to how hard the endgrain of this wood was, and of course it could have been my utter inexperience with such a tool, too ;) ).

I'd love to hear your guys experiences with these two different kinds of systems and their different kinds of cutters.
 
Joined
Feb 26, 2019
Messages
1,825
Likes
1,423
Location
Lebanon, Missouri
@Jon Rista Sometimes you get a piece a wood from hell… nothing works, its 4th and long, and you just gotta punt…


So, I have two lathes, a Wen 14x20" and a Laguna 15x24". Is the laguna long enough for these systems? It also has bed extensions and whatnot, so I can certainly extend the bed if I need to.

24” c-c is long enough for an articulating system I think, but @Mark Jundanian would have a better idea. The Jamieson system can work also. He sells a short bed back support extension, or you can make one from wood cheaply (could before the virus tripled the cost of wood anyway). Things will probably get tight if you go deep, over 12” or so.
 

Bill Boehme

Administrator
Staff member
Beta Tester
TOTW Team
Joined
Jan 27, 2005
Messages
12,899
Likes
5,188
Location
Dalworthington Gardens, TX
Website
pbase.com
I don't think that you can readily see the difference in grain structure unless you examine the grain structure under magnification.

It sounds like your challenge is to determine the source of vibration. Here are some of my random thoughts about possible causes of vibration:
  • The distance that the piece is extended from the chuck. This has already been discussed.
  • The piece might be shifting in the chuck jaws for various reasons. Also been discussed.
  • Possibly a dull tool. I have the same hollowing tool, but I sharpen the end of the cutter. There is a large teardrop cutter for cleaning up the inside surface that I believe is sharpened by dressing the top surface with a diamond hone.
  • Hollowing with the cutter contacting the wood below the centerline will create lots of vibration. Make sure that the cutter is contacting the wood above center.
  • In addition to the hollowing tool needing to be above the centerline, the tool also needs to be angled down a few degrees. If the tool is angled up that can make the tool grabby and hard to control.
 
Joined
Feb 26, 2019
Messages
1,825
Likes
1,423
Location
Lebanon, Missouri
I'd love to hear your guys experiences with these two different kinds of systems and their different kinds of cutters.

I have shop made tools with carbide inserts which would be similar to the EWT tools/cutters. I have 3/4" round, 3/4" radius square, and 8.9mm (0.350") round, all flat (not cupped). For hollowing, the 3/4" are just too big - even the round one presents too much edge to the wood. I use the 8.9mm on my hand held hollowing tools. I start HF's with a drilled hole, then hog out the upper interior with hand held tools, for 2 reasons - have to remove the tool often at 1st to get rid of chips and it's just easier, and it gives some room to maneuver a boring bar with cutter inside the form. It also provides some easy practice hollowing by hand. I also made a 1/2" dia bent bar with an 8.9mm cutter that mounts in the Jamieson system to reach across flatter shouldered forms. His 1/2" bar with angled cutter can't get under flatter tops through a 5/8" hole. I also have Lyle's carbide cutter assembly, which uses a Hunter #1 6mm cupped cutter. The assembly fits in place of the std 3/16" hss cutter.

Outside or inside, carbide will not cut as cleanly as sharp hss. Just as a flat top hss scraper used on the outside can be grabby, especially above center, a hss hollowing bit can be grabby (its just a small scraper) especially below center. The hollowmaster cutter can be extended past the tool centerline, which will create torque, twisting the handle, and if not kept above center could get unwieldy in a hurry. The pivot point of the bit holder is too close to the tool centerline, not allowing the bit to be extended a 1/4-1/2" and still be at centerline. The design defeats the purpose of the swan neck they designed in. Ellsworth likes his bent tool to extend past centerline by a couple of inches, and he has an oval grip at the end of his handle to resist the torque. He wants the tool edge to rotate away when it hits a hard spot. I've tried it and don't like it at all, but I don't have his 50+ years of experience.

I like the small round carbide on the hand held tools because they don't cut as well and are easier to control. I usually only go ~3-5" off the rest with handheld. I have used them on dry wood, and they do ok, but are better with wet wood. I try to get all my hollowing done with wet wood. After working the OD, I wrap the OD in stretch wrap so it won't dry out as I hollow it. Sometimes I spray the piece down, outside and inside, to prevent drying. You can also soak a piece in water if it's too dry.

For the captive system, I prefer hss, until I've almost finished. I use the carbide cutter to smooth up the surface where the inside is visible. The angled carbide cutter has a sweet spot, where it is in a shearing cut, that it works very well. Unfortunately you will move the cutter in and out of that sweet spot. It requires changing the angle of the arm quite often to stay in the sweet spot, which gets annoying. It must be pulled through a cut - you do not want to push it through a cut. It also does not like hard spots or knots - it can really chatter when extended off the rest cutting hard spots. It also can catch severely. The cupped design can self feed under the right conditions - I've lost or had to shorten a few forms when the boring bar tore through the side of the entry hole when the cutter dug in. The hss bits do not have those issues. They will not self feed, can be pushed or pulled, will cut smoothly through knots when the carbide is chattering, and don't have to be adjusted nearly as often. They do have to be sharpened, but that is quick and painless. I keep several bits ready so I can get through a project or 3, then sharpen several bits at a time. They are also cheap - I bought 5 pieces of 3/16" x 3/16" x 5" m42 tool bits for $19. I cut in 1/2 for 10 bits, $1.90 each. The cupped carbide runs about $20 each and cannot be sharpened. I do sharpen the flat top 8.9mm carbide on a 600 grit diamond hone.

Enjoy David Ellsworth's book. His methods, tools, and techniques have improved my turning a lot, but I still don't like his bent hollowing tool
 
Joined
Nov 4, 2011
Messages
498
Likes
749
Location
Bay Settlement, WI
Looking at the Simple articulating system, vs. the Jamieson system...there are different kinds of cutters.

With my Simple Hollowing system, I can use either the carbide cutters Harrison provides or my John Jordan HSS tools.
 
Joined
Jul 30, 2021
Messages
101
Likes
33
Location
Aurora, CO
I have shop made tools with carbide inserts which would be similar to the EWT tools/cutters. I have 3/4" round, 3/4" radius square, and 8.9mm (0.350") round, all flat (not cupped). For hollowing, the 3/4" are just too big - even the round one presents too much edge to the wood. I use the 8.9mm on my hand held hollowing tools. I start HF's with a drilled hole, then hog out the upper interior with hand held tools, for 2 reasons - have to remove the tool often at 1st to get rid of chips and it's just easier, and it gives some room to maneuver a boring bar with cutter inside the form. It also provides some easy practice hollowing by hand. I also made a 1/2" dia bent bar with an 8.9mm cutter that mounts in the Jamieson system to reach across flatter shouldered forms. His 1/2" bar with angled cutter can't get under flatter tops through a 5/8" hole. I also have Lyle's carbide cutter assembly, which uses a Hunter #1 6mm cupped cutter. The assembly fits in place of the std 3/16" hss cutter.

Outside or inside, carbide will not cut as cleanly as sharp hss. Just as a flat top hss scraper used on the outside can be grabby, especially above center, a hss hollowing bit can be grabby (its just a small scraper) especially below center. The hollowmaster cutter can be extended past the tool centerline, which will create torque, twisting the handle, and if not kept above center could get unwieldy in a hurry. The pivot point of the bit holder is too close to the tool centerline, not allowing the bit to be extended a 1/4-1/2" and still be at centerline. The design defeats the purpose of the swan neck they designed in. Ellsworth likes his bent tool to extend past centerline by a couple of inches, and he has an oval grip at the end of his handle to resist the torque. He wants the tool edge to rotate away when it hits a hard spot. I've tried it and don't like it at all, but I don't have his 50+ years of experience.

I like the small round carbide on the hand held tools because they don't cut as well and are easier to control. I usually only go ~3-5" off the rest with handheld. I have used them on dry wood, and they do ok, but are better with wet wood. I try to get all my hollowing done with wet wood. After working the OD, I wrap the OD in stretch wrap so it won't dry out as I hollow it. Sometimes I spray the piece down, outside and inside, to prevent drying. You can also soak a piece in water if it's too dry.

For the captive system, I prefer hss, until I've almost finished. I use the carbide cutter to smooth up the surface where the inside is visible. The angled carbide cutter has a sweet spot, where it is in a shearing cut, that it works very well. Unfortunately you will move the cutter in and out of that sweet spot. It requires changing the angle of the arm quite often to stay in the sweet spot, which gets annoying. It must be pulled through a cut - you do not want to push it through a cut. It also does not like hard spots or knots - it can really chatter when extended off the rest cutting hard spots. It also can catch severely. The cupped design can self feed under the right conditions - I've lost or had to shorten a few forms when the boring bar tore through the side of the entry hole when the cutter dug in. The hss bits do not have those issues. They will not self feed, can be pushed or pulled, will cut smoothly through knots when the carbide is chattering, and don't have to be adjusted nearly as often. They do have to be sharpened, but that is quick and painless. I keep several bits ready so I can get through a project or 3, then sharpen several bits at a time. They are also cheap - I bought 5 pieces of 3/16" x 3/16" x 5" m42 tool bits for $19. I cut in 1/2 for 10 bits, $1.90 each. The cupped carbide runs about $20 each and cannot be sharpened. I do sharpen the flat top 8.9mm carbide on a 600 grit diamond hone.

Enjoy David Ellsworth's book. His methods, tools, and techniques have improved my turning a lot, but I still don't like his bent hollowing tool

Thank you so much for taking all the time, Doug! I appreciate all your insights.

I hear you about cutting green wood... I live in Colorado, where it is quite dry this time of year, and usually from mid spring through mid fall. Green wood has generally been a challenge as it cracks even while turning, for most green woods. But when I have turned green wood, it has been so much easier than turning dry wood. The chips come flying off much easier, and you get those nice big chips. I can understand why turning vessels green would be easier. I have never tried to soak a dry piece before...but, I my try that. See how things go.

I am curious, how does wood movement affect a vessel? It usually makes bowls either crack, or go oval. But you can twice-turn a bowl, so you leave it thick and dry the first-turned for a while, then finish it up after the wood moves to get a bowl that won't move much more after you are done. I haven't turned a green vessel before, and that is in part because I wasn't sure how to handle wood movement.

Also interesting about the differences in bits and how well they cut. I always felt the EWT tools weren't cutting as well...but, it is very interesting thinking that that actually makes them easier to control.

Well, you and @Mark Jundanian have both given me a ton of food for thought. @Mark Jundanian has given me a number of brands of hollowing systems to research, so I am going to be looking into those. This thread has been immensely useful. I wasn't really quite sure where to start with my larger vase blanks before. I have a solid plan now, and will be starting with some smaller 4x4xN and 5x5xN size blanks to practice using the hollowing system first once I get one. I can pick up 4x4xN blanks pretty cheaply, and thinking about it, I have a bunch of logs I've had sitting that are 4-5" in diameter that would probably also suffice as practice material.

I want to thank everyone again for all their insights. Very useful! I also don't necessarily want to end the thread here, I'm sure there is more useful conversation to have, but I wanted to thank everyone here for things regardless.
 
Joined
Jun 6, 2018
Messages
1,958
Likes
1,004
Location
La Grange, IL
I'd love to hear your guys experiences with these two different kinds of systems and their different kinds of cutters.

24” c-c is long enough for an articulating system I think, but @Mark Jundanian would have a better idea.

Not entierly sure what I'm being asked to comment on, but here goes.

First a caveat or two. I do a lot of hollowing, but I don't make hollow forms like you're thinking of (@GRJensen might have more direct experience using the SHS in that regard). Also I don't generally turn green wood, but rather as dry as I can find. This is a WIP, but an example of the kind of form I'm usually after:
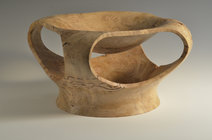
_DEA3357-Wow.jpg

So for me the contour is everything. If I have to start sanding at p60 or p80 I'm OK with that, indeed I use these "tools" to perfect the contour. So I want to say that without question carbide scrapers leave a much rougher surface than do HSS gouges. That is just a price I am willing to pay (though I tell you, there are some days I would be willing to pay someone else to do it). What carbide scrapers bring to the table, particularly when used withe SHS, is the ability to create these contours. As to how carbide scrapers compare to HSS scrapers I can't really say.

For the sake of complete clarity let me say carbide like HSS is a material, not a tool per se, although we often use the term that way. Carbide is used to make cutters of various shape, square, round, diamond, etc. But more important is the different edge profiles. The most common is the scraper insert with a single bevel on the bottom and a flat top. Related are the new negative rake (top and bottom bevels) scraper inserts from EWT. And then there is another animal all together, the Hunter style cutters with a cupped or pie pan profile. These are not scrapers at all, but shear cutters.

The scrapers leave the roughest surface. The negative rake scrapers leave a much better surface, but you are still going to sand. The shear cutters can leave a very smooth surface. These require some skill to use correctly and I can't say that I have developed mastery. The shear cutters are also a very directionally sensitive tool. Where I will engage a round scraper or NRS anywhere from 8 to 12 and 12 to 4 O'clock, the shear cutters seem to work best between 11 and 1. So the two scrapers are the best tools for me use when creating contours. Where I have found the cupped cutters useful is in removing the bulk material. As I need start worrying a contour line I switch to a flat top scraper, and then when I'm in striking distance of the final contour line I switch to the more expensive NRS insert and a very light touch to get the least rough surface.

As GRJensen mentioned the SHS with the Simple Hollowing tool kit will work best at less than 9 inches depth (I would say 6 to 8). Indeed I think the tools only extend 9 1/2 inches out of the receiver. With the shapes I pursue I am able to introduce the tool rest deeper into the work piece than you would be able to with a narrow necked vessel, so I seldom have to reach farther than 6".

The SHS is sold with a 1/2" receiver, but if you're considering buying one I suggest purchasing the optional 5/8" reciever (and a set of Trent Bosch's reducers). You are not limited to using the Simple Hollowing tools with the SHS and the larger reciever creates some opportunities to use other tools. For example I have a Jackofsky hollower (with a cupped cutter) that I often use, as well as Thompson and D-way NR scrapers. You just have more options.

As far as tools for the SHS, EWT sells handleless versions of its tools, but these are only available directly from the company. If not the whole set, consider buying at least the 16 mm round tool as you can then get their NR inserts. The Simple Hollowing round tool mounts a 15 mm insert and so these are not interchangeable. The EWT tools are an inch shorter than the SH, though.

I don't think the SHS is the ideal solution for every hollowing task. If you're looking to hollow out an 18" vase, the SHS might work, but wouldn't be the best choice. But bed length can be another limitation. With the 15 24 laguna 12 inches might be the max. Figure 12 inches for the form plus 2 inches of waste wood and 4 inches for the chuck and you're already at 18 inches and looking for a place to mount the hollowing rig and the banjo. But I do encourage people to look at articulated arm systems when considering a hollowing rig (and I would definetly look at the new Elbow that Gerald Lawrence mentioned), because they are capable and very versatile. In fact for the peice pictured above I did the entire thing, top bottom, inside outside, all with the SHS. And we haven't even touched on how I've used it for other non-hollowing tasks.
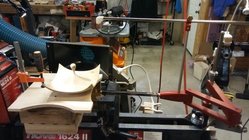
1584712944399.jpg1584663338607.jpg
(The tool reads the template and the laser drops a dot. Mark with a pencil and the contour line is transfered).
 
Back
Top