• We just finished moving the forums to a new hosting server. It looks like everything is functioning correctly but if you find a problem please report it in the Forum Technical Support Forum (click here) or email us at forum_moderator AT aawforum.org. Thanks!
  • Beware of Counterfeit Woodturning Tools (click here for details)
  • Johnathan Silwones is starting a new AAW chapter, Southern Alleghenies Woodturners, in Johnstown, PA. (click here for details)
  • Congratulations to Dave Roberts for "2 Hats" being selected as Turning of the Week for April 22, 2024 (click here for details)
  • Welcome new registering member. Your username must be your real First and Last name (for example: John Doe). "Screen names" and "handles" are not allowed and your registration will be deleted if you don't use your real name. Also, do not use all caps nor all lower case.
John Glessner

Turnings with wood inlays

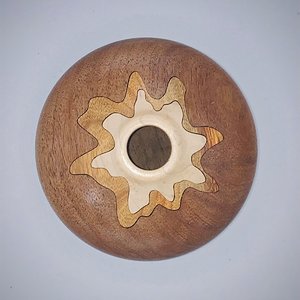
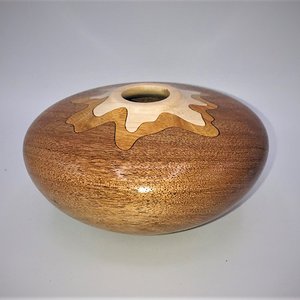
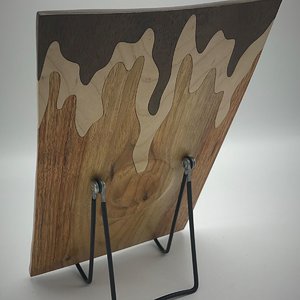
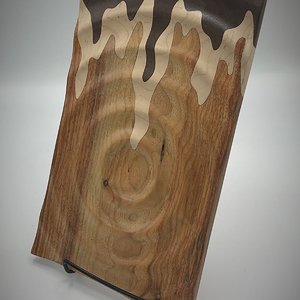
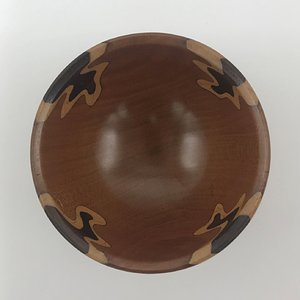
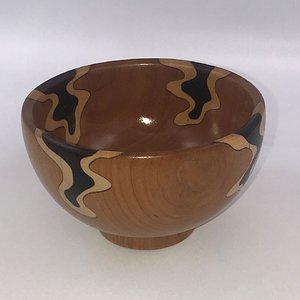
Turnings created by inlaying thick sections of wood for decorations
John, the bowl is beautiful. Can you share any more about how you prepared the blank for turning? How the inlays were placed? I have to admit I am often frustrated when I see a terrific piece like this but cannot figure for the life of me, how you did it. I would enjoy a complete article on your technique. So tell me what you can with my thanks in advance.

Jim
 
Thank you. I'll give you the quick version on how I did this. I am not sure if I am ready to do a full article yet as I am still experimenting with this idea. This was the first piece and it was very much a .... "mmm let me see if this works....." experiment. And part of the idea was creating something that got people saying "how did you do that?". I have a couple more larger pieces in the planning stage so I'll get to see if this is solid repeatable technique or if i got lucky. If its solid I might submit something to the journal. They published and article of mine a couple years ago which was fun.

About the technique. This is not something you can do by hand. It was enabled because I bought a Shaper Origin Router which is a handheld CNC device. Go to their website and check out the videos. It basically is a router that you move by hand but it corrects itself to stay on the line (the line being a CAD file). These arent cheap but I became enamored by what it could do after seeing a demo. It can cut very accurate inlays which is what is needed here.

I started with a 4x4 piece of cherry. I designed the 4 unique patterns using a CAD program. I imported these to the Shaper Router. I then cut a 3/4' deep recess in one flat side of the cherry to the CAD pattern. I then cut out the maple pattern from a piece of 3/4 stock. I glued this in with epoxy. The maple was cut to be a super close fit of only a few thousands of an inch gap. I then cut a second recess into the maple 3/4 deep. I cut the walnut piece from a separate of 3/4 stock, this was inserted and glued in place like the maple was. I repeated this on each side. I'll upload a picture that hopefully communicates the idea

Once each side was done I put the 4x4 onto my lathe and turned the bowl. Turning the inside of the bowl exposed the inlay on the inside. And I crossed my fingers that the glue line on the inlays would live through the turning process (which is why I chose epoxy instead of standard wood glue).
 
OK, I see now. John, thanks for sharing. I have a CNC, one of the smaller sharks, and it might well be able to do this as well. It may not be as flexible as the Shaper Origin since it is limited in the Z dimension but I am intrigued. I will let you know how/if it can work with my machine. By the way, I have found the CNC a very creative addition to my shop. Yes it's small but opens a whole new dimension. I often use it to complement traditional woodworking techniques such as creating patterns, etc.
 

Album information

Album owner
John Glessner
Date created
Item count
6
View count
204
Comment count
3
Rating
0.00 star(s) 0 ratings

Album privacy

John Glessner

Can view media items
Everyone
Can add media items
Album owner only

Share this album

Back
Top