Odie
Panning for Montana gold, with Betsy, the mule!
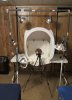
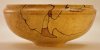
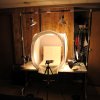
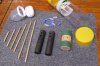
Just wondering if anyone is aware of an adjustable photography stand for standing bowls upright?
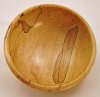
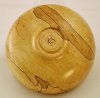
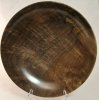
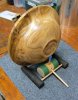
The stands I have are made for plate display, and only marginally usable for deeper bowls......both for views of foot and directly above.
Has anyone ever made one of these adjustable stands? If so, I'd be very interested in seeing, and hearing your description/comments.
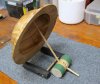
Wish I had a bad radio somewhere, because that adjustable antenna could possibly be used for this. Anyone with ideas on a suitable substitute for the expandable antenna?
Ideas please!
ooc
The stands I have are made for plate display, and only marginally usable for deeper bowls......both for views of foot and directly above.
Has anyone ever made one of these adjustable stands? If so, I'd be very interested in seeing, and hearing your description/comments.
Wish I had a bad radio somewhere, because that adjustable antenna could possibly be used for this. Anyone with ideas on a suitable substitute for the expandable antenna?
Ideas please!
ooc
Attachments
Last edited:
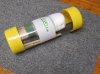


") I suppose that the gaffer's tape was less glossy, but my memory didn't store that information.
I suppose that the gaffer's tape was less glossy, but my memory didn't store that information.