• Congratulations to Phil Hamel winner of the April 2025 Turning Challenge (click here for details)
  • Congratulations to Steve Bonny for "A Book Holds What Time Lets Go" being selected as Turning of the Week for 28 April, 2025 (click here for details)
  • Welcome new registering member. Your username must be your real First and Last name (for example: John Doe). "Screen names" and "handles" are not allowed and your registration will be deleted if you don't use your real name. Also, do not use all caps nor all lower case.

face plate screws

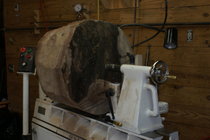
o basically one “wastes” an inch or so of the blank (a little more than screw length) in order to create a tenon into which the faceplate is screwed, later turning off that tenon when the bottom of the piece is turned—and the tenon is not used to mount the piece in a four jaw chuck. Is that correct?

Yes! A couple of of points to keep in mind.
1. The screws will open a hole ahead of their depth. An inch of screw want 1 1/4 of waste tenon.
2. I want an extra wide tenon when I drive in the screws. Prevents splitting then turn it close to the faceplate diameter.
3. Faceplate is a much better hold for hollowing face grain
4. A chuck is a better hold for hollowing engrain until you get into the taller than 18” forms

Leaving the nub is handy for centering to turn off the bottom.
John Jordan used to turn his nubs short and the diameter of his faceplate hole so the faceplate would center easily.
As much as John teased me about that I never got past using pencil circles which get me close.
 
basically one “wastes” an inch or so of the blank (a little more than screw length) in order to create a tenon into which the faceplate is screwed
You don’t have to waste the whole tenon. You can turn the foot of a form inside the tenon. Has to be smaller diameter than the screws.
I use wood inside chuck tenons a lot. Rarely use wood inside faceplate tenon. But it can be worth remembering if i hollow a bit deeper than planed.
 
I’m fairly new at this so forgive the neophyte questions. I don’t fully understand your setup. I’ve used a faceplate on what is to be the vessel top, turned a tenon on bottom, and shaped vessel, then flipped it around to grip by tenon while hollowing.

It looks like you are placing a faceplate directly on your tenon. How then did you grip the vessel to create the tenon (between centers?) and why place the faceplate through the tenon?

And in the last picture I see only 4 screws, not 18.
Any suggestions I have mostly pertain to large hollow-forms.
  • STEP-ONE: Round first to remove saw-facets - while I've gotten fairly good at determining which is the better top /better bottom, occasionally I reverse on the lathe. I always position the top at the drive (pic-2) and bottom at the tail-stock (pic-1). I then do final shaping which includes the tenon. Unlike Hockenbery, I cut the tenon to exactly 6" - for me, it makes for a more accurate attachment of faceplate.
  • STEP-TWO: Lift the piece with a hoist and attach the faceplate as per above post - you may have to chisel the little nub in the middle of the tenon. Attach to the spindle - with the hoist, no big deal
  • STEP-THREE: Turn on slowly and snug the live-center - after attaching to faceplate you always have to re-true the whole piece.
To answer the above questions:
  • The faceplate is attached to the tenon. When weight is on the chain-hoist and the piece steadied on the bed of the lathe, I attach the faceplate with one screw and then use the hinge drill to mark the rest. Take the faceplate off and drill all holes - attach the faceplate, hand tighten with the big screwdriver. remount and you're done.
  • Regarding your last question, after all hollowing, tweaking, diving under for the 3.5" base, and then lots of sanding, I take it off the lathe and attach the 3" floor flange with 10" nipple - that allow me to use a "finishing horse" for spraying, sanding and, hopefully, minor filling prior to the next coating session.
Feel free to send your cell number and I'll give you a call. When I look back on the last few days posts, I get confused. Eschew obfuscation, espouse elucidation
 

Attachments

  • DSC01740.JPG
    DSC01740.JPG
    277.2 KB · Views: 17
  • DSC01739.JPG
    DSC01739.JPG
    246.4 KB · Views: 17
The pic showing four screws is a 1/2" pipe flange with 10" nipple - when turning is done, all pieces go on a pipe-flange for the finishing process
 
Back
Top