Stumbled across this grinder platform - actually, saw an ad on FB for it (one of those that just shows up in your feed. Looks to be well made, decent design, there’s an option to fit wolverine base. Has anyone actually seen one? I’m very happy with the Robo Rest I’ve been using for the past several years, so not in the market, but have seen discussions on alternatives since Robo got out of the business.

 www.rightanglenow.com
Not easy to locate the Wolverine mount option, but its there…there’s also another version with six or so adjustable presets.
TALON - Rail Mount | Right Angle
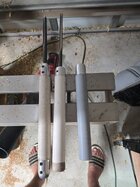
The TALON, rail-mount (rail mount for use with the OneWay rail system), offers very fast, easy, accurate repeatability for 32 grinding angles using increments within 2 degrees. The range is from about 22 degrees to about 70 degrees depending on the mount and tilt adjustment. A skew adapter is...
www.rightanglenow.com
Not easy to locate the Wolverine mount option, but its there…there’s also another version with six or so adjustable presets.