PM3520B Set Up and Assembly Info
So, you have either gone to the freight terminal and picked up the new Mustard Monster, or you are standing in the driveway, and the truck driver is leaving as we speak. What do you do next? Here are some tips from when I got mine in November, 2007.
Read these instructions all the way through before you do anything else!
I am assuming you are looking at a carton on a skid, about 24" tall, 30" deep and about 72" long. This is how mine came from the factory. Before you do anything else, call a strong friend. This job can be done alone, but you just spent almost $3000 on this lathe: do you really want to chance hurting it, or worse, you? Not worth it, IMO. (See photo below.)
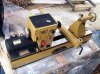
When you open the carton, you'll notice that the lathe is shipped with the headstock, tailstock, and banjo installed on the bed. (See second photo.) There should also be two cartons inside which are the legs. These are about 80# each, and should be the first thing to carry into the shop to make some room. Unpack them and stand them securely out of the way.
I suggest the following: set up two sawhorses in the middle of the floor. Check the height of the horses vs. the height of the legs. If you are going to use the levelling feet, install them in the legs all the way up to the feet, and then measure the leg height. Add 1x or 2x lumber to the horses so that they become 1/4" to 1/2" taller than the legs. Now you can go back to the carton, and take the tailstock off the bed, and bring it in the shop, setting it somewhere where it won't fall over. Do the same with the tool rest banjo. The headstock needs some consideration. It weighs about 150# and is extremely unsteady. In addition, the locking mechanism hangs out of the bottom and will not allow you to set it down directly. My suggestion is to have a couple of short 2x4s laid side by side with enough space between them for the locking mechanism. You and your friend can now bring in the headstock, set it down on the 2xs, and check to see if you need to put something under the motor to steady the assembly. Do
whatever it takes to secure this assembly, because when it falls off of the bench, all of the damage will be expensive!
The empty bed can now be brought in, and set on the sawhorses. (Note: you can bring in the bed, set it upside down on a blanket or cardboard on the floor, and then assemble the legs. When finished, you will have to turn it over, which is not easy. The sawhorse method eliminates turning it over.) Bring one leg over, and stand it under one end of the bed, and put in the bolts, tightening them until they are secure. (Usual recommendation is finger tight, then 1/4 turn with the allen wrench.) Do the other leg the same way. When finished, lift one end until it clears the horse and remove the horse. Repeat again at the other end. Now is the time to put the bed and leg assembly in the spot you want it - while it is standing on it's own, and not too terribly heavy. Furniture dollies work great here, although with a concrete floor, it will slide fairly easily. Clean the bed with a mild solvent like mineral spirits, let dry, and apply some paste wax or something like Boeshield to seal and lubricate the bed. Then, with your helper, clean the bottom of the headstock, banjo, and tailstock. No need to wax them, they will absorb enough from the bed to do the job! If you bought the bed extension, install it now, and clean and wax it, also.
You and your helper can now install the headstock, the tool rest, and finally the tailstock. Remember to reinstall the two safety bolts that keep the headstock and tailstock from sliding off the end of the bed. The factory ships the lathe with no plug, and a relatively short cord. You may want to make an extension cord; please follow the manufacturer's recommendations for this. I hope these tips help, and your assembly and set up go smoothly, and safely! Sure hope you enjoy your new Mustard Monster as much as I have enjoyed mine.
")
Photos by Scott Hubl