• November 2025 Turning Challenge: Wall Hanging! (click here for details)
  • Sign up for the 2025 AAW Forum Holiday Swap by Monday, November 24th (click here for details)
  • Congratulations to Konstantin Gusev for "The Nutcracker" being selected as Turning of the Week for November 17, 2025 (click here for details)
  • Welcome new registering member. Your username must be your real First and Last name (for example: John Doe). "Screen names" and "handles" are not allowed and your registration will be deleted if you don't use your real name. Also, do not use all caps nor all lower case.

Parting and cleaning up the parted workpiece...

Joined
Jul 30, 2021
Messages
883
Likes
273
Location
Aurora, CO
This image below comes from a post from @John K Jordan in another thread. However, it reminded me I keep meaning to ask this question about parting, and cleaning up the nub or remaining unwanted wood on the parted workpiece.


I've been turning, on and off, since 2020. I have a decent amount of skill, but I'm in that phase, and have been for a bit here, where I'm never really satisfied with my work. I've gone through rounds with sanding techniques, tooling techniques, grinding techniques. I have good skill, but, also never quite satisfied and always trying to improve. Currently, I think my single greatest struggle, is getting good, clean results on my workpieces, after parting. I have a lot of trouble with this.

FWIW, this is mostly on smaller items, like those pictured in John's photo above. This really is not an issue with bowls or platters, its spindle type pieces mostly, although I sometimes have issues parting vases as well (mostly, tearout on the bottom...which seems to occur as a result of the parting process with parting tools, even when they are as sharp as I can make them.

When I first started, I used parting tools, left a bit of wood on, sanded that down. But it never looked good. So I started parting part way, then sawing through the connecting piece of wood, which also left a piece of wood, but I was able to make it smaller. I still couldn't get really great results, and there were often shape issues, and with certain woods sanding that wood down can take ages. I tried "carving" that wood off for a while, and that seemed to lead to worse shape issues. I then tried to actually turn the piece right off, shaping optimally as I went, and 90% of the time the piece would break off, shredding fibers right into the piece, which then of course was unfixable. So I went back to parting tools and sawing the last little bit to leave a little nub of wood, and I'm still trying to figure out the best way to deal with that.

Recently, after parting and sawing off the workpiece, I have taken to using a rasp, to remove the nub, and try and lightly shape. I then sand, and its hit or miss, whether I can actually get a nice, clean, quality surface around the parting point that looks seamless with the rest of the piece. However, using the rasp, has improved things, it gives me more control than trying to sand off the remaining wood nub with a sanding disc, and I'm able to keep a better shape overall most of the time. The thing that is really challenging for me, is getting the final finish around the parted area to look as nice as the rest of the workpiece.

A secondary issue I have with parting, and this mostly happens with vases where I may be parting through a larger area of wood (the base of my vases are usually around 2" in diameter across most of the time, or larger), is tearout in the fibers on the bottom of the piece. Even when I sharpen the parting tool as much as I possibly can, it still seems like most woods that I turn, end up tearing out. I've tried varying my speed, going very slowly...which does minimize the issue, but it does not seem to eliminate it. I don't know if I've turned a vase yet where I really like the base...they all seem to look terrible.

So anyway. Curious how everyone else parts their workpieces. What the tricks are to produce a clean, high quality result in the parted areas, and avoid serious problems like tearout (which can essentially be unfixable, since it can extend so far into the wood.)
 
"Curious how everyone else parts their workpieces."

IN GENERAL
I part off spindles and smallish things almost, but not all the way, then use a fine saw to cut the rest of the way. This prevents the last little bit of wood breaking and possibly pulling fibers out of the bottom of the piece. These can be a horror to fix unless the turner is not too picky or has bad eyesight.

Before parting, I have usually already cut away the supporting block for clearance then shaped the and detailed the bottom with spindle gouge, skew, or special tools. What's left then, is just a tiny nub which I pare away with a rotating/slicing cut with a spindle gouge, skew, scalpel, or other tool depending - some are custom tools. I don't touch the turned part.

If I use a parting tool to prepare to remove the waste, I part well away from the intended bottom, remove much of the supporting waste wood to provide the aforementioned clearance which gives me room to make clean facing cuts with the skew or curved cuts with the spindle gouge, perhaps using special NRS and other custom tools, perhaps shear scraping with the side of a spindle gouge.

Then, again, depending, I may smooth the bottom with a small curved hand scraper before smoothing with sandpaper.
If needed, I devise a method to reverse mount the piece and turn, smooth, sand, and detail the bottom of the foot.

There are numerous ways to reverse either face or spindle work. Some involve jam chucking, double-sided tape, cole or other jaws, sometimes larger jaws tightened on a cylinder of closed-cell foam shaped to hold the piece. I often support larger pieces with multiple strips of tape, my favorite is Scotch 2060.

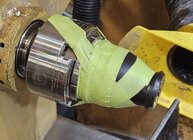
Here's an example of finishing up the bottom of an African Blackwood box, parted off, reversed and loosely jammed into a turned piece of scrap wood, then firmly secured with multiple pieces of the green Scotch 2030 masking tape (this is NOT your low-rent green masking tape found at HD, etc which is worthless for this - the 2060 is made for "hard to stick" surfaces such as concrete, cinderblock, wood, etc., holds FAR better). With the piece secured so I couldn't MAKE it wobble, I had easy access to the bottom to shape, refine, smooth, and finish as I liked. I clean up MANY pieces this way, often held in different ways depending on the shape. I'll even use Cole Jaws at times, but not often, but if I do the piece is secured with the same green 2060 tape. I do not like pieces coming off the lathe uninvited.

1762812865537.jpeg

BOWLS, SMALL PLATTERS
On most bowls and platters I avoid all the fuss of reverse mounting by simply turning the entire bottom first while holding the flat top in a Glaser screw chuck.

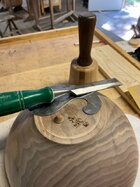
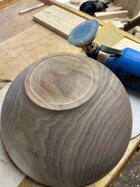
Turning the bottom includes defining the foot, shaping inside the foot, cutting a shallow recess for the chuck, and detailing inside the foot and the recess. Turn the entire outside, smooth with NRS, remove from lathe (still in the screw chuck) and hold with a carving/finishing stand to hand scrape and hand sand the bottom, then apply finish. Turn the piece over and hold by the recess then do the top. This avoids any/all parting off.

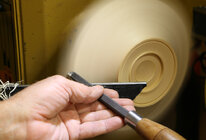
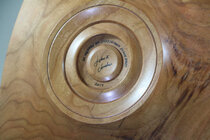
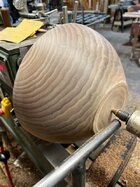
This is a "winged" piece made this way, the first pic showing the foot/recess/detail done and me turning the winged outside. The second photo is a similar one all done. As mentioned, zero reversing and cleanup needed with this method - by the time the start on the top of the platter/inside of the bowl, the bottom is done. (Note: I turn dry wood.)

1762813429997.jpeg 1762813366604.jpeg

SPINDLES
For spindles as in the earlier picture, I shape the end, ALMOST part off and saw off the same way, then use a sharp skew to remove the nub. No tearout or pulled fibers allowed or experienced. Then I and sand the end to achieve the profile - sometimes starting with sanding sticks I make, sometimes hand sanding, and often finishing up by placing a piece of sand paper on a hard surface covered with carpet and sand while rotating. My lathes have flat topped headstocks so I inset or stick the carpet there. Handy. Finish was applied to the entire piece before this point, so I just need to put finish on the end. I do all wands, gavels and some other handles, finger tops, and more.

If the piece is a two part piece with a hole, such as some handles, little weed pots, etc, I'll turn a "dowel" from soft wood to jam into the hole to hold it securely and turn the end. Sometimes if the piece is long I'll lightly support it with my left hand while turning, smoothing, detailing, and finishing the end.

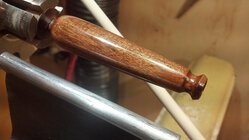
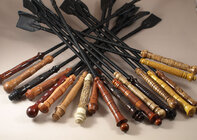
That's how I clean up the end of many spindles, conductor's batons, rider's crops, and handles like this:

1762814129342.jpeg

Sorry, can't find any good photos of details on this specific subject. If I had the energy I'd do a video of every method I use.
For those who read, a good book to have on the shelf is "Fixtures and Chucks for Woodturning" by Doc Green.
Another is "A Guide to Work-Holding on the Lathe" by Fred Holder
My shop library would be incomplete without these two books (and a dozens of others). Youtube might be helpful for those who don't read.

POWER SANDNG
I never, ever, use any type of power tool such as a sanding disk to finish the end of any turning, bowl/platter or spindle - not needed and too much chance of destroying the carefully shaped end.

Many years ago I took a bowl-turning course. What a waste of time - I learned many bad techniques. One was to part the waste wood or waste block then use a sanding disk to clean up and make a depression in the bottom of the foot so the piece would sit on the table. Never again.

All these are things I teach. I'm sure others have different methods. I'm also sure there are many details of my methods I forgot or got too lazy to write. Come visit. I will gladly show all methods. No secrets. My fee is a good story or a good joke.

JKJ
 
Last edited:
Glue a felt pad on the bottom?

Ok, a bit more serious. I just sand the best I can while it's on the lathe. when it comes off, I chisel the nub, and sand some more. A little sanding sealer (shellac is my very best friend) and a little more sanding. I do often have to start at a very low grit on the bottom, but once that is satisfactory, it's a quick progression up to 3 or 400, or wherever I'm stopping on that particular piece.

If I'm ever worried that the bottom won't be flat anymore (pretty uncommon) I tape a sheet of sandpaper to a granite tile I keep about (it cost a dollar at the habitat store) and scoot the bottom of the piece around on it until I feel better.

I also like to leave a chiseled recess sometimes. If the wood is good enough (I turn a lot of questionable wood) I'll grab a curved chisel and make a flower or swirl in the bottom. Just be careful, the first couple I did like that, my wife made fun of it, said it looked like a b-hole.

I like the idea of decorating the parting point... Maybe its just what I've been turning lately, but I always seem to have trouble getting sandpaper into that area, after I've turned down the connection to the chucked block, before finally parting it off. So sanding things to be really nice and clean, ends up being a ton of work, and if I accidentally tear out the fibers when I part (less common now that I'm using a saw to fully part), then that becomes a nearly uncorrectable issue. Except, if I were to carve it out.

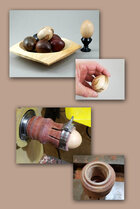
Shaping is one of my bigger concerns, too. I've been turning wooden eggs, and that has been a consistent struggle for me. The top of the eggs (which is where I'm parting...was parting at the bottom of the eggs, but I again was having a hard time getting enough room to sand well in there, without at least, wasting a lot of good blank from which I could turn another egg or two. So I flipped, and turned the top towards the parting end. The tops of these eggs, once parted and sanded to the point where they look good, often end up misshaped. I've spent even more time, re-shaping with sandpaper...which is a dubious process at best! Since this shaping issue is always at the tip of the egg, there isn't any good way to re-mount it so I can clean up the shaping issues on the lathe (at least, not that I know of....perhaps a vacuum chuck might assist there, I don't own one right now.) I have similar issues with other kinds of items I turn, though...keeping the shape at the parted off point nice.
 
Why not turn an egg shaped cup for a jam chuck and cut splits on the bandsaw. Then use a hose clamp to compress it on the egg. Use the tail stock to line it up so it runs true then you can turn the end off and lightly sand?
 
Why not turn an egg shaped cup for a jam chuck and cut splits on the bandsaw. Then use a hose clamp to compress it on the egg. Use the tail stock to line it up so it runs true then you can turn the end off and lightly sand?

"and cut splits on the bandsaw." Not sure I understand this part?
 
Since it’s a spindle, cut with the grain so you have “fingers”. Imagine turning a box and sticking the egg in the end. You’re sticking the egg in a tube that the clamp will pull the sides down on the egg.
 
Shaping is one of my bigger concerns, too. I've been turning wooden eggs, and that has been a consistent struggle for me. The top of the eggs (which is where I'm parting...was parting at the bottom of the eggs, but I again was having a hard time getting enough room to sand well in there

I made this just to hold chicken-sized eggs. I used somewhat fingers flexible ERC, shaped the inside to hold the egg, tighten with a hose clamp (watch the fingers). Since ERC is not an especially strong wood I made a threaded dogwood insert to mount on the lathe:

eggs_com_A.jpg

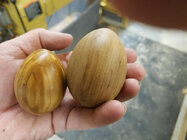
Having chickens I'm sensitive to what a real egg looks like I've see some turned eggs that just don't look right to me.. Although there are a lot of natural variations, I picked a typical egg shape and size that made me happy. I made a template to work from by mounting a point source LED light on the shop ceiling and carefully tracing the shadow. Measuring key points and sizing with a parting tool and calipers gives me the egg shape I want.

I've also made some wooden guinea and peacock eggs, smaller and larger than chicken and sometimes shaped differently. I oftenuse these as "decoy" eggs to entice a bird to lay eggs in a particular spot.

FWIW, a turned chicken egg next to a turned peafowl egg.
1763079146548.jpeg

(Remember: if a picture is worth a 1000 words, a word must be worth a milli-picture.)

JKJ
 

Ah! Yeah, picture is definitely worth a thousand words here. I'll give it a whirl. I keep trying to get out in the shop this week, but, it hasn't been happening. So it'll probably be a weekend endeavor.

I made this just to hold chicken-sized eggs. I used somewhat fingers flexible ERC, shaped the inside to hold the egg, tighten with a hose clamp (watch the fingers). Since ERC is not an especially strong wood I made a threaded dogwood insert to mount on the lathe:

View attachment 81521

Having chickens I'm sensitive to what a real egg looks like I've see some turned eggs that just don't look right to me.. Although there are a lot of natural variations, I picked a typical egg shape and size that made me happy. I made a template to work from by mounting a point source LED light on the shop ceiling and carefully tracing the shadow. Measuring key points and sizing with a parting tool and calipers gives me the egg shape I want.

I've also made some wooden guinea and peacock eggs, smaller and larger than chicken and sometimes shaped differently. I oftenuse these as "decoy" eggs to entice a bird to lay eggs in a particular spot.

FWIW, a turned chicken egg next to a turned peafowl egg.
View attachment 81523

(Remember: if a picture is worth a 1000 words, a word must be worth a milli-picture.)

JKJ
Yeah, those shapes are wonderful. Well, I have a few eggs to clean up here.

"A word is a milli-picture." 🤣
 
A parting tool peels the surface, cut DOES NOT slice the fibers forming the side of the parting cut. They are pulled out as the peling cut proceeds. Hence the side of the resulting shoulder will not be a finished surface. Slice a finished surface on the shoulder using a skew chisel long point or a spindle or detail gouge with the flute facing away (3 or 9 o'clock) from the shoulder. This ccan be done at the same time as the little stub (after sawing) is similarly removed.
 
A parting tool peels the surface, cut DOES NOT slice the fibers forming the side of the parting cut. They are pulled out as the peling cut proceeds. Hence the side of the resulting shoulder will not be a finished surface. Slice a finished surface on the shoulder using a skew chisel long point or a spindle or detail gouge with the flute facing away (3 or 9 o'clock) from the shoulder. This ccan be done at the same time as the little stub (after sawing) is similarly removed.
Thanks. I guess the problem is primarily with spindles. Was parting a bowl the other day, and it parted off clean. Grain orientation is totally different with a bowl though. I need to give myself more clearance when parting, more room on the bottom of pieces, so I can then run a skew along the parted (or mostly parted) bottom to clean things up before fully separating the piece.
 
Thanks. I guess the problem is primarily with spindles. Was parting a bowl the other day, and it parted off clean. Grain orientation is totally different with a bowl though. I need to give myself more clearance when parting, more room on the bottom of pieces, so I can then run a skew along the parted (or mostly parted) bottom to clean things up before fully separating the piece.
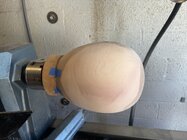
I turn (or have turned) a decent amount of eggs. In addition to the other methods here, I suggest using a simple glue block and some hot melt glue. Shape the glue block’s “cup” to match the profile of the egg top or bottom, place the egg, add a couple of beads of hot melt glue, and you’re good to go. Easy peasy.

Hot melt glue is surprisingly strong. Here’s a big, big egg held in place with this method (tape was only used for helping with initial alignment).

IMG_9870.jpeg
 
Last edited:
I turn (or have turned) a decent amount of eggs. In addition to the other methods here, I suggest using a simple glue block and some hot melt glue. Shape the glue block’s “cup” to match the profile of the egg top or bottom, place the egg, add a couple of beads of hot melt glue, and you’re good to go. Easy peasy.

Hot melt glue is surprisingly strong. Here’s a big, big egg held in place with this method (tape was only used for helping with initial alignment).

View attachment 81710
I often do hot glue like this. For some reason I was thinking it might not work with the eggs. But, I'm going to give it a try before I make an egg holding jig, see how it goes.
 
The bowl in these pictures was driven by a friction chuck , which is nothing more than a block of wood on a face plate turned to the shape of the interior. The bowl is held by the live center and then the tenon is turned away without the use of a parting tool, the rest should be evident in the sequence of photos.
IMG_0306.jpgIMG_0309.jpgIMG_0310.jpg
 
The bowl in these pictures was driven by a friction chuck , which is nothing more than a block of wood on a face plate turned to the shape of the interior. The bowl is held by the live center and then the tenon is turned away without the use of a parting tool, the rest should be evident in the sequence of photos.
View attachment 81739View attachment 81740View attachment 81741

For bowls this is great. I think mostly, I'm fine when it comes to parting and cleaning up bowls. The grain orientation helps for one.

The biggest challenges I have is when it comes to parting off spindles. The grain orientation lends itself to torn fibers at the point of parting, and sometimes its challenging to turn things with the right shape towards the point of parting. One way to solve that is to waste more wood, however, I guess I often get myself into situations where I really want to get N items out of a blank, I guess that's often restricting how much space I have for room around the parting point.

The hot glue approach, is what I'm doing right now for all the eggs. I have a bunch of other items, though, that can't really be jigged up? Maybe they can, and I just am not thinking outside the box enough. Many of the items are christmas ornaments...mostly finials, long, thin, highly shaped. The top of the ornament is where I part, but there is often a pointed top (still a finial, then I drill a hole and thread a string through). Some have more of a rounded top, and I insert a threaded christmas ornament eyelet. Other items include the handles for coffee scoops, the scoops themselves (two types of wood per scoop for contrast), stuff like that.
 
I've been reading this thread with interest.
I turned this bowl from a big chunk of Red Oak.
It was my first time trying to turn a piece of wood that was radically out of round and balance.
It's not perfect but was a good learning experience.
Now I need to remove the tenon.
I've chucked up a glue block and centered the bowl on it so it turns nearly true with the tail stock run down tight.
I guess that's a jam chuck huh?
Is this a viable method if I go slow and carefully?

Craig

IMG_4204[1].JPGIMG_4205[1].JPGIMG_4208[2].JPG
 
The bowl in these pictures was driven by a friction chuck , which is nothing more than a block of wood on a face plate turned to the shape of the interior. The bowl is held by the live center and then the tenon is turned away without the use of a parting tool, the rest should be evident in the sequence of photos.
View attachment 81739View attachment 81740View attachment 81741
When it DOES come to bowls...after you removed that final piece of the tenon, did you use the scraper there to clean up the bottom? I've never thought to use a card scraper to clean up the bottom of a bowl...

I've been reading this thread with interest.
I turned this bowl from a big chunk of Red Oak.
It was my first time trying to turn a piece of wood that was radically out of round and balance.
It's not perfect but was a good learning experience.
Now I need to remove the tenon.
I've chucked up a glue block and centered the bowl on it so it turns nearly true with the tail stock run down tight.
I guess that's a jam chuck huh?
Is this a viable method if I go slow and carefully?

Craig

View attachment 81769View attachment 81770View attachment 81771
If I understand what you are saying, sounds like its basically the same as what Don described above. You mention "glue" block...sounds like Don just turned a scrap piece of wood to fit the internal shape of his bowl, doesn't sound like he is using any glue. It stays put by friction alone. I think usually, there is some padding material placed between the friction chuck and the bowl.
 
I've been reading this thread with interest.
I turned this bowl from a big chunk of Red Oak.
It was my first time trying to turn a piece of wood that was radically out of round and balance.
It's not perfect but was a good learning experience.
Now I need to remove the tenon.
I've chucked up a glue block and centered the bowl on it so it turns nearly true with the tail stock run down tight.
I guess that's a jam chuck huh?
Is this a viable method if I go slow and carefully?

Craig

View attachment 81769View attachment 81770View attachment 81771
That should work but a cup live center would be better since when you get to the small cone you still can apply enough pressure to hold it, where as the single point is likely to split the cone.
 
When it DOES come to bowls...after you removed that final piece of the tenon, did you use the scraper there to clean up the bottom? I've never thought to use a card scraper to clean up the bottom of a bowl...
That is exactly what I did. Also when using the bench chisel to cut off the cone don't start flush with the bottom, because the chisel will follow the grain, and after the initial cut you can adjust the angle of attack so you don't lift a splinter causing a hole.
 
That is exactly what I did. Also when using the bench chisel to cut off the cone don't start flush with the bottom, because the chisel will follow the grain, and after the initial cut you can adjust the angle of attack so you don't lift a splinter causing a hole.
Ah, so...you start with the edge just off the bottom, and then adjust the angle down as you cut?
 
Ah, so...you start with the edge just off the bottom, and then adjust the angle down as you cut?

After making a clean cut and sawing then paring off the nub, I almost always use a hand scraper to seamlessly smooth the bottom, followed by a bit of 600 grit.

The biggest challenges I have is when it comes to parting off spindles. The grain orientation lends itself to torn fibers at the point of parting, and sometimes its challenging to turn things with the right shape towards the point of parting.

I never use a parting tool to "part off" spindles. I'll use spindle gouge or skew to make clean cuts right to the point of separation. I'll use the parting tool to narrow the spindle a short distance from the desired end, use a small, fine-toothed saw to separate, then clean up the end by hand - usually with a skew then fine sandpaper.
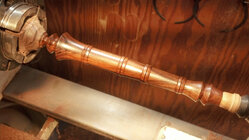
This is a finished crop handle about to be removed from the lathe.
1763679517095.jpeg

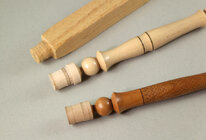
The same thing with thin spindles such as wands. Those in the photo below were held in the headstock with the short #2MT method - very little wood is "wasted". I cut a little taper for clearance on the wasted wood is needed for the spindle gouge, although a shallow detail gouge can be ground so very little clearance is needed. On these wand handles, I turned with a spindle gouge and skew, smoothed, applied finish to the small spheres on the end, parted a bit away from the end, and used the saw to separate from the support wood. (Don't want no pulled fibers!) Then pare off the end and sand. For sanding I always lay a piece of fine sandpaper on the top of the lathe headstock where I've fastened a bit of short-pile carpet. This provides enough give to smooth the curve with no danger of making a flat spot. Usually, 600 grit is sufficient. Then add a bit of finish on the smoothed end.

1763679847405.jpeg

I show little spheres here but use a variety of end shapes, whatever strikes my fancy at the moment.
Old photo (2007) with a few end variations. Some are "softened" points.
1763680273069.jpeg

If the end of the spindle is flat, it's even easier - part maybe a 1/16" away from the desired end, cut a little clearance to the left with a spindle gouge or something, then make a facing cut with the skew to flatten the end. Again, saw off the tiny bit remaining and smooth as usual.

The ends of Hunter-Jumper horse riders crops are made the same way, but for safety reasons all have smooth round or curved ends - no impaling points allowed!
1763680934179.jpeg

JKJ
 
Back
Top