• April 2025 Turning Challenge: Turn an Egg! (click here for details)
  • Congratulations to Kelly Shaw winner of the March 2025 Turning Challenge (click here for details)
  • Congratulations to Guillaume Fontaine for "Nebules" being selected as Turning of the Week for April 6, 2025 (click here for details)
  • Welcome new registering member. Your username must be your real First and Last name (for example: John Doe). "Screen names" and "handles" are not allowed and your registration will be deleted if you don't use your real name. Also, do not use all caps nor all lower case.

Project Idea - Dice Tower

Joined
Sep 19, 2023
Messages
1,298
Likes
2,596
Location
Columbia, TN
My daughter and her husband play D&D. I guess a common accessory is a dice tower. The dice tower is nothing more than a fancy way to roll dice.

I want to make them a dice tower. This post is mostly me thinking aloud. Feel free to jump in with suggestions.

Here's the most basic tower:

1734097271054.png
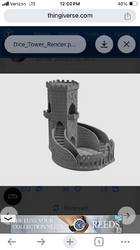
And some fancier ones:

1734097304568.png1734097357766.png1734097391570.png

I haven't done any piercing work but it looks like I'll be headed down that road.

I'm still in the pondering stage on this. One idea I had was to make a tower that looks like the first pic. Then I could turn a cylinder that fits over the tower. Finally, make a staircase out of the cylinder. The tower would have a hole through it so players can drop the dice in the hole or take the staircase route.

I'll post progress along the way, I'm sure there will be a few prototypes headed for the fireplace.
 
I think the first one would be the way to go to start with. Turn the tower and turn a base for it to sit in. You could do a lot of the tower on the lathe and the flat sides could be done with a sander, router fixture, or possibly done on a bandsaw. And, I see a power carver in your future😁. Looks like a great project with several processes to complete. Post pictures with your progress so if I decide to make one I won’t have to figure it all out😁!
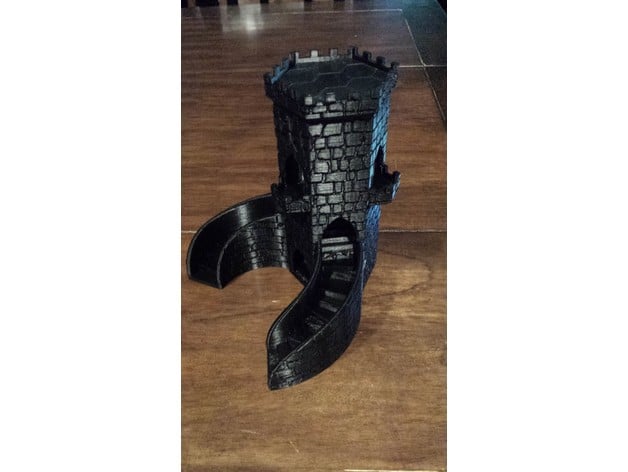
 
I think the first design is too boring and the staircase ones are too difficult. There is a different design that I think a lathe could handle. I’ve attached a link to a free 3D printer build. Look at the later pictures where they show the three cylinders that stack.

The top cylinder has three dice paths (drill holes). The next cylinder has three paths that are rotated 30 degrees from the top, so the dice can go one of two directions. The side paths exit to the two staircases which curve back to the dice pool. The center path drops down and exits at the dice pool area. So that’s like 3 tower sections and 1 dice pool. I cant think of an easy way to do curved staircases on the lathe.


Attachments

  • IMG_9897.png
    IMG_9897.png
    337 KB · Views: 9
These look really cool. I used to play D&D a lot, and we had so many problems in the past with dice flying off the table, getting lost, wasted time finding them to read the roll (hey, a roll is a roll! Doesn't matter where it falls! :P)

More recently, chatting with some other D&D players, they use these dice roll trays now. Some, are actually dice boxes as well. I thought that was an interesting idea, too. They usually have a leather-based interior roll surface, so that any dice made out of semiprecious stones (a popular thing these days) won't risk cracking or breaking on rolls. But, these trays often double as boxes, and often have interesting designs, say a star shape so that when you open them, triangular wings fold out. Sometimes they are also dice storage boxes, with shaped holes for each kind of die (for D&D you have a lot of different die: 4-sided, 6-sided, 8-sided, 10-sided, 12-sided and 20-sided. Sometimes there are others, such as the vaunted D100, which often comes in a D10 style with 00-99 or 01-100 instead of 1-10). You can fit each die into its properly shaped space, usually in a rim around the leather-bottomed tray, then close up the tray with the dice inside.

Could be an interesting item. Lot of D&D players out there still, and the semiprecious dice have become pretty popular these days.
 
Cool idea!! Like Steve said, add some deflectors. You could even make it in a few different sections so you have accessibility when adding the deflectors. Keep us posted!
 
Got it roughed in to a basic form. Green walnut has some weird coloration until it dries. I drilled a hole through it with my largest Forstner but. I might need more clearance for the dice. Need to research the size of a 20-sided die.

I may part off the battlement at the top and attach it with magnets. I can't think of a good reason to do that right now, though.

IMG_20241215_115728.jpgIMG_20241215_115820.jpg
 
So what is the longer term plan? Are you going to build a kind of spiral stair case around this for the dice to roll down? Or are you going to make it more like a cup, where they can put the dice in and toss them out kind of like yahtzee dice?

The staircase is an optional piece. If I make it, my thought is to turn a sleeve that fits over the tower. Then carve the staircase out of the sleeve.

The primary way to roll is to drop the dice into the hole in the tower. I need to install flappers or pegs on the inside so the dice don't just fall through. The dice tumble onto the platter at the base.
 
One of the tricky parts is coming up. Inside, at the base, there needs to be a ramp so the die tumble onto the base. I could drill the initial hole at an angle with a Forstner bit. Probably a better option is to cut the hole for the door and then build a ramp to go on the inside. Thoughts are welcomed.
 
I wonder if you couldn't create a tilted "floor" sloped toward the opening. If done with some popsicle sticks or similar, it wouldn't be totally smooth or flat, to insure they tumble, not just slide. (it probalby needs to be steep enough that they don't jamb up inside. A small part of it in front of the opening could be made with a more realistic looking stairway appearance.

My son was really into Axis & Allies in high school. He had both the European and Pacific theaters, so when both boards were side by side, you had a map of the world. His friends came over often and completing a game would take multiple sessions. The setup was huge and sort of inconvenient to move, so sometimes took our dining room table for days or weeks. One Christmas, I asked him to create the ultimate wish list for a dedicated table. We got the game board artwork together in one pdf file and sent it to a poster printer. He wanted it standing-height, (for reach, you're on your feet mostly) trays along each side for the different armies that could be arranged differently depending on number of players.

Rolling dice was always an issue. Lots of rolls with lots of dice determined superiority in battles, so dice pits at each end of the table were the best option. We sloped the near side, so the dice were always visible and covered it with leather to dampen the sound. It's a pretty cool setup. Fun project.

So cool that you're doing this. They will love it.
 
Last edited:
I know nothing about building but maybe something like this?

None of us know anything about this. ;)

Your drawing helps. That last deflector is essentially what I need. As DF said, it would be cool to make a stairway out of that.

1734441118499.png
My drawing is rough, but you get the idea. I'm not sure how I am going to attach the deflectors. Probably just CA. They won't take much abuse. I'm going to open up the bottom so I will have room to work. Later I will put in a bottom that holds a magnet to attach to the base.

Thanks for moving my thoughts forward. I like to just wing it, but it isn't the smartest approach.
 
I drew lines over this image to visualize how the bricks will look. Is it too busy? In this drawing the bricks are 2mm wide(ish). The height of the bricks is 2mm. So the top bricks are square, and the width of each brick increases at the bottom. I might be better off with 2.5 or 3mm wide bricks.

I have a 24" circumference at the top. The bricks are currently 2mm wide so there are 12 around the tower. If I go to 3mm, then there will be 8 bricks, 2.5mm will be 10 bricks, and so on. I like the bottom OK, but the top looks clunky with the square bricks.

tower planning.jpg
 
This is really coming together! That stair at the bottom...and the clearance with the door, is going to be critical. Make sure you test the necessary clearance with all the various die used for D&D, as the die sizes change a fair bit. A D20 is pretty large, and some of them have odd shapes and maximum angular sizes (i.e. a D4 is pyramidal in shape, and it can be deceptive what kind of clearance you might need for it.)
 
This is really coming together! That stair at the bottom...and the clearance with the door, is going to be critical. Make sure you test the necessary clearance with all the various die used for D&D, as the die sizes change a fair bit. A D20 is pretty large, and some of them have odd shapes and maximum angular sizes (i.e. a D4 is pyramidal in shape, and it can be deceptive what kind of clearance you might need for it.)

I've avoided buying a set of die but I guess I'll have to.
 
What is the plan for cutting the vertical grooves for the bricks? Dremel on a jig and indexing wheel?

This got a little complicated because my tower is just a touch out of round. That's probably due to the fact that it was pretty wet when I turned it. The result is that I had to burn the horizontal lines a bit deeper to get depth on the shallow side.

I don't trust myself with a Dremel, unless I build a jig as you mentioned. My original plan was to burn the vertical lines with a woodburner. Now I don't know if that will look bad because the vertical lines won't have the depth of the horizontal lines. I'll experiment.
 
I thought I was going to burn these verticals after notching them, but I don't think it will be necessary. Maybe I still will for a uniform looking mortar.
 
Back
Top