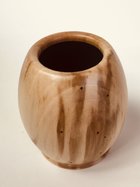
I usually turn bowls but had a request for a medium sized vase, only to realize I don’t know the best way to sand the inside. Checked on Utube but didn’t find much. Vase is about 8” deep and the mouth is maybe 5” wide. Any suggestions?
-
It's time to cast your vote in the December 2025 Turning Challenge. (click here for details) -
Congratulations to Pat White for "Sicilian Mosaic" being selected as Turning of the Week for December 29, 2025 (click here for details) -
Welcome new registering member. Your username must be your real First and Last name (for example: John Doe). "Screen names" and "handles" are not allowed and your registration will be deleted if you don't use your real name. Also, do not use all caps nor all lower case.
You are using an out of date browser. It may not display this or other websites correctly.
You should upgrade or use an alternative browser.
You should upgrade or use an alternative browser.
Sanding Interior of vase
- Thread starter Trevor Mills
- Start date
Dave Landers
Beta Tester
Well first, you only need to sand as deep as your clients fingers are long. For anything deeper you just want a reasonably good looking surface.
You can grip sandpaper (maybe with a bit of foam backing) with long forceps or something. Or wrap/glue Velcro to a padded rod
You can grip sandpaper (maybe with a bit of foam backing) with long forceps or something. Or wrap/glue Velcro to a padded rod
I use an 8-10" long alligator forcep on deep boxes. To grab the sandpaper, I take a piece of the foam pad I stand on, place a piece of sandpaper over it and grab it with the end of the clamp. Old used medical clamps work fine if you know an old, used doctor who is going out of business, but you can find brand new, non-medical quality ones, used for fishing and ?else, for $5-10 bucks online.
john lucas
AAW Forum Expert
I lost it in the move but had a rubber ball glued on a stick with velcro attached. Guess I will.have to make a other one. I looked for it just a month ago a d ended up just taking a broomstick handle a d wrapping velcro around it. That project was kind of small and didnt really need the ball although it would have fit.
Don't want to be guilty of suggesting overkill, but finishing the inside is important. A low-viscosity epoxy works well - I've used Aero Marine 300/21 for years. You can pour a bit in, swirl and wipe. Epoxy is a much better barrier to water-vapor than the oils and other wipe-on products.
A good tool for working deep into small openings is an arrow. At a local archery shop or range, you should have no problem picking up an arrow or two - they are super stiff and strong plus they all come with a threaded insert that accommodates the target tips, broad-heads, etc. and also a standard thread bolt. Great for swabbing, filling and all the last minute corrections we need to make. You can get either carbon or aluminum - both work great for swabbing - with the aluminum you can insert a flux-brush, tape if needed, and have a super-stiff 24" brush.
A good tool for working deep into small openings is an arrow. At a local archery shop or range, you should have no problem picking up an arrow or two - they are super stiff and strong plus they all come with a threaded insert that accommodates the target tips, broad-heads, etc. and also a standard thread bolt. Great for swabbing, filling and all the last minute corrections we need to make. You can get either carbon or aluminum - both work great for swabbing - with the aluminum you can insert a flux-brush, tape if needed, and have a super-stiff 24" brush.
Trevor,
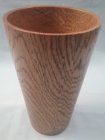
Here's a small oak vase finished with black Kiwi shoe polish that I believe would be close to the description you gave (8"H x 5"D). I use 1 of 2 methods. For the inertia sander I slice cuts a 3" sanding disk to conform to the ball shape. The "Extend A Sand" takes your regular soft pad and disks (I prefer using Abranet for this because it conforms to the shape at the bottom of the vase) connected to your angle drill. Makes for quick clean up on hollowing tool marks.


Here's a small oak vase finished with black Kiwi shoe polish that I believe would be close to the description you gave (8"H x 5"D). I use 1 of 2 methods. For the inertia sander I slice cuts a 3" sanding disk to conform to the ball shape. The "Extend A Sand" takes your regular soft pad and disks (I prefer using Abranet for this because it conforms to the shape at the bottom of the vase) connected to your angle drill. Makes for quick clean up on hollowing tool marks.


Alternatively to sanding and finishing, I flock the inside of some of my vessels. Looks and feels good.
I'm guess that borrowing the neighbor's small child with skinny arms is out of the question?
Damn, I was going to offer free babysitting tommorrow.I'm guess that borrowing the neighbor's small child with skinny arms is out of the question?
Probably considered a no-no based on some other threads but I can get my hand into 5”, and will hand sand, 100 rpm lathe speed. Depending on the bottom shape I’ll use the drill with foam pads and an extension for the bottom, but steep inner walls will require something else - I use hands.
I usually put finish on the ID of HF’s/vases, not to hold water but to slow water vapor moving in/out of the wood. Oil, poly, shellac are used - usually the same finish used on the OD, usually swashed around, concerned only with sealing the wood and not a nice surface finish. An open, funnel shape like the pic needs a nice ID finish.
I usually put finish on the ID of HF’s/vases, not to hold water but to slow water vapor moving in/out of the wood. Oil, poly, shellac are used - usually the same finish used on the OD, usually swashed around, concerned only with sealing the wood and not a nice surface finish. An open, funnel shape like the pic needs a nice ID finish.
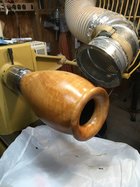
I made an inertia sander that i use to sand any HF or vase that i can get the 2 inch mandrel into. For around $20 you can get enough magnets from ebay and bronze bushings from lowes to make a bunch at different angles. I made a handle with 3 positions. One straight off the end for the bottom. One at a angle to get the side walls. One at an angle pointing back to get under the lip of the opening. I spray most of my large turnings nowadays so i just spray the inside to give it a coating. Just enough so if someone looks inside it looks finished and not raw wood.
Na it would be messy when the Childs arm jammed into the vase and the kid started flopping around and the neighbor probably wouldn't appreciate that kind of treatment of their child.I'm guess that borrowing the neighbor's small child with skinny arms is out of the question?
Another vote for a rubber ball on a stick covered in Velcro. This is what I have found to work the best and it keeps the temptation of me putting my fingers in opening out of my head.
I'm with Dave, I sand up to about 120 as deep as I can reach my fingers and then try for a decent surface for the rest with my cutter - no big ridges or gouges and done. Never known anyone to inspect and criticize the texture deep inside of a vase with a 1 1/2" opening.
Thanks for all the suggestions. I did find these “amaze balls”available on a 5” shaft and think they’ll work for me.
https://performance-abrasives.com/product/2-new-wave-scuff-buff-ball/
https://performance-abrasives.com/product/2-new-wave-scuff-buff-ball/
The description on the page linked does not state the shank diameter.  Klindspor sells something similar/identical with a 14" shaft.
- Joined
- Feb 6, 2010
- Messages
- 3,464
- Likes
- 2,536
- Location
- Brandon, MS
- Website
- threeringswoodshop.square.site
I bough some of those . Not sure what manufacturer. I did not find them helpfulThanks for all the suggestions. I did find these “amaze balls”available on a 5” shaft and think they’ll work for me.
https://performance-abrasives.com/product/2-new-wave-scuff-buff-ball/
Or ..... you can get the inside pretty smooth with your hollowing tool, clean up what you can reach with a scraper, sand what you can reach to no better than 120 grit, and then paint the inside with flat black latex paint. I think it adds depth to the piece and, unless someone shines a flashlight into the interior, they won't see those ridges and tool marks in the bottom. People who see it think the piece is lined with velvet or something and think the inside is smooth. To apply, I grab a small sponge (the ones on the end of a bottle washer work great) with a pair of forceps. I dip the sponge in the jar of paint, saturate it pretty good on the end and one side, and carefully insert it into the opening with the lathe turning slowly ... trying like heck no to drip paint on the outside. Holding a paper towel underneath the sponge and holding the wet side up while inserting helps keep the paint off the rim ... sometimes. I swab the inside real good with a thick coat and then, with a re-wetted sponge, slowly drag a wet edge out to where I want the paint to stop and make a nice crisp edge. Then I sand off any paint that dripped on the outside (after it dries) and only then finish the outside. I don't do real small openings but it should work for those as well. Just a thought ... and not an original one either ... others have done this.


