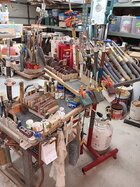
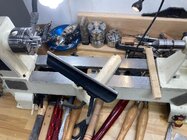
awesome ideaHere is mine. It's a craftsman tool box. I mounted boards around the outside in a sort of 2 step staircase. I drilled holes in the boards to fit specific tools. It holds about 70 tools. I have my hollowing bars in the drawers along with chucks, tool rests and all sorts of other stuff. I have a magnet on the wall behind the tool chest that holds some larger more cumbersome tools and my captured bar system.

-
It's time to cast your vote in the March 2026 Turning Challenge. (click here for details) -
Congratulations to Chris Lawrence for "Dragon's Grip" being selected as Turning of the Week for March 30, 2026 (click here for details) -
Welcome new registering member. Your username must be your real First and Last name (for example: John Doe). "Screen names" and "handles" are not allowed and your registration will be deleted if you don't use your real name. Also, do not use all caps nor all lower case.
You are using an out of date browser. It may not display this or other websites correctly.
You should upgrade or use an alternative browser.
You should upgrade or use an alternative browser.
Show us your tool rack/cart
- Thread starter Douglas Ladendorf
- Start date
do you get a lot of dust into those drawers withouth the frontsI don't have 1/2 the tools John does ..........
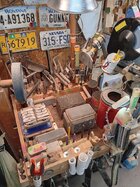
with me, pegboard wall holds chucks & larger accessories, and 500w halogen backlighting
cabinet holds lathe, all turning tools used on regular basis are in plastic tubes mounted to back, with another 500w halogen light lighting front of work......
top & bottom drawers hold lathe accessories, middle 2 drawers hold turning tools not used all too frequently (hollowing, etc.)
the base of cabinet raised to accommodate my stance needed because of bad back.
View attachment 7382
View attachment 7383
Odie
Panning for Montana gold, with Betsy, the mule!
Odie
Panning for Montana gold, with Betsy, the mule!
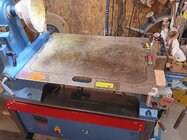
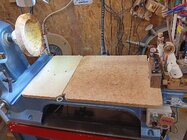
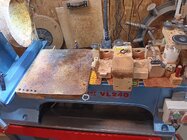
The two walls behind my VL240 in the corner of my shop:
=o=


I've switched much of my exercise program to dumbells....once in the morning, and once in the evening:

=o=
I've switched much of my exercise program to dumbells....once in the morning, and once in the evening:
Odie
Panning for Montana gold, with Betsy, the mule!
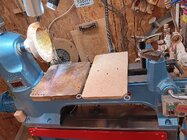
I've created several platform configurations to help with certain conditions.....sure is handy when you need it! ")
Note: Since switching to a new lathe, there is only one new platform. The rest have been adapted to a different distance between the bedways.
=o=
Note: Since switching to a new lathe, there is only one new platform. The rest have been adapted to a different distance between the bedways.
=o=
Attachments
Last edited:

I just put these up. I don’t have as many tool as most of you (yet) but just put up studs and paneling on the cement wall of the shop. I’ll add more storage for chucks and other stuff soon.
Tom Gall
TOTW Team
Bud ... don't know how you have those frames attached to the wall, but ... I think if you can block out or shim the bottom of the frame an inch (or two or three) from the wall so the tools will lean it will be easier to use. It will eliminate the need for the cord or elastic you have which may be a PITA to use. Just my 2¢ !View attachment 81300
I just put these up. I don’t have as many tool as most of you (yet) but just put up studs and paneling on the cement wall of the shop. I’ll add more storage for chucks and other stuff soon.

I have some tools here on the wall and some in a bucket
Do I currently have a worthy tool storage method? Nope.
My tools in current use live in a pile under the lathe bed and
around the shop in messy wood boxes.
But I am mostly posting here to bump the conversation
up to the top for a buddy. Woodturning buddies are the best!
My tools in current use live in a pile under the lathe bed and
around the shop in messy wood boxes.
But I am mostly posting here to bump the conversation
up to the top for a buddy. Woodturning buddies are the best!
Attachments
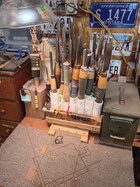
Updated mine. Added another chuck.
It's not an issue I can stop when ever I want!

It's not an issue I can stop when ever I want!
That's about $2000, or more, in chucks!Updated mine. Added another chuck.
It's not an issue I can stop when ever I want!
View attachment 82787
Yeah, this is an issue for you. If there is a Vicmarc VM120, or two, in that mix that need a new home, that new home is here at my shop. I'll donate the space to "store" them for you.
I own 3 chucks. The VM120 I bought with my VL300 lathe in 2001 (lathe sold 5 years ago), the Oneway Talon I bought with my Oneway 1224 two years ago, and a Talon that came with the Vicmarc VL200 I bought from a friend about 10 years ago.
A month or two ago I demonstrated it takes me a casual 3 minutes to change jaws, starting while the chuck is on the lathe, to the bench for the swap, and back onto the lathe.
I'd need at least six VM120 chucks for the jaws I have, and 4 or 5 Talon chucks for those jaws. That totals the price of a Oneway 1224 lathe! Or a seriously sweet bandsaw.
Updated mine. Added another chuck.
It's not an issue I can stop when ever I want!
View attachment 82787
You can stop any time?? You say that as it you mean it...
I've said the same thing and really meant it. Yet I'm up to 21 chucks again, even after giving away four....
 But you still have three sets of unique jaws without chucks in the back of the drawer! Oh, right. But !hat's OK, I don't use those much But they are lonely. And what if you need them in a hurry some day?
 Well...
JKJ
I have 3 sets of jaws do in with no available chucks...................Oh Oh!You can stop any time?? You say that as it you mean it...