An 80 degrees bowl gouge is practically unusable, it is way too grubby. That's probably why you do not have it anymore. Stuart and Ashley's bottom bowl gouge is 60 degrees. For platters I have one with 50 degrees. If you try an 80 for a few cuts, then put it down, and grab a 60, it is day and night. I use my #4 Hunter tool for the transition area of all my calabashes and the bottom of my boxes. Anything wider than 10 inches, like a 20 plus in calabash it is nearly impossible to cut it without leaving any ridges. The bottom bowl gouge is far superior.What I call a bottoming gouge is simply a gouge with the nose ground to a more blunt angle. My normal gouge is about 55 or 60 degrees. My bottom gouge is closer to 80 degrees although I don't really have one any more. I use the Hunter #4 or #5 when I need a bottoming gouge. The reason behind a bottom gouge is with a regualar gouge when you have a steep sided bowl you can't rub the bevel through that transition area or in the case of bowl with a closed in top the lip of the bowl will hit the gouge shank as you get close to the bottom preventing bevel rubbing. So you grind a bowl gouge with a more blunt angle so that you can rub the bevel while going across the bottom. The more blunt angle of course doesn't always cut as clean. I use the Hunter tool because the outside bevel is about 82 degrees which allows you to rub the bevel on really deep boxes or bowls that look more like a spitoon. The inside cutting angle on a Hunter carbide cutter is about 30 degrees give or take a couple, so you get the advantage of a bottoming gouge with clean cutting of a very sharp spindle gouge.
If you look at the beginning of this video you see I am using a #4 Hunter tool and I'm cutting the face of a platter but notice that the shank of the tool is almost straight out. That would allow me to cut across the bottom of a bowl that looks more like a cannister.
View: https://www.youtube.com/watch?v=nfp2kvhH6Mo

-
We just finished moving the forums to a new hosting server. It looks like everything is functioning correctly but if you find a problem please report it in the Forum Technical Support Forum (click here) or email us at forum_moderator AT aawforum.org. Thanks! -
Beware of Counterfeit Woodturning Tools (click here for details) -
Johnathan Silwones is starting a new AAW chapter, Southern Alleghenies Woodturners, in Johnstown, PA. (click here for details) -
Congratulations to Peter Jacobson for "Red Winged Burl Bowl" being selected as Turning of the Week for April 29, 2024 (click here for details) -
Welcome new registering member. Your username must be your real First and Last name (for example: John Doe). "Screen names" and "handles" are not allowed and your registration will be deleted if you don't use your real name. Also, do not use all caps nor all lower case.
You are using an out of date browser. It may not display this or other websites correctly.
You should upgrade or use an alternative browser.
You should upgrade or use an alternative browser.
Bottom Bowl Gouge?
- Thread starter Tom Albrecht
- Start date
Interesting discussion. How about one more option...Thompson 5/8 U-shape ground at 70-80 degrees with an assymetric (sp) grind...right wing ground further back. Cut with flute close to 12 o'clock and light cuts.
- Joined
- Apr 27, 2004
- Messages
- 8,642
- Likes
- 4,985
- Location
- Lakeland, Florida
- Website
- www.hockenberywoodturning.com
Sounds like the finishing tool Trent Bosch was teaching in 2000 when I first met him.Interesting discussion. How about one more option...Thompson 5/8 U-shape ground at 70-80 degrees with an assymetric (sp) grind...right wing ground further back. Cut with flute close to 12 o'clock and light cuts.
The right wing straight up used for shear cut on the outside and pulled back left wing for a shear cut on the inside both are flute up cuts.
I do the same cut with the Ellsworth grind inside bowls. Virtually no bevel drag and it cuts from just under the rim to bottom center on cut rim bowls. And rim to bottom center on NE bowls. No transition issues.
The steeper front bevel you use will give a little higher shear angle on the front edge of the wing.
Last edited:
Well, I don't have any of those handles, and won't be getting any, ever. Main reason is that they will only take one type of tool, which are hers, and probably Stuarts. The handles look the same to me. I believe her tools are M42HSS. I do remember Stuart commenting some thing like 'why use M42 when you have V10'. Some prefer one over the other, but I can't tell any difference at all between them.
robo hippy
robo hippy
Thank you, as a fairly new turner I have some Easy Wood carbide tools. It looks like the Hunter carbide cutters are thicker/deeper? Do you find this is more helpful? I am looking for another tool that would help me with end grain and hollowing. Again thank you.What I call a bottoming gouge is simply a gouge with the nose ground to a more blunt angle. My normal gouge is about 55 or 60 degrees. My bottom gouge is closer to 80 degrees although I don't really have one any more. I use the Hunter #4 or #5 when I need a bottoming gouge. The reason behind a bottom gouge is with a regualar gouge when you have a steep sided bowl you can't rub the bevel through that transition area or in the case of bowl with a closed in top the lip of the bowl will hit the gouge shank as you get close to the bottom preventing bevel rubbing. So you grind a bowl gouge with a more blunt angle so that you can rub the bevel while going across the bottom. The more blunt angle of course doesn't always cut as clean. I use the Hunter tool because the outside bevel is about 82 degrees which allows you to rub the bevel on really deep boxes or bowls that look more like a spitoon. The inside cutting angle on a Hunter carbide cutter is about 30 degrees give or take a couple, so you get the advantage of a bottoming gouge with clean cutting of a very sharp spindle gouge.
If you look at the beginning of this video you see I am using a #4 Hunter tool and I'm cutting the face of a platter but notice that the shank of the tool is almost straight out. That would allow me to cut across the bottom of a bowl that looks more like a cannister.
View: https://www.youtube.com/watch?v=nfp2kvhH6Mo
- Joined
- Apr 27, 2004
- Messages
- 8,642
- Likes
- 4,985
- Location
- Lakeland, Florida
- Website
- www.hockenberywoodturning.com
I have used carbides for hollowing but they never come close to removing material as fast a gouge, hook tool, or a scraper hollowing bit.Thank you, as a fairly new turner I have some Easy Wood carbide tools. It looks like the Hunter carbide cutters are thicker/deeper? Do you find this is more helpful? I am looking for another tool that would help me with end grain and hollowing. Again thank you.
When I do endgrain hollowing for goblets I use a spindle gouge to drill a depth hole and remove the boule of the material.
Then I use a #4 Hunter to smooth the surface and clean up the bottom center.
@john lucas has a lot more experience with the hunters than I do.
Hunter's carbide tools are an entirely different "animal" from the Easy Wood carbide tools. After all, carbide is a material like M2 steel, it is not a tool design.Thank you, as a fairly new turner I have some Easy Wood carbide tools. It looks like the Hunter carbide cutters are thicker/deeper? Do you find this is more helpful? I am looking for another tool that would help me with end grain and hollowing. Again thank you.
The Hunter cutters are intended for shear cutting, they have a cupped or pie pan shape and are presented to the wood surface at an angle. The EW tools are scrapers, they are flat across the top and are presented to the wood at zero pitch and zero roll. The EW are available as a single bevel tool and as a double bevel (a.k.a. negative rake). They perform differently and have different strengths and weaknesses. You may like the Hunter cutters for hollowing, side or end grain. I so a fair bit of side grain work and frequently use a Jakofsky tool which mounts a Hunter carbide insert.
odie
TOTW Team
- Joined
- Dec 22, 2006
- Messages
- 7,117
- Likes
- 9,858
Since there are so many methods and different shaped gouges being used for interiors of bowls......I'm assuming getting a perfect interior surface is just as perplexing to everyone else, as it is for me. When it comes to the sides of the interior, I can get a pretty good consistent curve....but, the bottom, and especially for those pieces that are more flat, a more perfect tooled surface becomes much more difficult. This is why I've never been able to rid myself of the need for power sanding on interiors.....and thank God for my friend Milwaukee 55°! ")
From the transition area to the center, I find pull cuts are more effective than the alternative, and there are times (depending on how responsive the individual piece of wood is) where a heavy scraper is more useful for getting a more consistent and flat surface. Some pieces of wood will make a liar out of me and I find that at times, a pull cut from the center towards the transition area is also useful!
The real trick, is to have more than one arrow in your quiver, and do some experimenting with different techniques to find what works best with the wood you are currently working with. (This piece of advice works with nearly every aspect of bowl turning......what works this time will not necessarily work as well for the next bowl, so have alternative plans to deal with specific issues that may come up!)
-----odie-----
Just returned from a 3 day class with Ashley Harwood. This was my first real experience with the 40/40 and bottom of bowl gouge. To say I was impressed would be an understatement.The instruction was outstanding and there is a genuine desire to help you be successful. I will say that while we used her tools - she never pushed, or hinted to anyone in the class that they needed to buy her tools.
Once I understood the use of and approach with the bottom of bowl gouge....I was hooked. It clearly can provide you with the best finish on the bottom of the bowl.
Once I understood the use of and approach with the bottom of bowl gouge....I was hooked. It clearly can provide you with the best finish on the bottom of the bowl.
Actually...I have several of the SB and AH handles and bolsters - with Thomson, D-Way and other brands of tool steel in them. The handles are not the same. The AH line allows you to store the tool inside the handle. Quickly, cleanly. Worth a look Reed. And...she has no tooling made with M42. Only uses M2 and V10. Your choice.Well, I don't have any of those handles, and won't be getting any, ever. Main reason is that they will only take one type of tool, which are hers, and probably Stuarts. The handles look the same to me. I believe her tools are M42HSS. I do remember Stuart commenting some thing like 'why use M42 when you have V10'. Some prefer one over the other, but I can't tell any difference at all between them.
robo hippy
- Joined
- Apr 18, 2009
- Messages
- 145
- Likes
- 65
Tim,
This is a 5/8" Ashley Harwood gouge that I received last month. I was expecting more of the 40 deg nose bevel to continue around the side of the tool. Is this representative of what you were using in her class?
Thanks,
Joe


This is a 5/8" Ashley Harwood gouge that I received last month. I was expecting more of the 40 deg nose bevel to continue around the side of the tool. Is this representative of what you were using in her class?
Thanks,
Joe
Joe -
I think if you measure the nose angle - and the angle from the top of the flute down to the tip of the nose angle - it should be about 40 degrees on each. I am not sure I understand your question - but I think that is what you are asking? The 40/40 is not like an Irish or and Ellsworth grind. The wings are not as swept back. And...yep - looks pretty close to what we were using. I did not find these tools to be aggressive or grabby - which was a nice surprise.
I think if you measure the nose angle - and the angle from the top of the flute down to the tip of the nose angle - it should be about 40 degrees on each. I am not sure I understand your question - but I think that is what you are asking? The 40/40 is not like an Irish or and Ellsworth grind. The wings are not as swept back. And...yep - looks pretty close to what we were using. I did not find these tools to be aggressive or grabby - which was a nice surprise.
Last edited:
Tim, it may have been in my mind only, but would swear I saw M42 on one of the tool shafts.
Not sure why anyone would store a tool in the handle, other than for transporting. I wouldn't want the extra weight in the handle for any turning. Kind of like the shot filled handles....
Joe, that does look pretty close to a 40/40. I am surprised at all the facets in the primary bevel. While they won't make any real difference when using the tool, most of the time, the final grind is smooth and even, and if you grind away the heel of the gouge, then it can look like that.
robo hippy
Reed - I have all of the tools that Ashley sells. ( Yes...I know, I know.... ) And was at her school this weekend. M42 came up in discussion, and she explained that she chose not to make M42 based on some metallurgical report that a friend of hers in the woodturning world had done. Under microscopic examination, the cobalt particles that are that make M42 different from M2 , are much larger and his report showed that these particles would break off a sharpened edge under use - thus dulling the edge faster than V10. Frankly - the cost she shrugs for M2 - vs - V10 is about $18 if I remember correctly. For me....I don't see enough difference in performance, because I probably sharpen more than most think necessary.
The storage of the tool steel in the handle may benefit some - depending on how ty store their tools, but I believe it was primarily for the convenience of transport. A couple of things about the carbon fiber handles I have noticed: They are light like wood, they are vastly "warmer" - than aluminum. I have a shot filled handle from a famous hat maker... and like you, I do not really like it. I know some folks do...just not for me. The SB Tools, and now the AH tool handles feel more like wood in use. And, they tend to dampen vibrations better than some other materials. They are not cheaper...which would make them perfect, to me - all around.. The bolsters fit both handles. But the SB tool bolster cannot be inserted and locked into the base of the AH handle. I have put on my wish list with her to make a plug for the bottom end of the handle, so I can drill and tap it - put in screw eyes, and hang 'em like the rest of my tools.
) And was at her school this weekend. M42 came up in discussion, and she explained that she chose not to make M42 based on some metallurgical report that a friend of hers in the woodturning world had done. Under microscopic examination, the cobalt particles that are that make M42 different from M2 , are much larger and his report showed that these particles would break off a sharpened edge under use - thus dulling the edge faster than V10. Frankly - the cost she shrugs for M2 - vs - V10 is about $18 if I remember correctly. For me....I don't see enough difference in performance, because I probably sharpen more than most think necessary.The storage of the tool steel in the handle may benefit some - depending on how ty store their tools, but I believe it was primarily for the convenience of transport. A couple of things about the carbon fiber handles I have noticed: They are light like wood, they are vastly "warmer" - than aluminum. I have a shot filled handle from a famous hat maker...
and like you, I do not really like it. I know some folks do...just not for me. The SB Tools, and now the AH tool handles feel more like wood in use. And, they tend to dampen vibrations better than some other materials. They are not cheaper...which would make them perfect, to me - all around.. The bolsters fit both handles. But the SB tool bolster cannot be inserted and locked into the base of the AH handle. I have put on my wish list with her to make a plug for the bottom end of the handle, so I can drill and tap it - put in screw eyes, and hang 'em like the rest of my tools.Nope, I'm not Reed, but since you didn't send that in a Conversation, I'll post a comment...Reed - I have all of the tools that Ashley sells. ( Yes...I know, I know....
The storage of the tool steel in the handle may benefit some - depending on how ty store their tools, but I believe it was primarily for the convenience of transport. A couple of things about the carbon fiber handles I have noticed: They are light like wood, they are vastly "warmer" - than aluminum. I have a shot filled handle from a famous hat maker...
What stops you from drilling out the bottom of her handles and inserting a wooden plug for your screw eye?
- Joined
- Apr 18, 2009
- Messages
- 145
- Likes
- 65
Tim,
The area is highlighted in the attachment is what I was referring to. It wasn't apparent just looking at the gouge that there was much difference from the One-Way Varigrind jig grind. I tried going thru the motions with the jig and there is a noticeable difference. I guess I expected more of a visual difference.
The area is highlighted in the attachment is what I was referring to. It wasn't apparent just looking at the gouge that there was much difference from the One-Way Varigrind jig grind. I tried going thru the motions with the jig and there is a noticeable difference. I guess I expected more of a visual difference.
Attachments
Tom - and no this is not in a "conversation"...tho I think it "conversational"..?...
The bottom end is open, with an odd taper and 2 pins 180 degrees apart to allow the bolster to be inserted and locked in place. Sure, a piece could be turned, but I would be concerned it may come loose as there are no actual threads to attach to.
I will go down to my lathe room and take some pictures and post them so you can see the details. I can imagine this is not something very easy to visualize.
...The bottom end is open, with an odd taper and 2 pins 180 degrees apart to allow the bolster to be inserted and locked in place. Sure, a piece could be turned, but I would be concerned it may come loose as there are no actual threads to attach to.
I will go down to my lathe room and take some pictures and post them so you can see the details. I can imagine this is not something very easy to visualize.
Joe, I think that - if your Wolverine did is set at 40 degrees - and you are testing it in the area just off of the point of the nose, you will not see much difference. But if you rotate the tool fully in the Wolverine jig you would see quite a difference because the geometry of how you would sharpen the 40/40 freehand on the platform vs a Wolverine jig. We spent a good portion of the 3 days just practicing the grind. Takes practice....So I am continuing to practice on some old Sorby gouges with parabolic flutes. FWIW...Stuart Batty has said that the Johannes Michelson sharpening jig will give you a very close grind to Stuart's 40/40.Tim,
The area is highlighted in the attachment is what I was referring to. It wasn't apparent just looking at the gouge that there was much difference from the One-Way Varigrind jig grind. I tried going thru the motions with the jig and there is a noticeable difference. I guess I expected more of a visual difference.
Tom here are some pictures of the handle and tool and how it all fits together
 WW
WW WW
WW WW
WW WW
WW
WWWWWWWWWell done Tim, very clear now. My idea won’t work if you want to reverse your tool for safe travel. That’s quite a fancy rig she’s got there.
My pleasure Tom!
Yep - because the long taper on the bolster is hollow and has female threads that must screw onto a stud down in the top end of the handle, pushing the tool in from the lower/back end of the handle seemed the only way she could do that. Ashley's handle will accept the Stuart Batty bolsters. But the "L" shaped groove that locks onto the pins in the back of the handle are not present on the SB Tools bolster. So - you can use any SB tools tool w/bolster in any of the AH handles - you just cannot store them in the handle...unless you are creative....
Yep - because the long taper on the bolster is hollow and has female threads that must screw onto a stud down in the top end of the handle, pushing the tool in from the lower/back end of the handle seemed the only way she could do that. Ashley's handle will accept the Stuart Batty bolsters. But the "L" shaped groove that locks onto the pins in the back of the handle are not present on the SB Tools bolster. So - you can use any SB tools tool w/bolster in any of the AH handles - you just cannot store them in the handle...unless you are creative....
That is the Kaufman grind or the grind someone put on a gouge to sell it. It’s not the Stuart Batty 40/40 grind. If that works for you, that's great.Tim,
This is a 5/8" Ashley Harwood gouge that I received last month. I was expecting more of the 40 deg nose bevel to continue around the side of the tool. Is this representative of what you were using in her class?
Thanks,
Joe
View attachment 43226View attachment 43227
- Joined
- Apr 18, 2009
- Messages
- 145
- Likes
- 65
Emiliano
The photo is the following gouge as received from Ashley Harwood.
The photo is the following gouge as received from Ashley Harwood.
Ashley Harwood 10V 5/8" Push Cut Bowl Gouge
• True 5/8” diameter
• Parabolic flute with rounded top edges
• 10V Steel
• 40/40 grind
• Smooth hand polished inner flute surface
• Made in the USA
• Designed by Ashley Harwood
I believe it is safe to say that the "40/40 grind" terminology only specifies the intersecting angle at the tip or point of the gouge. Once the grind progresses around the point to the side it does not have a standard or dimensional specification. To specify a Stewart Batty 40/40 grind I have to rely on a photo taken during SB demo a few years ago, which is difficult. The "40/40 grind" term means different things to different people as to the configuration of side grind.
Last edited:
The biggest difference between the jig ground 40 degree bevel and the platform grind 40/40 is in the wings. In the jigs, the wings are far more acute. I am not really sure how much difference that actually makes in tool performance.
I have done a lot of turning with both the M42 and V10 tools, D Way and Thompson. I gave some to a friend who turned myrtle wood trays for the Oregon coast shops for 30 or so years, about 700 to 800 per year. He said he didn't notice any difference. I am very curious to about who her friend was that came to that conclusion. I would guess it was Stuart because in one demo, he commented some thing like 'with the V10, who needs M42'. If put to a test, and I am not sure how you could do this, probably, like with all things, ask 10 people and get 15 different answers. Stuart does have some good ideas, but I disagree with some of them. Regardless, both will outlast the M2 by a huge degree.
After a 3 day workshop with Allen and Stuart, it took me a long time to figure out what was wrong with Stuart's style, other than he didn't turn bowls the way I do. Finally figured it out. His methods are for turning bowls on a long bed lathe. My methods are for turning on a short bed lathe, which means slide the headstock down to the end, or pivot the headstock. I guess I could adapt to holding the tool out away from my body like he does, but feel that I have better control by keeping the tools in close to my body and doing all of the movements with my body and not my arms. I got a good laugh, silent one since it was a demo, when Stuart said that you don't want to hold the tool handle under your forearm when using a scraper because you don't have the control that you do with your arms out away from your body and a long handle.
As for the 40/40 grind, I prefer it. Platform sharpening came easy to me. As for doing it with jigs, Ron Brown (?) has a jig set up that can do it, but it requires a 3-inch protrusion. Dennis Gooding had an article under tips and tutorials where it could be done with the Varigrind setup and a 2-inch protrusion, but after reading it, it didn't make sense to me, mostly because I don't use the Wolverine at all. Maybe I will have to invent one..... You can't get enough sideways roll to the tool with the standard gouge jigs. The Tormek is better, but still not good.
robo hippy
I asked Ashley if she meant Stuart - when talking about the M42 vs V10...she replied, "No, this person has a history in metallurgy". So, I don't know who it is and she did not divulge any names.
I know about the Ron Brown jig...and about Ron Brown..... So. I bought the Johannes Michelson set up. I will try a free hand, and a Michelson and compare them - as that tis the only other grind I have known Stuart to mention as being extremely close to his.
Agree with you about the "evolution" of Stuart's style of turning developing around a fixed head, long bed lathe. That makes complete sense.
I know about the Ron Brown jig...and about Ron Brown....
. So. I bought the Johannes Michelson set up. I will try a free hand, and a Michelson and compare them - as that tis the only other grind I have known Stuart to mention as being extremely close to his.Agree with you about the "evolution" of Stuart's style of turning developing around a fixed head, long bed lathe. That makes complete sense.
The 40/40 grind was developed and promoted by Stuart Batty. It only means different things for people simply because they do not know what it is and it is not an easy grind to achieve. It is also very difficult for beginners to maintain it. You can ruin it in one 15 seconds sharpening session. For your new bowl gouge to be a 40/40 grind, you need to set the platform at about 22.5 degrees and take most of the bevel off. You want a 1/8 in bevel, smaller if you want to undercut a rim. You can also take the heel freehand, I have one platform set at 22.5 just for that and for a bunch of NRS.Emiliano
The photo is the following gouge as received from Ashley Harwood.
Ashley Harwood 10V 5/8" Push Cut Bowl Gouge
• True 5/8” diameter
• Parabolic flute with rounded top edges
• 10V Steel
• 40/40 grind
• Smooth hand polished inner flute surface
• Made in the USA
• Designed by Ashley Harwood
I believe it is safe to say that the "40/40 grind" terminology only specifies the intersecting angle at the tip or point of the gouge. Once the grind progresses around the point to the side it does not have a standard or dimensional specification. To specify a Stewart Batty 40/40 grind I have to rely on a photo taken during SB demo a few years ago, which is difficult. The "40/40 grind" term means different things to different people as to the configuration of side grind.
I have the same problem. I have 2 Stubby lathes. ANd they are, well, stubby, LOL I turn a lot from the end like you. Some of the cuts with Stuart, my body gets in the way of the fluid cut if I don't stand on the side.The biggest difference between the jig ground 40 degree bevel and the platform grind 40/40 is in the wings. In the jigs, the wings are far more acute. I am not really sure how much difference that actually makes in tool performance.
I have done a lot of turning with both the M42 and V10 tools, D Way and Thompson. I gave some to a friend who turned myrtle wood trays for the Oregon coast shops for 30 or so years, about 700 to 800 per year. He said he didn't notice any difference. I am very curious to about who her friend was that came to that conclusion. I would guess it was Stuart because in one demo, he commented some thing like 'with the V10, who needs M42'. If put to a test, and I am not sure how you could do this, probably, like with all things, ask 10 people and get 15 different answers. Stuart does have some good ideas, but I disagree with some of them. Regardless, both will outlast the M2 by a huge degree.
After a 3 day workshop with Allen and Stuart, it took me a long time to figure out what was wrong with Stuart's style, other than he didn't turn bowls the way I do. Finally figured it out. His methods are for turning bowls on a long bed lathe. My methods are for turning on a short bed lathe, which means slide the headstock down to the end, or pivot the headstock. I guess I could adapt to holding the tool out away from my body like he does, but feel that I have better control by keeping the tools in close to my body and doing all of the movements with my body and not my arms. I got a good laugh, silent one since it was a demo, when Stuart said that you don't want to hold the tool handle under your forearm when using a scraper because you don't have the control that you do with your arms out away from your body and a long handle.
As for the 40/40 grind, I prefer it. Platform sharpening came easy to me. As for doing it with jigs, Ron Brown (?) has a jig set up that can do it, but it requires a 3-inch protrusion. Dennis Gooding had an article under tips and tutorials where it could be done with the Varigrind setup and a 2-inch protrusion, but after reading it, it didn't make sense to me, mostly because I don't use the Wolverine at all. Maybe I will have to invent one..... You can't get enough sideways roll to the tool with the standard gouge jigs. The Tormek is better, but still not good.
robo hippy
Can you please advise if it is possible to view the demoI'm happy to hear that you saw my demo. No wonder you nailed the bottom, LOL. It would not matter how long your handle is if you have a tailstock on. I'm guilty of forgetting things when I'm talking too much, and or on camera. The bottom bowl gouge as a learning curve, once you master there is no tool better for the bottom.
regards Brian
john lucas
AAW Forum Expert
The flat carbide tools are nothing like the cupped carbide Hunter tools. The Hunter tools can be used as bevel riding tools and leave a spectacular finish. Here is a quick piece I cut with the Hunter badger to show how clean it cuts and to demonstrate how you can cut a 90° corner on a box.Thank you, as a fairly new turner I have some Easy Wood carbide tools. It looks like the Hunter carbide cutters are thicker/deeper? Do you find this is more helpful? I am looking for another tool that would help me with end grain and hollowing. Again thank you.

Hi Brian,Can you please advise if it is possible to view the demo
regards Brian
The demo that Emiliano and myself were referencing was one that he gave for Woodturning 360. I'm afraid that particular demo is no longer available.
That little tool, the Hunter #4 is almost too good to be true. I was a nonbeliever until @john lucas sent me one. I was instantly hooked. However, if you never used one, you have to watch John's Youtube video about it. I did not, and I had a huge catch on the bottom of a big Koa calabash. I held the tool horizontal. It is my to go tool for the inside of boxes. However, there are countless situations where this tool can excel at cutting wood.The flat carbide tools are nothing like the cupped carbide Hunter tools. The Hunter tools can be used as bevel riding tools and leave a spectacular finish. Here is a quick piece I cut with the Hunter badger to show how clean it cuts and to demonstrate how you can cut a 90° corner on a box.
View attachment 43304
End grain only or face grain as well?
john lucas
AAW Forum Expert
You can turn face grain with the Hunter Badger. Or any Hunter tool for that matter. The Badger excels at cutting end grain. Well actually so does the Hercules or Viceroy.
Thanks John!
John, it looks like to me that the Badger just comes with a #3 cutter. What are you using with a #4 cutter or did I just misunderstand?
Thanks!
Thanks!
john lucas
AAW Forum Expert
He may have changed the numbers since I got that tool. I have 2. One has a 6mm cutter and one has the 12mm cutter. The smaller cutter removes wood faster. The larger cutter takes less skill to use.
Thanks, I have one (Badger) with the #3 cutter which is 10mm. As far as I can see that's all he's offering in the Badger now. Regardless, I need more practice with it for sure. Love the Hercules tool and so does my daugher who has even less experience than I do.
Last edited:
- Joined
- Jan 27, 2005
- Messages
- 12,899
- Likes
- 5,188
- Location
- Dalworthington Gardens, TX
- Website
- pbase.com
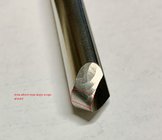
... John, would you mind linking your hunter #4 video? Also, I bought this tool used and I'm trying to determine if it's a hunter tool or a knockoff,, and if so, which one. There are no markings anywhere on it and has a 3/8" shank. My guess is the "small tapered shoulder tool" as the handle is 12" and the shank sticks out 5.25"
Tom, I think that you can find the demo on his YouTube channel, john60lucas.
john lucas
AAW Forum Expert
I cant link from my phone but if you type in john60lucas/Hunter. It will take you right to the Badger video.
A few will remember Del Stubs and his dvd where he was cutting wood with a modified piece of water pipe. It comes down to presenting the tool in a position that it will cut cleaning and adjusting your movement in unison with the particular tool. Find what works for you and practice to perfect that cutting from top to to bottom of the bowl. Turning fifty years and still leaning.