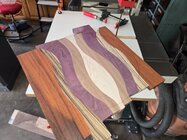
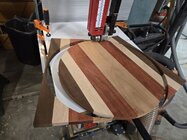
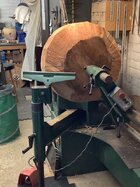
I simply don't worry about cutting it nicely round. I get reasonably close freehand, but it's going to be trued up once on the lathe anyway, so why worry? And with much of the work I do, especially with 4/4 material, a drilled hole would simply complicate what I need to do. I don't do many bowls anymore.
-
December 2025 Turning Challenge: Single Tree! (click here for details) -
Congratulations to Bob Henrickson, People's Choice in the November 2025 Turning Challenge (click here for details) -
Congratulations to Guillaume Fontaine for "Old Tea Pot" being selected as Turning of the Week for December 15, 2025 (click here for details) -
Welcome new registering member. Your username must be your real First and Last name (for example: John Doe). "Screen names" and "handles" are not allowed and your registration will be deleted if you don't use your real name. Also, do not use all caps nor all lower case.
You are using an out of date browser. It may not display this or other websites correctly.
You should upgrade or use an alternative browser.
You should upgrade or use an alternative browser.
Cutting circles on band saw
- Thread starter David Friedman
- Start date
Well, one thing I tend to do differently, when cutting up a log for bowls, I always cut a flat spot on the bark side so there is a flat spot for the blank to sit on and then I can scribe the circle with a compass on the top side. To me, this is still faster than using a jig. Having the circle perfect is not necessary because you never can get a chuck perfectly centered and the outside of the bowl blank still needs to be trued up. This does not work for natural edge bowls, and I turn very few of them.
robo hippy
robo hippy
- Joined
- Apr 27, 2004
- Messages
- 9,304
- Likes
- 6,058
- Location
- Lakeland, Florida
- Website
- www.hockenberywoodturning.com
I start my blank prep by finding the center of the opening .
For a NE hollowform or NE bowl this will consider the bark contours that will form the rim.
Also takes into account the sapwood that will show at the rim.
For a bowl from a half log the center point will balance the grain and control the sapwood that will show .
When driven by a spur in the opening center. The grain orientation will be maintained unless the tail center is moved a large amount causing a big change in the angle of the grain from it original plane. It is rare that I don’t foresee this.
Can always choose another center if needed - really rare
I split the log down the middle cut to bowl width or a little more, draw a circle on the flat side to get max bowl size, draw a circle for the faceplate on the same flat side. I measure from middle point to bowl edge then set the bandsaw pin distance. Drill a hole at the compass middle point and mount it on the bandsaw jig and cut a perfect circle, flip it over and mount the faceplate at the circle drawn for it and mount it on the lathe. It is within an 1/4" or less of running true. I haven't tried a NE bowl yet, may when I get down to the bottom of the black walnut stack...
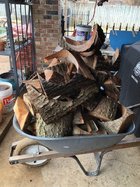
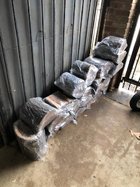


I have owned my bandsaw for 15 plus years, and cut freehand until I joined this forum, a club, then the AAW at the first of this year. I don't know how many blades I've ruined, still have several hanging on the wall. Got to a point I sawed the corners off with the chainsaw and started turning...Does anyone have experience using the Carter Accu Right circle jig? I am looking for a jig to make circles and possibly my own bowl blanks. Not sure if I should spend $100+ on this jig? Or for smaller circles buy a less expensive jig for router?
Thank you.
I built a sled using tips from the guys here and bought new blades at the same time. There is nothing complicated about the design, pictures are above. Just some furniture plywood I found on the side of the road for trash pickup, a couple strips of oak I had, couple washers and a bolt. I had a piece of 1/4" slick rod left over from something for the pin.
The reason for this post is more of an update than anything. I have cut about 140 bowl blanks since building this, still using the same 3/8" 2tpi carbon blade, just had to clean the gunk off of it a couple times. The jig is still in great shape.
If you are a little handy, you can build a good sled that cuts almost perfect circles, get the most out of your wood, save yourself a bunch on ruined blades if you are like me, freehand not working that great....Everyone is different and there are so many variations that can be had. I suggest looking them over, one might just fit for you.
Built my circle-cutting jig out of plywood scraps, a piece of aluminum t-track, a t-bolt and knob. The center pin is a 1/4-20 bolt, threaded through the t-track. The t-track slides in a groove routed into the plywood.
I realize I could turn my blanks to round on the lathe, but trimming them on the bandsaw makes for a lot less shavings to clean up!
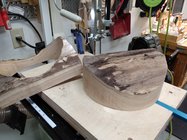
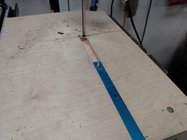
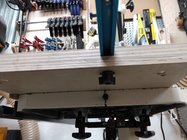
I realize I could turn my blanks to round on the lathe, but trimming them on the bandsaw makes for a lot less shavings to clean up!


Nice jig GR.
I made one major modification to the slot slider on my circle jig. I used hard maple for the slider. When I narrowed the slider to the right size, I stopped the cut before the end and squared the end of cut off so that the wider end acts as my stop block. Thus I don't need a separate stop block. I also made it a little snugger at the end of the cut so it kind of locks the jig in place so it can't easily shift backward out of the best cutting position.
I woke up this morning and saw this old thread revived.
I've never made or used or needed a jig. I have used the cardboard circle technique held in place with a nail or awl, then bandsawn. But better for me is to flatten both top and bottom, draw a circle with a compass or plastic circle jig, then trace over the pencil line with a sharpie pen to make it easier to seal. Cut freehand.
No need for precision but it's easy to get very close if I imagine turning the block constantly around the marked or visualized center. Good lighting, steady hands.
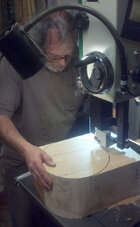
Since I prefer to turn dry wood, I'll seal and let the rectangular block dry for a while (year or so?) then cut away any cracks that developed, mark and cut the circle, seal again, and let it continue to dry. A blank this size might take a while, dryness checked by recording the weight.
For bowl blanks from thick slabs, air or kiln dried, I like to flatten both sides with the drum sander before rounding - makes the circle easier to see and cut AND reveals the true color and any problems in the wood. Blanks like that, ready to mount and turn, bring good prices at our club wood auctions.
JKJ
I've never made or used or needed a jig. I have used the cardboard circle technique held in place with a nail or awl, then bandsawn. But better for me is to flatten both top and bottom, draw a circle with a compass or plastic circle jig, then trace over the pencil line with a sharpie pen to make it easier to seal. Cut freehand.
No need for precision but it's easy to get very close if I imagine turning the block constantly around the marked or visualized center. Good lighting, steady hands.

Since I prefer to turn dry wood, I'll seal and let the rectangular block dry for a while (year or so?) then cut away any cracks that developed, mark and cut the circle, seal again, and let it continue to dry. A blank this size might take a while, dryness checked by recording the weight.
For bowl blanks from thick slabs, air or kiln dried, I like to flatten both sides with the drum sander before rounding - makes the circle easier to see and cut AND reveals the true color and any problems in the wood. Blanks like that, ready to mount and turn, bring good prices at our club wood auctions.
JKJ
Made a jig years ago, but finding a blade that lasts on my bandsaw long enough to make it worth it is my problem.
The problem with cutting circles on a bandsaw is that it wears the blade more on one side than the other. This eventually makes the blade useless for accurate straight cuts.
I’m not sure why some folks think they need perfectly circular bowl blanks, that’s what the lathe is for isn’t it, making the wood perfectly round?!
Seriously, making ten or twelve straight cuts is quicker and preserves the blade for other jobs.
I’m not sure why some folks think they need perfectly circular bowl blanks, that’s what the lathe is for isn’t it, making the wood perfectly round?!
Seriously, making ten or twelve straight cuts is quicker and preserves the blade for other jobs.
The problem with cutting circles on a bandsaw is that it wears the blade more on one side than the other. This eventually makes the blade useless for accurate straight cuts.
If I make blanks round, it's because I want to.
Some options for those who what round blanks but experience uneven tooth wear:
- Alternate cutting by rotating in the opposite direction.
- Sharpen the blade when needed. I usually sharpen a blade 3-4 times before replacing it. Easy if you know how.
Some blanks I cut close to final shape on the bandsaw, flatten the top an bot with a drum sander, then smooth the sides on a disk sander before mounting on a screw chuck. These, for example:, curved but not round. For this design I use only dry wood.
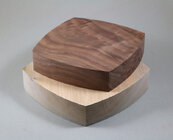
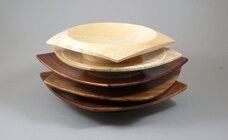
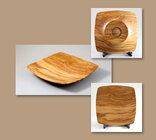
JKJ
Old thread.... Bill, I have NEVER heard that about cutting circles with the blade wanting to cut curves rather than straight. Best guess would be using cheap blades. With the Lennox Diemaster bimetal blades, no problems. I have found cutting into rough circles, I use a compass/divider to scribe a line to be helpful, and good lighting so these old tired eyes can see.... Cutting blanks into close to round circles is a HUGE time saver to a production turner.
robo hippy
robo hippy
...I have NEVER heard that about cutting circles with the blade wanting to cut curves rather than straight.
It can happen but I don't consider it a big deal. What I found dulls one side of a blade more than the other is making "skimming" cuts on rectangular blanks. I'm a fanatic when it comes to square and rectangular blanks. After I process and dry such blanks, I often put them back on the bandsaw and make skimming cuts on the four sides and the ends. These cuts can be cutting with just one side of the blade with the other in the air. A lot of this will definitely dull the teeth that are set towards one side, especially with certain type of wood.
However, dulling the, teeth on one side has never interfered with me making straight cuts - I just cut a little slower. (Surprise: I like to use the fence for straight cuts and hold one side firmly against the fence by one of several methods.
In case anyone cares, I make skimming cuts after drying to:
- Expose any defects that I didn't detect earlier or, like check and cracks, defects which developed during the drying process. When I leave defects in the wood I mark them with a red sharpie so I can cut them away or work around them if needed. I like good wood.
- Square up spindle/box/vase blanks to make centering and holding in a chuck easier. Woods like holly, persimmon, and dogwood can go significantly trapezoidal depending on the ring orientation.
- Clean up the blank to remove a tiny bit of the wood darkened by the drying process. Lets me see the color and figures better. I think this is especially useful when giving blanks to friends, students, or donating to the club wood auction. Lets people see what they are getting; IMO adds value.
BTW, I almost always use the inexpensive Lennox spring steel blades, 1/2"x3tpi for green wood. I have some of the bimetal Lennox blades, a Starrett, and some carbide, but the spring steel is my first choice. I have them made locally. I can cut a LOT of wood with one blade if I sharpen several times.
And I can identify with the "tired, old, eyes!" I use three lights at the bandsaw but still, after marking a circle with a compass and pencil I usually go over the line by hand with an extra-fine black Sharpie pen. Makes a dark line so much easier to see. For some round but especially non-round "squarish" shapes, saw just outside the marked line then disk-sand to the line.
I find the advantages of cutting the circle outweigh the small time savings of just cutting off the corners. For example, at the lathe it's quicker, less effort, and perhaps even a bit safer to true up a blank that's already cut round and nicely centered.
Another advantage of cutting a circle: the corners are gone allowing a larger piece to be turned on a given lathe. For example, the largest of these two platters is about 19-1/2", turned on my PM with a 20" swing. If I had started by simply removing the corners the result would be a smaller platter. These are Jatoba, oil finish.
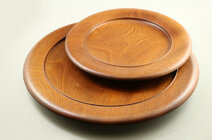
JKJ
Bill, I have NEVER heard that about cutting circles with the blade wanting to cut curves rather than straight. Best guess would be using cheap blades.
robo hippy
The blade doesn’t want to cut curves, it’s just that if you cut enough blanks into perfect circles with a jig the blade wears more on one side than the other.
And blade quality has little to do with it apart from the time it takes. It’s just physics.
I learnt about this many years ago on a woodworking forum. It’s a well understood problem if you do both flatwork and wood turning.
Some folks keep one specific blade for cutting circles and don’t use it for anything that needs accurate straight cuts.
- Joined
- Feb 28, 2021
- Messages
- 1,770
- Likes
- 1,582
- Location
- Roulette, PA
- Website
- www.reallyruralwoodworks.com
I'd kind of like to see the actual physics of that theory... sounds more to me like "old school bunkum" - A.K.A. Old wives tales.. even at the microscopic level given the point of contact of the teeth to wood, I just don't see it. One of those things for Mythbusters, I'd say. I just don't see it affecting accuracy - by the time a blade got dulled enough by cutting circles (and I'd bet you it'd dull far faster cutting MDF or glued-up flatwork) it'd be too dull anyways to cut flatwork either. Most of the dulling I'd imagine comes from cutting into the bark of green logs, where it'd be harboring more abrasive dirt & silicates.The blade doesn’t want to cut curves, it’s just that if you cut enough blanks into perfect circles with a jig the blade wears more on one side than the other.
And blade quality has little to do with it apart from the time it takes. It’s just physics.
I learnt about this many years ago on a woodworking forum. It’s a well understood problem if you do both flatwork and wood turning.
Some folks keep one specific blade for cutting circles and don’t use it for anything that needs accurate straight cuts.
On the subject of blades, I use the .032 thickness blades rather than the standard .025. They cut straighter without wandering. Possibly they cut curves less efficiently than the thinner blades but I can't say I've seen a difference.
Mythbusters were far from infallible. Never in doubt, but often wrong or not really testing the idea properly. One striking instance was when they "proved" that in battles between wooden warships, that splintering could not be responsible for battle injuries and deaths. That despite centuries of ships' logs, surgeon and after action reports which explicitly enumerated the wounds and deaths caused by splinters. "Splinters" being anything up to feet long. We are all familiar with how oak behaves. Broken ends are jagged and sharp. The show was entertaining but not necessarily correct. Youtube 'experts' are their descendants.One of those things for Mythbusters, I'd say.
I'd kind of like to see the actual physics of that theory... sounds more to me like "old school bunkum" - A.K.A. Old wives tales.. even at the microscopic level given the point of contact of the teeth to wood, I just don't see it. One of those things for Mythbusters, I'd say. I just don't see it affecting accuracy - by the time a blade got dulled enough by cutting circles (and I'd bet you it'd dull far faster cutting MDF or glued-up flatwork) it'd be too dull anyways to cut flatwork either. Most of the dulling I'd imagine comes from cutting into the bark of green logs, where it'd be harboring more abrasive dirt & silicates.
From what I’ve read it’s practical experience from those that have experienced the problem.
Mythbusters were far from infallible.
I agree. I don’t know if at times they deliberately ignored certain facts just for the sake of entertainment, or they didn’t get the right information? Very entertaining though at times.
Well, for sure, how wide your blade is will limit how tight of a curve you can make. I use a half inch blade, 3 tpi, and the thicker blades like Kent. They do a better job when cutting a straight line. On the big saw, it is a 1 1/4 inch wide blade, and it can drift a bit, but the amount is minimal.
robo hippy
robo hippy

