• July 2025 Turning Challenge: Turn a Multi-axis Weed Pot! (click here for details)
  • Congratulations to Bobby McCarly for "Hemostatmorphodon" being selected as Turning of the Week for July 7, 2025 (click here for details)
  • Welcome new registering member. Your username must be your real First and Last name (for example: John Doe). "Screen names" and "handles" are not allowed and your registration will be deleted if you don't use your real name. Also, do not use all caps nor all lower case.

Green Wood / Mold Issue

Joined
Dec 10, 2021
Messages
14
Likes
3
Location
Birmingham, Al
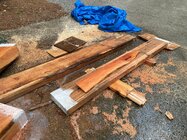
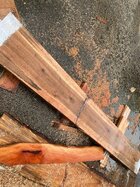
A few weeks ago I obtained some slabs of sweetgum and sycamore. The slabs varied in thickness 4", 6" and 8"; with each being about 14"-16" wide. When I cut the slabs to length, after cutting the slabs to length, I applied Anchorseal 2 to the end grain, and also brushed on approximately 4" around all four sides. After a week the sweetgum started showing signs of mold (as can be seen in the photo below); the sycamore shows no mold. I'm storing the wood in my basement which stays around 55-60 degrees. Is it normal to have this much mold growing on the surface? Could it be due to the fact that all wood/moisture is stored in one corner of the basement?


IMG_8498.JPEG
 
Possibly stupid question (that I'm sure has been asked and answered many times) but, assuming you wear proper PPE, is this a problem? Would that surface layer just be turned off and then dry out harmlessly?
 
A few weeks ago I obtained some slabs of sweetgum and sycamore. The slabs varied in thickness 4", 6" and 8"; with each being about 14"-16" wide. When I cut the slabs to length, after cutting the slabs to length, I applied Anchorseal 2 to the end grain, and also brushed on approximately 4" around all four sides. After a week the sweetgum started showing signs of mold (as can be seen in the photo below); the sycamore shows no mold. I'm storing the wood in my basement which stays around 55-60 degrees. Is it normal to have this much mold growing on the surface? Could it be due to the fact that all wood/moisture is stored in one corner of the basement?


View attachment 76823
Whenever I see that kind of mold on the surface, I always spray it with the bathroom (or kitchen) cleaner, like Clorox, "with bleach". Might take a few spritzes over a couple days to kill it off.

I kind of agree all the wood, with fresh cut ends, has created a little micro-environment in that corner of your basement. Too much moisture. I would think it would dissipate relatively quickly as the ends of each slab dry out a bit.
 
Last edited:
Possibly stupid question (that I'm sure has been asked and answered many times) but, assuming you wear proper PPE, is this a problem? Would that surface layer just be turned off and then dry out harmlessly?
I typically cut the slabs to rounds on my bandsaw when ready to use, so you would cut the mold off there. If you are going to slice into spindle blanks, it would still be there when turning (or you can also cut it off the end of each spindle). You could use proper PPE and wouldn't be a big problem when turning, but I think it would depend on if the mold spores are still active, or has the wood dryed out, and are the spores still active (or not) before you start turning it? Those pictured above are evidently active spores based on the original post.

In any case, I like to kill it off and not let it get any worse, which is why I made a comment above about spraying it with a weak bleach solution. If you turn with mold spores that are active I think the mold would go airborne in your turning area "for a while". I'm not sure about all that, but it's an assumption.
 
I've been traveling so I apologize for the late response. John K., I took your advice and put a fan in the basement for improved circulation. I also plan on pulling the rack out away from the wall to allow for more air flow. John D., I took your advice and sprayed a bleach solution on the wood. It definitely helps, however, it doesn't get the mold directly behind the Anchorseal. I do plan on cutting the blanks into rounds, which will help the blanks to dry out quicker due to less mass.

Dwayne, I could be wrong, but I don't think it's fungal spalting. The slabs were cut on June 4th (See Photo Below), I cut them into square blanks within a couple days and sealed the ends. When I sealed the ends, there was no sign of mold or spalting.

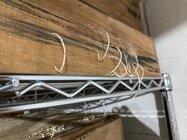
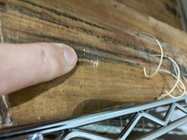
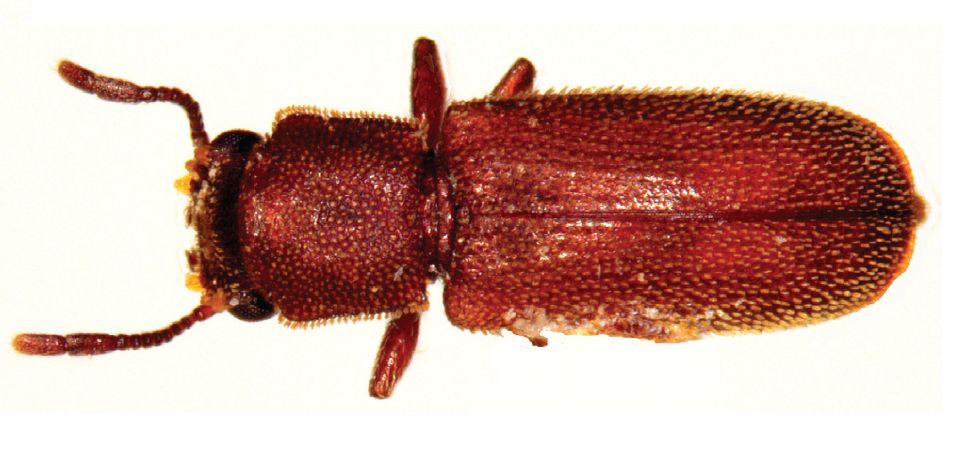
In looking at the wood, I also noticed something I've never seen before (See Photo Below). There is some type of very small insect that is in the sweatgum. They're not termites. I guess they're trying to escape from the wood and leaving these small tunnels similar to termites, but the holes are only 1/16th of an inch. I have not seen the actual insect, just the tubes which i suspect keep them moist. Has anyone ever seen these before?
 

Attachments

  • IMG_2530.JPG
    IMG_2530.JPG
    1,019.2 KB · Views: 33
  • IMG_2534.JPG
    IMG_2534.JPG
    1.1 MB · Views: 32
  • IMG_3942.JPG
    IMG_3942.JPG
    449.3 KB · Views: 34
  • IMG_3944.JPG
    IMG_3944.JPG
    439.6 KB · Views: 33
In looking at the wood, I also noticed something I've never seen before (See Photo Below). There is some type of very small insect that is in the sweatgum. They're not termites. I guess they're trying to escape from the wood and leaving these small tunnels similar to termites, but the holes are only 1/16th of an inch. I have not seen the actual insect, just the tubes which i suspect keep them moist. Has anyone ever seen these before?
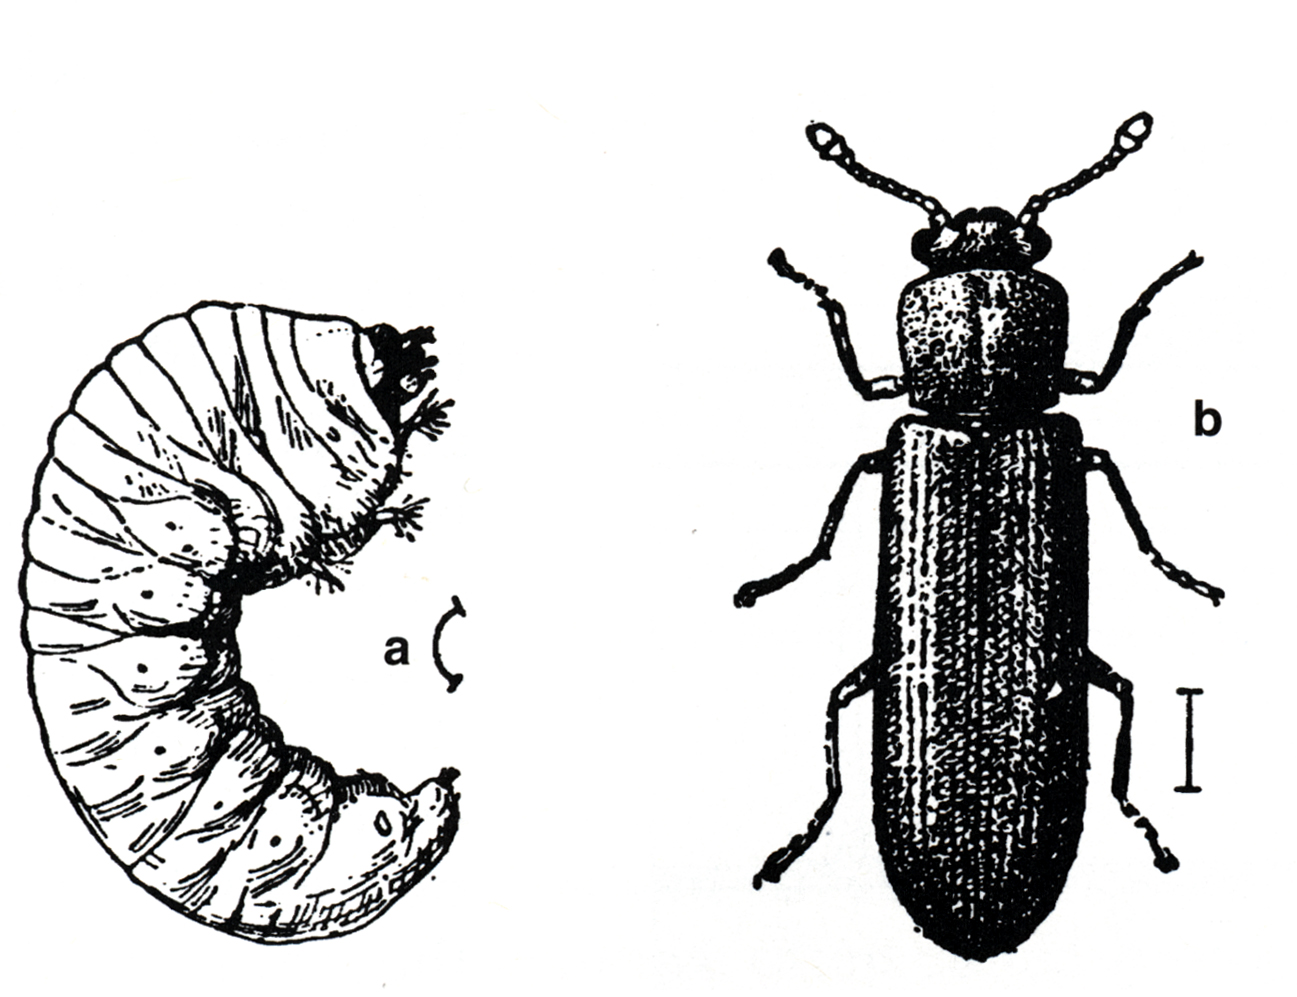
Powder Post Beetles. I'd advise getting those pieces of wood out of the house ASAP before they decide to chew on your antique furniture and any other unfinished wood they can get to.
 
There are several types of PPBs, some go for different wood. Some types will go for dry wood, others not. The larvae bore deep into the wood eating as they go. There is a lot of info on the web about what to look for and how to protect from infestation. A sure sign of active infestation is fine wood powder, frass, dropping from the holes. The females lay eggs in pores and crevices in the wood, the eggs hatch and the larvae start boring and eating. They may stay in a chunk of wood for years before they come out as adults and fly away. There has been much written on this and other forum about what to look for and what to do. You might try a search here and on the wood web.
This recent thread had some comments:

Here's an article on PPBs.

Something on the life cycle:

If cutting logs you can protect from PPBs by applying products like Boracare.

If there is no active beetle infestation, the wood is fine to turn. The trick is knowing when to turn and when to panic.

There are other types of beetles, for example Ambrosia maple typically has beautiful fungal discoloration with two or three beetle holes close in a row across the discoloration. Here are some blanks I cut from some BIG ambrosia log sections: about 30" dia, 16" length.. Hard to see beetle holes in these. (Ambrosia beetles are different beetles than powder post beetles.)

ambrosia_maple_IMG_20171202_134017_767.jpg

Wormy chestnut can be beautiful. I think the holes were also caused by ambrosia beetles. I take all the wormy chestnut I can find.

handmirrors_two.jpg

The fungus could be the start of spalting, but you won't see any spalted wood for a while, maybe months, as the fungus moves through the wood eating what I can. BTW, the black lines you see in spalted wood are not the spalting itself but the protective zone lines the fungus create to protect their claims. If you keep the wood damp the fungus can work it's way through the wood and cause spalting. But there's a fine line between spalting and rot.

JKJ
 
Brad, when I process Arbutus (Madrone) I rough turn bowl blank and square pepper mill blanks and then boil in a 60 gallon pot for 6 hours. I then air dry for a day outside and then move them to my basement. I use a dehumidifier 24/7 and a big fan, the fan is on a timer for 8 hrs a day. I monitor the surface moisture daily and once its dry enough to not mold I then stop using the fan. I use cleaning vinegar to wash the wood if it does get mold. The green fuzzy mold I do get when the wood is too wet or I don't use the fan stains black right through the blank. I am processing different wood in a different part of the country but experiment to see what works for your situation. Have fun and good luck.
 
Dave, thank you for your response. What is the purpose of boiling the wood?

I'm not Dave, but if I may butt in... According to those with experience boiling can do several things:

One, it can reduce drying time.

Two, it can equalize stresses in the wood and reduce or eliminate warping and cracking.

Three, it will kill fungus or anything else living in the wood.

The late Jim King, wood exporter in Iquitos Peru, told me they produced a LOT of bowls and sold to markets in the US and elsewhere. He said every roughed bowl was boiled along with others in a 55-gal drum over a wood fire. The boiling time was determined by the wood thickness. Some don't like boiling since it can change some colors a little. Some boil in water in a turkey fryer, but must acknowledge the danger of boiling a bowl too close to the diameter of the fryer if the wood swells and plugs the fryer, steam pressure builds, and the thing explodes.

I got a huge block of extremely rare Pink Flamewood from Jim and he said it MUST be boiled or it would self destruct. (Instead, I cut it up into little pieces, let them dry, and made many small things)

pinkflame.jpg
We've used the carved coffee scoop every day for many years.

The brilliant turner Steven Russell used to have a web site which had a wealth of information about woodturning including boiling - why, how to, etc. Unfortunately he let the website go away. His articles were so useful I was devastated. I got on the internet archive (Wayback Machine), found his old web site, and spent a day downloading all his articles to my local machine - html, photos, everything - giving me an exact copy of his web site. Any specific questions I could look up what he said (when I get time).

BTW, the internet archive is S..L..O..W but SO incredibly useful when you need it. If it's still how it used to be, everything put on the internet is still accessible through the archive. Probably even this sentence.

JKJ
 
Dave, thank you for your response. What is the purpose of boiling the wood?
Along with what John mentions it can stop most cracking once you have a system for the species sorted out. Technically I don't have a clue what the boiling does but I suspect it breaks the cells structure so the cell moisture can leave at the same rate as the free moisture and reduces that stress. I mostly only boil Arbutus (Madrone) because it cracks so badly and very quickly in warm weather its not suitable for turning. If you process it correctly its a fantastic turning wood. Have fun and I do have some posts on my blog on our website darawoodworks just google it, cheers
 
I mostly only boil Arbutus (Madrone) because it cracks so badly and very quickly in warm weather its not suitable for turning.

I forget if I already said this, but all the madrone I've had, both some highly figured from Pete at Big Monk, and beautiful creamy white from the NW through a friend, had been boiled. Pete indicated the only madrone he sold was boiled. Most I have are 4x4 squares and not a single crack or any warping after years of storing. Love to turn it, fine grained, cuts well.
.
That's my only experience with madrone and with boiling. The native species here, cherry, hickory, sassafras, the maples, dogwood, persimmon, and many others including oak can dried successfully without boiling if the blanks are not too large, the engrain is sealed well, and I keep the juvenile wood out of the blank.

You have me curious about what boiling does to the cells. Google offerssome AI comments. I might dig through some technical books.


OK, I checked some of Steven Russell's boiling articles - he started experimenting because of matrone!

"I first started experimenting with boiling green wood in 1996. At the time, I had a supply of green Madrone Burr in my studio. This burr is quite unstable when it is green. Drying defects typically include severe cellular collapse, gross deformation, numerous checks and corrugation. With a supply of the burr in stock, I began to experiment by boiling green wood to reduce its drying defects. The procedure I developed for boiling green wood was a tremendous success."


He did comparison tests of different drying methods with 450 bowls. Some snipppets from one of his articles on boiling:

"In March of 2000, the first group of four hundred and fifty bowls and platters from the boiling green wood and paper bag testing were removed from drying production. All of these bowls and platters were dried in paper bags. Some of the rough outs were boiled for one hour and were placed into paper bags without end grain sealer. The balance was placed into the bag straight off the lathe, without end grain sealer. The species included in this analysis: Maple, Walnut, Mulberry, Sycamore, Pecan, Winged Elm, White Ash, Flowering Plum, Bodark, Sweet Gum, Black Ash, Cottonwood and a few others."


This:
"Boiling Green Wood - Summary and Advantages

This testing clearly demonstrates that the addition of a boiling cycle helps to prevent or eliminate many common drying defects. For me, I plan to boil, and then bag much more often! I will reserve the plain paper bag method for pieces whose grain character and overall defects are within the demonstrated success profile. Other pieces that exhibit various defects or possible grain/growth ring compromises will get a "hot water bath."

I have also found that boiled timber dries an average of fifty percent faster than non-boiled timber. Another advantage comes when you sand the piece. Species that tend to clog the sandpaper when traditionally air-dried, offer little to no clogging when they are boiled. In addition, most unwanted guests are eliminated in the boil cycle. This is especially important if you dry your bowls inside your home and you want to stay out of divorce court!

It is clear that boiling green wood does have benefits for marginal, as well as sound pieces. It is my guess that the process relieves or relaxes much of the internal stresses. The area around the branchlets on dry (boiled) pieces was very tight and showed no separation from the surrounding timber. I believe that the combination of the heat and hot water loosens the lignin bond between the cell walls. The internal stresses then relax a bit when boiling green wood and when the piece cools, the lignin bond "cures" (for lack of a better word) in the new relaxed state. Wild grain and other defect prone areas are therefore, brought under control."


And one more snippet:
"Boiling Green Wood - Final Thoughts

Some turners say that the reason they do not like to boil is the inherent color loss. In my experience, the outer 1/16" or so WILL loose color, but below that, the color is unaffected. I have carefully compared the color in air dried and boiled pieces many times. In my opinion, there is no detectable difference between color, shading or tone values in boiled timber and that of traditionally air-dried timber. If your rough out is only 1/8" or less in thickness, you have a valid point regarding color loss.
However, on a 12" bowl with a wall thickness of one inch, the point is moot
"

There is MUCH more about boiling, drying, and turning. way to much to put in a thread.
There's a good article on the HOW of boiling.

For those who haven't heard about Steven, some credentials (remember this is some years old):

"Steven D. Russell is a professional studio woodturner, teacher and writer. He has written numerous articles for international woodturning magazines, which have been published in more than 78 countries around the world. Steve has demonstrated in numerous cities across the United States. His studio, Eurowood Werks, specializes in bowls, platters and hollow forms with unique visual and tactile treatments.
He's the "...founding President of the Lone Star Woodturners Association, Inc., an AAW member chapter. The LSWA is a 501(c)3 non-profit educational organization dedicated to teaching and demonstrating the art and craft of woodturning... a featured writer for the Guild of Master Craftsman's "Woodturning" magazine, published in London England..."

Looking through my files I counted:
55 articles in his "Woodturning Education" library, 58 articles in the "Woodturning Tips" library, and much more.
I wish somehow all his articles were available to everyone, maybe in a book. I know I learned a lot from him. I feel pretty stingy keeping it all to myself, but I think anyone can download all the articles from the Wayback Machine with a few hours of effort.

I haven't looked for a long time but the last time I did he was still active in the club in Texas. Does anyone know if that club still exists or anything about Steven?

JKJ
 
Boiling breaks down cell walls and lignin which allows water to move more freely in wood which is why it dries fasters. It also makes the wood softer and more flexible which reduces the tension which in turn reduces the stresses that can cause cracking and warping. Now that I think about it, I suspect that microwaving a green bowl is doing more that just drying the wood out.

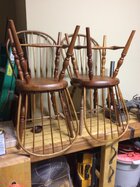
I built a set of spindle back chairs back in the 80’s which my daughter now has. Several years ago, she brought them to me for some repairs and this thread reminded me of steaming wood to make it pliable.

The backs were in a steam box for an hour, bent, and then placed on a form until they dried.

Out of curiosity, I wonder if a difference can be noticed between boiled vs non-boiled dry wood when turning the same species.
 

Attachments

  • IMG_1040.jpeg
    IMG_1040.jpeg
    634.1 KB · Views: 9
@John K Jordan , Steven Russel obviously did a lot of work on boiling. Thanks for sharing that. But from what you posted, it seems that most of that work was on roughed out bowls. Like you, I turn predominantly dry wood. Do you know if Steven's methods would work on un-turned blanks? e.g say something like 4 x 8 x 8?
 
... Do you know if Steven's methods would work on un-turned blanks? e.g say something like 4 x 8 x 8?

Do you mean unturned green blanks before drying them?

From what I remember, it should. Jim King told me to boil the big block of Pink Flame (don't remember, but it was probably 8x8x12")
Good sized blocks of madrone are boiled.
The thing that would need to be figured out is the boiling time. There might have been something about the time per inch.

I reviewed Steven Russel's docs and hr doesn't mention unturned blanks, rough turned bowls and platters only.
He said he boiled 60 minutes per inch of wood - would be a long time for 4" thick blanks. But if like other boiled things, might dry quicker afterwards so it might be worth trying. I might try this come winter when I tend to process wood. (less chance of fungal staining in the log sections when it's cold outside.).

He used a cut off section of 55 gal drum, heated with a gas heater (as from a turkey fryer), and submerged the wood, weighting it down with a grill made of rebar and weighted with cinder block or rocks.

He said it was important not to expose the just-boiled wood directly to dry air or it would dry out too quickly and crack. He stacked the bowls on the ground and covered with a tarp until they cooled, then put into paper bags.

The microwave method might also work for green blanks, but I think would also take a long time. If not familiar with microwaving wood, you can't leave the oven on high for very long or the wood can burn in the middle and even smoke or catch fire. Some people use a separate microwave oven for the shop to keep from stinking up the kitchen and getting thrown out of the house.. It's heated for a bit, then cooled, then repeat. You can feel the heat on the surface of thinner things but I don't know about thick blanks. It's used a lot for drying but the heat should do the same thing with the wood cells to equalized stresses and minimize drying cracks. There might be more info on the internet on microwaving than boiling.

JKJ
 
Last edited:
Back
Top