This thread is a companion to one that I have added to the main discussion forum. This one is how I went about it while the other one covers the background and the results of my efforts. That other thread in the main discussion forum is titled DIY bowl gouges and flutes.
Prior to now the method I used to adjust flute profiles was to use diamond burs in my Dremel, but I have recently adopted fellow forum member Hughie’s method of using a thin cut-off wheel on my angle grinder to begin making a flute to make a new bowl gouge.
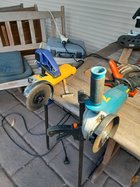
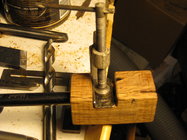
Initially I fixed the gouge down and handheld the grinder, but found it worked better for me to fix the grinder and handhold the gouge…
I used the back of a chair as a ‘tool rest’ in front of these grinders and that also afforded some safety like you do when keeping your fingers behind the tool rest at the lathe. Eye and ear protection, of course!
Using the thin cut-off disc on that right hand grinder I established the depth of the flute and also did some shaping cuts…
Then I used the wider grinding disc on the left to finesse the flute profile. You might need a stack of two discs if you are going for a wide flute, provided the shaft of your grinder will accommodate that. The diamond dressing tool on the bench in the above photos is critical at this stage. I made a template of the flute profile I wanted to achieve (see next photo) and shaped the grinding wheel with the diamond dresser to that profile, repeating the dressing process frequently to maintain the profile and to keep the disc cutting efficiently. Dressing the wheel will create a cloud of abrasive dust and I wore a mask to avoid breathing that in.
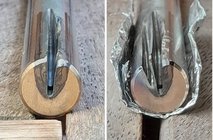
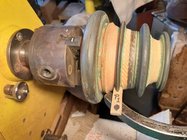
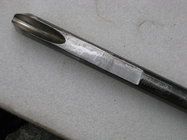
After getting the flute as close as I could to the desired flute shape with the wider disk I moved on to a hard buff loaded with fine abrasive paste. The area of the buff used for that was shaped to match my flute template, as shown here…
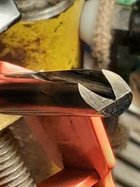
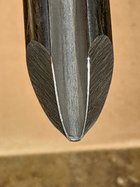
Following that I did a quick buff of the flute with my rag wheel and I was then ready to add the bevel, which counter intuitively begins by grinding the top of the wings to the desired relief angle, like this…
To do that I used my coarsest (#40) wheel on my bench grinder with the gouge held in my gouge jig set to the required wing relief angle with the flute facing towards the wheel, in this case I was going for 42°, which was also going to be my nose bevel angle. If you prefer you can do this step freehand on the grinder platform, but it is important that the wings are ground evenly in relation to the flute. I took that grind down to almost where the wings will meet the bottom of the flute.
At this stage the surface that will become the wing edge will have a slightly concave profile off the wheel, which needs to be adjusted to your preferred convex wing edge profile, or at least straight. I did that part of the process on the grinder platform, flute towards the grinding wheel, and by sliding the gouge slightly up and down the wheel until I had my preferred wing edge profile.
Still on the coarse bench grinder wheel I then ground the bevel using my gouge jig set to my preferred profile, checking frequently for when I was getting close to an edge with the flute. See example in next post...
Last edited:

