Hello,
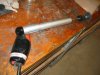
I need a little advice. I am having a terrible time removing a "knob" in the bottom a vase. The vase is about 2 foot tall about 7 1/2 in wide, the top of the bowl has about a 2-3 in hole, and the knob on the inside is probably about 2-3 inches long. No matter what I have tried, I can not seem to get it removed. I made 3 ft long scraper for the inside and it works great as long as I stay on the side of the inside of the bowl, but I can not find anything to help me get ride of the knob. I'm thinking about buying a long drill bit and putting a handle on it and drilling out the center before I get started next time. Any thought on the removal and drilling out the hole before hand.
thanks,
Jay