Here’s an update on my kiln experiments:
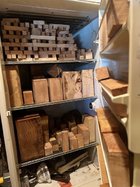
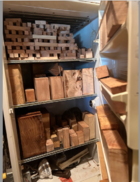
Since I’m concerned about bugs and mold, I wanted to heat treat my wood before storing in basement shop. Most common heat treatment is to heat in 160deg kiln until internal temperature is 135 deg for at least. 1/2 hour. Not wanting the wood to dry and crack, I wrapped each piece in a plastic garbage bag and put end grain sealer before putting into kiln. Then bake at 160 for 24 hours just to be extra sure. I’m happy to report that after 2 full loads, not one blank developed checks.
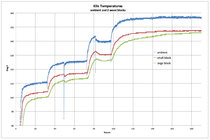
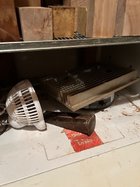
I have a load of white oak drying now. Mostly spindle blanks, and three large bowls. I wanted to use the usda drying schedules. These generally start at 110 with very high humidity to slow drying. In order to add humidity, I’m using a cheap Vicks vaporizer plugged into an inkbird humidity controller. I’m using the most conservative USDA recommended schedule. It’s for 16/4 red oak viral infection that makes it especially prone to splitting. It’s been in for about a week now.
The good:
The bowls had some pretty significant cracks forming from air drying before the kiln was ready. About as thick as a dime. After 48 hours at 110 degrees, 92% humidity, the cracks closed up completely ( even though the bowls got lighter). I hit them with thin CA, hopefully they won’t open up again.
The bad:
This is going to take a lot longer than I expected. Over a week to bring MC from 40% to 30% 2inch spindle blanks.
I can’t just set the controls when starting up. If the heater and vaporizer run at same time, it heats up too much. When starting, I need to raise humidity first, then slowly raise the temperature.
Because of the super high humidity, I’m getting condensation dripping on the floor. I’m doing 2 things to try to help this. First, I moved the humidity sensor to a cavity in the pile of wood. It’s cooler there. Second, I think I need to stop checking progress so much. Every time I open the door the temperature drops and it starts raining in the cabinet.
Here is a link to the usda heat sterilization guidelines.

www.fs.usda.gov
Here is a link to the usda kiln operation book.
This is the humidity controller.
This is a link to the vaporizer