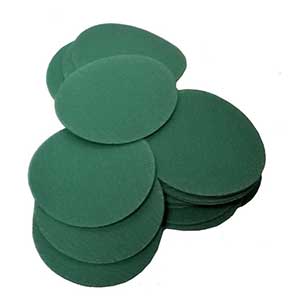
Perhaps I need to do my sanding video over.... So, for me, I looked at the inertial sanders and said no. Main reason is that you can't sand when the lathe is stopped, which with some tear out prone woods is necessary. I did try hand sanding, but went to power sanding exclusively, with the possible exception of spindles which have fewer tear out issues than bowls. Slow speeds are essential, main reason being that high speeds generate heat, and the abrasives don't really get the chance to 'gain traction' and dig in and cut. Same with the amount of pressure you use, too hard and you generate heat. High speed and high pressure will wear out your sanders a LOT faster too. No putting foam between your fingers and the wood if you are hand sanding, because the heat does not go away, but into the wood. For power sanding, I still go with the blue discs from Vince Welch at VinceswoodNwonders. They cut better than any other disc I have ever used and I generally get several bowls from each set of discs before I toss them. For the pads I use, I stick with a firm pad, the one with the 1/4 round edge for grits up to 180 to 220, and then medium pads, which fit into curves better than soft pads, up to 400 and I don't go beyond that because all of my pieces are intended for daily use. Above 400 grit, you kind of just polishing out scratches rather than sanding, if that makes any sense, and the soft pads are fine for that. The thing with the firm pads is that they cut far more efficiently with the coarser grits than they do on a soft pad, and the difference is huge. Same for the abranet abrasives, they don't work as well as standard abrasives with the coarser grits, up to the 180 to 220 grit range, then performance is pretty much equal. My guess is that with the coarser grits on the woven discs is that there is too much open area, which means there is more grit to cut with on standard abrasives. For lathe speeds, I sand my warped bowls at 10 to 15 rpm. Any speeds over that, and you just can't keep the abrasives on the wood as it spins. Check out my video on 'articulated arm for bowl sanding' which is another video I need to do over. What that does is allow me to spin the bowl by hand for the first grit or two, which is really handy for actually seeing what progress you are making. It is easy to do since the articulated arm totally supports the sander and your arm so all that arm has to do is pull the trigger. I can't sand out bowls without it any more. I do keep those rubber eraser sticks around too. Mostly, they can extend the useable life of your discs for a bit. Not forever, but for a bit. My progression is mostly starting at 120, but some times 100, and once in a while 80. So, if I start at 80, I go to 100, 120, 150, 180, 220, 320, and 400. I do not skip those grits ever. Main reason is it cuts down on the number of times I have to start over because I see 80 or 100 grit scratches after getting to the higher grits. I do wipe them down a bit with my hands in the higher grits. What this does is it will work the fine dust into any scratches left from the coarse grits, which makes it easier to see those scratches. Finally, as one turner over at Wood Turner's Resource said, "Never take your piece from the shop into the house on a sunny day. Sunlight causes scratches!". I prefer natural spectrum lighting. I used Blue Max lights for years, which had florescent bulbs in them. They were similar to the Ott lamps that the quilters and needle point people use. I have switched to 'Bright Reader' LED lights now, which I got from the same source, and they are natural spectrum type LEDs. When the LEDs first came out they were very white, and that did kind of hide scratches from me. Our eyes have evolved to see in natural sun light, not most standard lighting. Oh, getting prescription glasses helped a lot compared to the 'reading glasses' in the big box stores. Dust collection is huge! All sorts of sanding hoods, and do take a peek at mine. I can sand for hours and zero dust on my glasses or in my nose. Black hole/big gulp type hoods are okay, but you still need to wear a mask.
robo hippy


")