• The forum upgrades have been completed. These were moderate security fixes from our software vendor and it looks like everything is working well. If you see any problems please post in the Forum Technical Support forum or email us at forum_moderator (at) aawforum.org. Thank you
  • March 2026 Turning Challenge: Olla! (click here for details)
  • Congratulations to David Wyke, People's Choice in the February 2026 Turning Challenge (click here for details)
  • Congratulations to Tim Connell for "Black Locust Basket Illusion Series #4" being selected as Turning of the Week for March 16, 2026 (click here for details)
  • Welcome new registering member. Your username must be your real First and Last name (for example: John Doe). "Screen names" and "handles" are not allowed and your registration will be deleted if you don't use your real name. Also, do not use all caps nor all lower case.

Sanding the radial scratches

Joined
Jan 8, 2026
Messages
67
Likes
31
Location
Van Alstyne, TX
Granted it does take some patience to sand along the length of a turning to remove the scratches from turning tools.

I was wondering if anyone came up with a lightweight power tool method 😀😀

My thoughts would be something like this, with a likely, homemade drum. One that is surface conforming.

Dremels run to fast
This HF tool would be lightweight and has a max RPM of 180.
Also flips straight.

IMG_0983.jpeg
 
Are you intending this for spindle orientation or cross grain orientation (aka bowl)?

Many of us already use drills with 2 or 3" discs with appropriate sized sandpaper.
 
Howdy George, Acrylics are a bit different in my experience than when sanding wood. You can't rush the grits. Let me explain. When I do acrylic, I start with the courses grit and that is my woodturning tool. I have used both High Speed Steel (HSS) and carbide and carbide negative rake. They all can work well. But, you need to do everything you can at this stage to make it easier at the next. Clean cuts. Take your time and stop the lathe to evaluate how you are doing. There is a learning curve to each tool. And SHARP. Always sharp.

LIFE IS TOO SHORT FOR CHEAP SANDPAPER. Learn it. Live it. Love it.

When it is time to sand, I usually can start at 320 and sometimes when needed 220. But the method is always the same.
Sometimes I cut my sandpaper, and other times I tear it. In an acrylic call project where there are coves, I might tear the paper. A sharp cut edge may not glide (Yes, glide) along the cove shape and dig into an area you don't want it to. The softer edge on torn paper is gentler. Given that hint, when I say "cut" you might be looking at tearing and folding in edges of the paper to make a perfect sanding tool for different areas of the form. Another thing is I only use a single layer of sandpaper between my fingers and the project. It increases my control and keeps me from applying too much pressure (and heat).
Of course, a sharp fold in sandpaper can make a great sanding tool when needed.

320 Right after the tool I start here but if you need 220, go for it. Choose the right tool for the job. The surface may have ripples that I might or might not see, but I will be able to feel them. Cut a strip of 320 about an inch wide and use it as a single layer. Stretch this strip between your hands at 90 degrees to the spin of your spindle shape. Do not apply finger pressure on the paper. Let the paper FLOAT across the surface for a few seconds while moving left and right. Stop the lathe and inspect. Where it sanded are your high spots and not sanded are the low spots. Your goal is to blend these and get your project to your liking. Don't mow over your details. Try to keep those crisp. Details might need to wait for a finer grit of sandpaper to retain their crisp shapes. When this is complete, the entire surface will have consistent scratch patterns.

400 Do the same thing with the 400 until all the 320 radial scratches are gone. Move the paper around to fresh surfaces to avoid building heat. If you are feeling heat while sanding, you are not allowing the sandpaper to work correctly and could also be heat damaging your project. Right now you have all radial scratches. Stop the lathe and sand with the 400 along the length of the smooth areas and inspect. Do this until you determine you need to go back and sand with the lathe running to get spots you missed or have all the radial scratches gone. You may need to adjust this plan to accommodate the shapes and forms of your project.

500 and/or 600 Same as the 400 grit Take your time! It should only take a few minutes if you did everything at 400 correctly, then these go quick.

At this point, Acrylic people will probably keep going. Wood folks may not need to go to a higher level of sanding and then choose to go with compounds, waxes, buffing, or the finish of their choosing.

1200 (ish) At this point I have a very high quality 1200 (9 micron) sand paper that I use. Some people like to use those sanding paste products that are all the rage these days. I have some, but don't like them because the waxes can interfere with finishes bonding to the material. I also don't like them because if used, they may clog my Micro-Mesh Sandpapers or the grit get imbedded into my polishing wheel. I use the 1200 the same way as the previous grits. Although, I need to reduce speed (500-800) on the lathe since the soft cloth backing on my papers from this point on can easily melt. At this time even if you are not 40 years old or higher... get out your Geezer Glasses and inspect. A raking light will help here! Look for a consistent surface everywhere. If not, go back and fix it. (For those of you who might be offended at the thought of wearing Geezers, DON'T BE! What a valuable addition to your tool arsenal! In this process, I would be wearing mine at the point I put my acrylic blank on the lathe!)

3 Micron Here is a step I always include because I have it and it has never failed when I get into a super fine detail that my Micro-Mesh cannot access because it is too thick. My 3M soft cloth 3 Micron Pink paper is sold for jewelers to use, but I use it also. It is just a problem solver for me. Your set of Micro-Mesh pads will do the same thing as you work up those grits towards 12,000.

Micro-Mesh is a miracle product worth every penny. Go all the way through the grits. Take your time. Water or no water is up to you. I don't use water as I am too much of a messy person already and playing in the mud compounds the problem. But, what I do is 500-800 rpm and rotate the sanding pads around to prevent heat and debris build up in any spot. I also wipe off the dust from the pads often to increase sanding efficiency and the life of the pads.

Buffing! Final step!
Beal Buff (Beal is a great brand of product but it may not be the solution here on acrylic.) For those who want to try it, great... But be warned, I have found the grits used there are coarser than the process I just described above. Many folks use other products and refer to it as "Beal Buff" but I am only going to address what I use.

Here you have two choices a finishing compound at the buffing wheel or carnauba wax or similar and buffed out. Some folks use automotive paint buffing products, and I gave up on experimenting with those long ago. FIrst they are expensive and second, who knows what kind of chemicals are in them. Let alone silicone that I never want in my wood shop (can you say fisheye finishes?). I found a wonderful product the Tiny Turner (Emma Cook) suggested a while back and really like it. Menzerna tan very fine high gloss. Difficult to find and comes in a block that will last three lifetimes, but I like it.

My buffing/polishing wheel is a dedicated one-use only tool. I keep it covered when not in use and also the block of compound covered in plastic to keep chips and dust off. I learned that lesson the hard way. I wear my dust protection and face shield when using and carefully buff the surface to the best polish I can get. I look at the reflection of my overhead lights and make sure the gleam in the glossy surface is consistent all around and end to end.

I hope this helps.
I also hope Mr. John K. Jordan does not feel challenged about the length of my story here... he is the king of detailed responses... ;-)
 
Last edited:
Fantastic ! Deserving of a Sticky!

I did in fact, cut and paste to a document. I do that often with the info I find here.

This all came about from getting finger and hand cramps in quick fashion. Not even trying hard, you know!

What I have going on in response, and in general fun shop talk

Raking light: Flashlights including one I recently picked up that will blind you!

Geezer glasses. Oh lord yes. a few months away from 69 tears old, Glaucoma and Astigmatism. Have at least two pair each of 1.5, 2.0, 3.0 !! Cannot live without.

General sanding routine is much the same.

Sand Wet. start at 400. The Easy wood tools do a great job overall.
The wet and Dry paper I have is basic big box Wet and Dry up to 1500. I have some left over Tamiya paper to 2000. works ok wet.
So, 400, 600, 800, 1000, 1500, 2000.

But at 1500, 2000 I can make a choice.
As I did recently buy the larger size pack of Micromesh. Honestly I do skip a grit or two. towardds the higher numbers.
I wonder at what point do the MM grits overlap with liquid compounds ?

A few 500grit pads of abralon. save for wood maybe.

A few rolls of that open type, though in 320 or 400. I tend to like the 400 so far.

Other sandpapers in limited qty and doubtful of their use except on metal, are norton grades 3/0, 4/0 emery and or crocus. Used to get these from a surplus store.


so now - somewhere anyway, in the grit progression, I have the great pleasure (it is fun) to choose from
some of the following products, that I am fairly new to.

(kept indoors from our Texas weather, thank goodnesss.)
Maguires: 105, 208 ( or Fine cut #2) and Swirl remover 2.0 So far, I do like.

The new to me, Yorkshire compunds, both versions.

Good old Novus :)

Waxes... amazing how long these keep on the shelf.
Renaissance micro crystalline, Mylands Traditional, and throw in Mylands Friction polish. (For wood with CA)
You might guess, I get obssesd with these kind of prodcuts, LOL! I stilll wonder where my Bri-wax went off to!
heck for wood, I have some Aquacoat filler... new to me. intended for larger general WW that gets typical treatment including color Laquers.

Beall system. have had the 3 wheel setup for the longest time. From wjat I have read, I agree,I/we are going much finer. Not sure if my "blocks are still good. I only can assume they have a forever shelf life. Though thay are dirty.

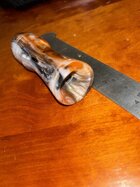
Since these are game calls, with zero profit... I had been using Friction polish with CA. up to 8 - 10 applications. For the most part, I think/know my customers will once tjhem just a few times, and then put on a display shelf :)

A note of interest from your post:

"3M soft cloth 3 Micron Pink paper is sold for jewelers to use."

Interesting. I can imagine not cheap. some of those higher quality papers do interest me. just a matter of percieved need and cost. I spend way way over my diasblity and SS budget!!! Honestly I cannot help it. I live to love what we / I do.

I did get the little HFBauer screwdrver. it is lightwiehg enouhg I think Icanfloat it... we will see. I have a completed Game call, that well, it is ugly.. so no sale. and collectiong now, scrap end/waste peices to practice the finer grits/polishes on.

I am willing to try a better grade of Wet n Dry, though on next months income. If you think it makes a differnece given the coarser grits they are.
It is just a shame I gave it up for a decade plus! Blessed to "be back"as best as I can
 
I wish to add on some other sanding shop talk :) I got steroids today in my chemo, so YAY!! it has been weeks!

Bowl sanding! I do make good use of this and other forums and you tube. As such I have invested in the typical, shall I say mid level papers, tools, pads.

when I started back at this some months ago,I swore I was not going to make game calls

I.E. spend $$ to make no money.
I and others sell in the $ 25 to $35. It is a weak market compared to 2005-2010, when I was yougner - late 40's - 50. Full of energy that I cannot even image now.

Could turrn 3 or 4 calls after work, post at midnight or 1am, wake up to see all were sold. :) Lather, Rinse, Repeat.
Now it is a "just" a great feeling to be recognized again, meet online with former and new customers or just good people who like what I and others do.
There are indeed some real works of art out there, one of a kind, and if/when they sell, they are expensive.

A lot like what you guys do. Segmented, carved, you name it.

And yes, I do NEED to make some Bowls and related!!! :) :)
I will temper this info, by saying selling is not a big thing in the eqaution. Though I will try here and there.
 
Back
Top