• November 2025 Turning Challenge: Wall Hanging! (click here for details)
  • Sign up for the 2025 AAW Forum Holiday Swap by Monday, November 24th (click here for details)
  • Congratulations to Konstantin Gusev for "The Nutcracker" being selected as Turning of the Week for November 17, 2025 (click here for details)
  • Welcome new registering member. Your username must be your real First and Last name (for example: John Doe). "Screen names" and "handles" are not allowed and your registration will be deleted if you don't use your real name. Also, do not use all caps nor all lower case.

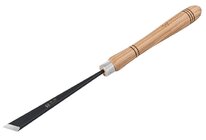
The skew chisel.

Joined
Apr 6, 2025
Messages
26
Likes
15
Location
Dracut, MA
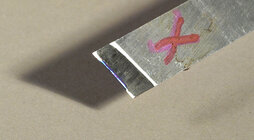
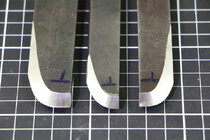
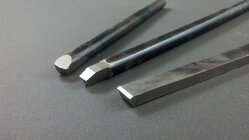
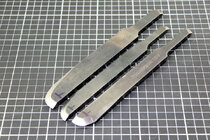
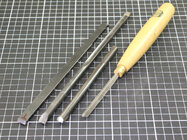
I wanted a one inch skew. All the pundits on YouTube use a skew. They make it look easy and useful for a variety of uses. I’ve tried a few times using it with the factory edge and I wasn’t overly impressed nor efficient with it. I enjoy watching Tomislav’s videos on sharpening. I like his “don’t worry about the angle” approach to sharpening. So I put a curved edge on the skew. This may seem trivial to the experienced turners, but what a difference. It was definitely a “this is how it is supposed to work” moment.
Anyway, thank you for letting me share.
 
As a beginner I struggle a lot with the skew, but the curved edge did help me quite a bit. I still struggle using it effectively (especially as effectively as Tomislav) but I improved with the curved edge.
 
My top woodturners for skew instruction are (no specific order):
  • Alan Lacer
  • Matt Monaco
  • Eric Lofstrom
A theme hidden in the above presents a bit of a bias I've also fallen into: the curved edge style of skew favored by these turners. I've tried some of the other skew tool shapes (e.g. oval cross section) and edge profiles and just vastly prefer the curved edge style.

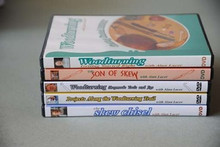
I have Lacer's DVDs and have studied some of his demos available online. I've also done in-person workshops with both Lofstrom and Monaco, and they're both great instructors and woodturners. I'd unreservedly recommend any/all of them as resources to help refine your skew work. Some specific video recommendations available online:


I also specifically recommend Eric's approach to honing above all others. It's at least as effective, easier to master and safer than any other approach I've encountered (esp. compared to Alan Lacer's earlier method in his older videos, which has your free hand moving toward/away from the edge... 😬). Eric's certainly the best instructor all around that I've encountered for teaching and use (especially for some of his turning series) of honed edges, skews and gouges, though the most of it relayed via his in-person workshops. Do you need to hone? No, obviously not. Is efficient, easy honing a great tool to have in your arsenal? Heck, yeah.

If you want to be blown away by a turner dancing with the skew, then look for some of Matt Monaco's videos (YouTube, and esp. on his Instagram) where he's just playing around turning a demo piece at full speed/fluency.
 
The curved edge effectively lengthens the edge, helping keep the tips away from the wood. A straight skew with an actual 1" long edge (tip to tip, or heel to toe as it were), reground to a curve, effectively becomes maybe 1-3/16" or 1-1/4" long.

Skews are one of those tools where practice, practice, practice will make you it's master. Practice the exact same cut 50 times in a row, tweaking and adjusting every few cuts, and pay attention to when a sweet cut is made. What did you do? How did you present it? What was the grain doing? Etc... When a cut feels poor, stop and walk yourself through it, compare what happened in that poor cut vs. what happened in the sweet cut. Pay attention, and practice. You and the skew are dance partners, the spinning wood is your ballroom floor. Then make 50 different cuts. Straight/flat cuts. Tapers. Beads and vees. Watch your videos, but practice, that is the only thing that will really get you to tame that tool.

Most importantly, have fun with it. Don't let it spoil your morale. You'll know you've arrived when sweet cuts are made by muscle memory because you've practiced the skill and the dance, and poor cuts are just the occasional whoopsie that happens to everyone, even those seasoned pros.
 
I wanted a one inch skew. All the pundits on YouTube use a skew. They make it look easy and useful for a variety of uses. I’ve tried a few times using it with the factory edge and I wasn’t overly impressed nor efficient with it. I enjoy watching Tomislav’s videos on sharpening. I like his “don’t worry about the angle” approach to sharpening. So I put a curved edge on the skew. This may seem trivial to the experienced turners, but what a difference. It was definitely a “this is how it is supposed to work” moment.
Anyway, thank you for letting me share.
The factory grind is rarely ideal, so your regrinding was probably very helpful. I'm an advocate of the curved or radius skew, as it definitely seems easier for beginning users, perhaps because the curve presents a smaller amount of edge to the wood. Glad you've found success.
 
Last edited:
I wanted a one inch skew. ...So I put a curved edge on the skew. This may seem trivial to the experienced turners, but what a difference. It was definitely a “this is how it is supposed to work” moment.

It's not trivial! But there are certain advantages to the curved skew and some to the straight edge (even some good reasons for a skew ground straight across with no angle!) Lots of variables on the included angle too.

I keep some skews with straight and curved grinds in various widths, from 1.5" down to 1/4". Since I like to turn thin spindles I have several 1/2" wide.

My favorites are Thompson steel. I never use his skew grind as shipped!

You may have already seen it, but if not, this video is good for showing some tradeoffs for a few different skew grinds. I grind some like shown and some differently.
View: https://www.youtube.com/watch?v=yhuEVVSkDtE


And don't worry, it WILL get easier with experience! I'm a believer in learning the skew first (then the spindle gouge). That's the first tool I put n a beginner's hands even if they have never seen a lathe before, and have taught remedial lessons to some old turners who got afraid of it and gave it up! I developed a way to teach it that so far has always worked - I've never had a student get a catch.

JKJ
 
I had a bunch of older and low end skews when I started. Used most of the videos mentioned above, and tried all sorts of grinds/shapes - straight, fully curved, and Lacer curved. Found that for larger skews, the Lacer works best for me. For 1/2" skews, my preference is straighter. Earlier this year, I got a Lacer 1 3/4" which has been great, and more recently I got a Thompson. I used the Thompson as shipped for a few projects, and went back and forth with the Lacer. Ended up grinding a Lacer profile on it, too. I do still have a straight 1" in the quiver, should I ever need a comparison again.

One thing that I picked up over this time is to sharpen the skew so that the length of the bevel is approximately 1.5x the thickness of the skew chisel. This provides a sweet spot. Mine are hollow ground on an 8" wheel, and touched up with diamond hones during use.

The more the skew is used, the better you get at it...
 
A great piece of advice Alan Lacer gave us in his skew class was to always practice and warm up before getting to work, just as you would before almost any athletic event. That could be turning a quick series of beads and pommels in a piece of firewood, or my favorite, make an egg. The work goes much better if you reset the muscle memory before you start. Plus, if the egg is successful, you have a nice thing to give people or sell-- folks seem to love wooden eggs,
 
A great piece of advice Alan Lacer gave us in his skew class was to always practice and warm up before getting to work, just as you would before almost any athletic event. That could be turning a quick series of beads and pommels in a piece of firewood, or my favorite, make an egg. The work goes much better if you reset the muscle memory before you start. Plus, if the egg is successful, you have a nice thing to give people or sell-- folks seem to love wooden eggs,
The first Pro demo I ever saw was Alan Lacer with his skew. It was shocking to see this very famous and skilled guy 'warming up' by making a few tops. If anybody wouldn't need the practice, it would be him. Good reminder, Roger.
 
Plus, if the egg is successful, you have a nice thing to give people or sell-- folks seem to love wooden eggs,

Ain't THAT the truth! When I visited Graeme Priddle and Melissa once he took me over to the gallery where he had a number of pieces, some with large (and expected) price tags.

In the door, he made a beeline to a bowl of wooden eggs to see how many had sold!

I've made a bunch, some as decoy eggs to put in guinea and peafowl nests to encourage the birds to lay more. I have a problem here with crows watching where guineas put their nests then steeling the eggs and dripping them on the driveway to break so they can eat the insides. One crow picked up a wood decoy egg. I found it on the driveway, obviously dropped many times - the darn thing must have really frustrated the crow!

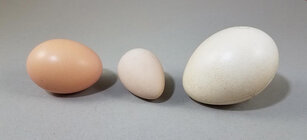
One think I discovered about turned eggs it it can be hard to get the shape right - sometimes too pointy, too round. Eggs do come in different shapes, but chicken eggs are usually pretty consistent (although guinea, peacock, and goose eggs are far different than chicken eggs).

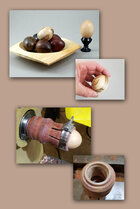
I got a number of eggs from our hens, picket my favorite "average" egg, and traced the outline with the help of a point-source LED light mounted on the ceiling above the work bench. I measured key points down the length and when turning, use a diamond point parting tool to make sizing grooves before turning the outline. I made a "egg" chuck to hold it when reversing to clean up the other end. Made it from soft cedar for flexible fingers, threaded a dogwood insert for mounting on the lathe.

For someone making eggs to sell, this can make the process much quicker!

One turned, after parting off and cleaning up end. I usually make two out of one blank.

egg_turning_blank.jpg
A127_eggs_com_A.jpg

Size and shape difference between chicken, guinea, and peafowl eggs.
eggs_three_chicken_guinea_peacock.jpg

And just for fun, a short video of a peacock hatching. Took hours of tries over several years to get a good shot with good lighting at the right time. On about day 28 they use special neck muscles to crack around the shell with their beak until they can push it open with muscles in their legs. Baby bird are hatched with a built-in food and water supply good for several days. (What's left from the egg yoke after using part for growth) The pull the yoke inside their bodies - the reason birds have "navels". There, not on only completely off topic but far more than most people ever wanted to know!
I've incubated thousands of eggs over the years, almost 300 just this year.
View: https://youtu.be/gdDtx0vyqfQ


JKJ
 
John, what becomes of the peacocks?
 
The first Pro demo I ever saw was Alan Lacer with his skew. It was shocking to see this very famous and skilled guy 'warming up' by making a few tops. If anybody wouldn't need the practice, it would be him. Good reminder, Roger.
Makes me wonder if he was warming up because he needed it or if it was to teach the audience.
I found that after years of skew the only warm up I usually do is rough the blank and round the cylinder, maybe make a practice facing cut. After a while, skew placement is almost automatic. But I probably don't use it with the same skill or for as much variety as Alan.

Might check out his store:

I do think his set of 5 DVDs is worth having on hand.
I really like his diamond slipstone (now back in stock), better than others I have, and without the Glaser screw chucks he sells I'd probably give up woodturning . :)

Any questions - he has always been great to answer the phone or return a call, pleasant and so, so knowledgeable!
Twice he sent me a stack of his catalogues to give out.

JKJ
 
John, what becomes of the peacocks?

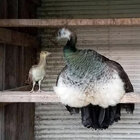
Some I've raised for breeding stock - unlike in the wild, I separate family lines for genetic soundness. I've crossed some white with Indian Blues for beautiful pied colors. This is Susie, a female pied (the bird, not the girl!), very tame since she had no companion when hatched so I handled her every day. I took her once to a vet friend's graduation party.

peacock_Susie_20220820_150836.jpg

Most are sold - it's amazing what they will fetch. Can easily get $300-$500 for a single bird or a pair. I don't do it for the money but it's nice to help with the rising cost of feed - a balanced blend of grains, birdseed, chicken feed, sunflower hearts, and peanuts for the adults. Young birds are very cheap from me. (I know one large breeder that sells day-old peachicks for $30 each, minimum order of 8, no guarantee of survival.) I guarantee all my birds for a week or so. (The only customer who has had birds die was one woman who refused to follow my feeding instructions and fed them nothing but cat food. :()

This year I incubated 200 chicken eggs, about 50 guinea, and maybe 25 peacock. No more turkeys!

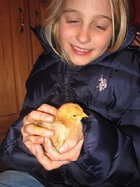
Great for kids!
chick_and_jaden.jpg

Sometimes I'lll let broody peahens haatch their eggs.

Peacock---baby-and-mama.jpg

I don't recommend this "hobby" for everyone - high-end, incubator, hatcher, and brooders are expensive, need daily attention until hatched - even more after hatching, had to build housing to protect from predators (I have six separate enclosures. Feeding and watering takes several hours per day - feed costs several hundred each month. Catching a big male in an enclosure can be dangerous - I have scars from toenails - and their wings are strong enough to break a jaw. (I guide them into a corner, hold up a large blanket, then lunge to enclose them in the blanket. Works sometimes.) I plan to do this for one more year then give it up.

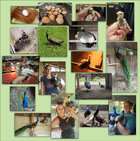
Peacocks_comp.jpg

Ok, back to the skew chisel: Keep it sharp.

JKJ
 
Alan Batty has a video up on You Tube that is also worth watching. I did make a special skew just for my boxes for refining the tenon to make it straight. The edge is straight across, like 90 degrees. I do prefer a slightly rounded curve to mine, and they are all sharpened to about 25 degrees, which is the 30 degree setting on my robo rest. I did see Stuart Batty at a past Oregon Woodturning Symposium 2 years ago, and he was turning a cylinder. He never started the cut from the end of the cylinder stating that it "always catches". I have done that cut many times, starting from the end, so I went home and tried it. No problems. I thought that maybe it was because he was using a straight edge skew, so I ground one down to straight across at maybe 20 degrees to square. I got the same results, no catches. It does take practice, and I am a bowl turner, but I am back into turning boxes, and it is an essential tool for the smaller boxes I make. I do love the peeling cut that Eric Lofstrom does. I do find him to be one of the most entertaining turners I have ever watched. He sets the wheels in my brain spinning.

robo hippy
 
and they are all sharpened to about 25 degrees

Just to be clear, is that about 25 deg bevel on one side measured from the straight side for about 50 deg included angle? (I measure the included angle parpendicular to the cutting edge for a given platform angle it varies a bit with the shape of the edge)


Hey, just for fun, I once designed and made a catchless skew. Unfortunately, it's only useful on fairly shallow V and facing cuts. Sharpened as usual, then the center of the edge, the part that will catch at the top of the V, is rounded a bit.

It does work, but is of no practical use since it's easy enough to hold the tiny side clearance angle needed, at least on a non-curved edge skew. Useless for planing cuts, of course! Probably a shameful waste of an otherwise good skew. :)

However, it would be good for teaching bad technique. :(

Also, little discussed and seldom taught is the skew actually has 5 cutting edges: not only the primary cutting edge but those that form the V-shapes when viewed from the narrow edges of a flat skew. Without these, the point could cut into one side of a v=groove but the wood on the other side might not be removed cleanly. It might have been in one of Raffan's or Darlow's books I read that, or heard it from a skew expert at a demo.

JKJ
 

Attachments

  • skew_catchless.jpg
    skew_catchless.jpg
    97.1 KB · Views: 9
Also, little discussed and seldom taught is the skew actually has 5 cutting edges: not only the primary cutting edge but those that form the V-shapes when viewed from the narrow edges of a flat skew. Without these, the point could cut into one side of a v=groove but the wood on the other side might not be removed cleanly. It might have been in one of Raffan's or Darlow's books I read that, or heard it from a skew expert at a demo.

JKJ
I learned that secret early on. After sharpening the primary cutting edge how do you sharpen those 4 other edges? I just touch the side of the skew to a 120 belt on my belt grinder. Not sure if this is the best way, which prompted my question.
 
I learned that secret early on. After sharpening the primary cutting edge how do you sharpen those 4 other edges?

I don't know if there is a "best" way. All I do is make a few strokes with a fine diamond hone held firmly against the flat edge of a rectangular skew.
 
John, thanks for these. I spent time in a waiting room yesterday while my wife had a medical procedure. I watched (with ear buds) most of the Matt Monaco video. It was terrific, and I loved his style. I learned a lot and the time flew by! He is an occasional teacher at the JC Campbell School where we’ve taken several courses and it makes me want to seek him out.
 
There's a lot to absorb in this discussion along with some great pea fowl photos. What surprises me is that no one has mentioned how great a skew works as a negative rake scraper. My skews are my go to tool for the final cuts on hollowforms and the outside surface of bowls. Best tool I've ever found for getting smooth curves with no flat spots. But using a skew as a skew, in my 25 years of turning I've never gotten even passable at it. I do use a small 1/4" round skew in small finials and icicle for Christmas ornaments. But most the time i'm scraping the too.
 
...t no one has mentioned how great a skew works as a negative rake scraper. My skews are my go to tool for the final cuts on hollowforms and the outside surface of bowls. Best tool I've ever found for getting smooth curves with no flat spots. But using a skew as a skew, in my 25 years of turning I've never gotten even passable at it. I do use a small 1/4" round skew in small finials and icicle for Christmas ornaments. But most the time i'm scraping the too.

A skew does work as an NRS, but can work better if any grinder burr is stropped away and a burr added with a burnisher. The tradeoff is that then the scraper is one-sided.

I personally keep my skews shaving sharp for "skewing", but use purpose made NRS with burrs for scraping with the lathe on, hand scrapers with the lathe off. I like to grind negative rake scrapers from Thompson stock but any HSS will work. I've made a bunch in the years after I discovered NRS. Call me a scraping maniac.

For outsides of things and insides of things I've evolved my NRS design to use mostly these, for a reason. I grind these with the same angle on both sides but put a burr on one side, making that the Top. (Sorry to bore those who've already seen these photos.)

_scrapers_IMG_7778.jpg

One reason I like this shape is the longish side curve works well to remove gouge marks on both concave and convex surfaces, inside and out. I grind a flat on the ends for certain convex and flat surfaces, especially the mostly flat corners when "turning air".

I make a number of other NRS, here are three out of about 20. Use NRS and/or hand scrapers on almost every piece, with an occasional shear scrap with a spindle/bowl gouge or even a Hunter tool.
NRS_small_thompson.jpg

Even those on in the top picture have a smaller second NRS on the other end, also ground similar to a skew with the same angle on either side:
I hand-hold these, never use handles. I do have a wonder small Ashley Isles scraper with a handle - ground it into NRS.

NRS_IMG_7777.jpg
scrapers_IMG_7783.jpg

I almost never use conventional scrapers any more although I have a collection. The biggest exception is a couple of nice box scrapers to clean up the straight insides of some boxes. Often use a BestWoodTools or Robust box rest with these.

BTW, NRS are amazing on end grain - with the right burr can make the surface smooth as glass. I do use a 1/4" skew as a scraper for this when cleaning up some tight recesses in the bottom of pieces.

So yes, a skew works well as an NRS. That kind of limits it's use as a sharp skew though. It's all good.

JKJ
 
Alan Batty has a video up on You Tube that is also worth watching. I did make a special skew just for my boxes for refining the tenon to make it straight. The edge is straight across, like 90 degrees. I do prefer a slightly rounded curve to mine, and they are all sharpened to about 25 degrees, which is the 30 degree setting on my robo rest. I did see Stuart Batty at a past Oregon Woodturning Symposium 2 years ago, and he was turning a cylinder. He never started the cut from the end of the cylinder stating that it "always catches". I have done that cut many times, starting from the end, so I went home and tried it. No problems. I thought that maybe it was because he was using a straight edge skew, so I ground one down to straight across at maybe 20 degrees to square. I got the same results, no catches. It does take practice, and I am a bowl turner, but I am back into turning boxes, and it is an essential tool for the smaller boxes I make. I do love the peeling cut that Eric Lofstrom does. I do find him to be one of the most entertaining turners I have ever watched. He sets the wheels in my brain spinning.

robo hippy
I have watched that Batty video dozens of times, back and forth to the lathe. I have also never had a catch starting from the end of a cylnder, so I dunno.

By far the biggest learning I have had with the skew is watching Steve Jones (stevethewoodturner); he is is the best I have ever seen, and he still amazes me. A big jump for me too was changing my grind to a 30 degree included bevel angle, rather than the more common 40 degrees, the way Steve does it. All my skews are straight, not curved, and I'm happy there.
 
I got a big kick out of this video, Richard Raffan for Fine Woodworking....

View: https://www.youtube.com/watch?v=jOvF5f1phhY


My skews are ground at the 30 degree setting on my robo rest, which means the actual angle is 25 degrees, or 50 degrees included angles. That does work for me. I have heard all sorts of formulas, and don't know what they mean, and don't want to mess with it. Our club has a sharpening demo coming up, with a number of us demonstrating, and I will be covering the skew chisel. The skew is the only one of my turning tools that I strop to make sure the burr is off the wood. It seemed to make a huge difference to me. I still have a lot of work to do in figuring out the skew, but I am getting better, and that comes from more practice. I am in the middle of a lidded box run, with 1/2 inch tenon and 1/2 inch recess, and the goal is for a 3 to 5 second drop fit, as in pick it up by the lid and the bottom falls off in 3 to 5 seconds. The tenon and recess need to be perfectly parallel. I do rough turn all blanks first and let them sit for a week or more before final turning and fitting the lid.

I do use the peeling cut a LOT in roughing all of my box blanks. Some times I think the more curved shape is better for this than the straight across one.

robo hippy
 
I have watched that Batty video dozens of times, back and forth to the lathe. I have also never had a catch starting from the end of a cylnder, so I dunno.

By far the biggest learning I have had with the skew is watching Steve Jones (stevethewoodturner); he is is the best I have ever seen, and he still amazes me. A big jump for me too was changing my grind to a 30 degree included bevel angle, rather than the more common 40 degrees, the way Steve does it. All my skews are straight, not curved, and I'm happy there.
+1 on Steve the woodturner. I think you may have brought him to my attention.
 
Practice is the secret. Not the edge or the grind. I played with just aboutvevery grindcand angle for 2 years. I was doing a little more spindle turning back then. What I learned was the skew you use the most will be the one you favor. Here is my video on skew varieties.
View: https://youtu.be/YFlZyGKYro4?si=WsM9lfPJDdHu8T2u
Quick question: I recently purchased a 1 1/4" skew from Carter and Son, but I find it a bit too wide for my small spindle work ( 2-3" diameter) . I'm unsure what size to get next. Any recommendations? They have a sale on right now, so I'd like to get a second skew. Any other brand you recommend ? Thanks!
 
Last edited:
I bought a used Crown 1” skew from the bargain table at Axminster tools a little while ago. It’s been sharped on what I’m guessing is a 8” grindstone, and it’s noticeably sharper than the flat grind on my other skews. I’ve not had occasion to use it yet though so I’ve no idea if it cuts any better.
 
Hi John, quick question: I recently purchased a 1 1/4" skew from Carter and Son, but I find it a bit too wide for my small spindle work ( 2-3" diameter) . I'm unsure what size to get next. Any recommendations? They have a sale on right now, so I'd like to get a second skew. Any other brand you recommend ? Thanks!
Not John, but I’d recommend a 1/2”. I use 1” and 1/2”. The 1/2” gets used mainly when the 1” is too wide to fit, or some < 1/2” dia stuff. I’m no skew expert, tho. As for brand, I’m not particular. I have 2x 1” and 2x 1/2” at different angles. They were 1” and 1/2” M2 scrapers that I shaped, including rounding the shaft corners so they don’t dig in to the tool rest.
 
Hi Manny, I'm not John, but... If you like the Carter, stick with them. M42 is an excellent edge steel. And their rolled edges make for good handling on the tool rest (and gentle to cast iron rests) In recent times I've added several of their scrapers and a spindle gouge to my fleet. Their 1/2" skew is made from 1/4" thick M42 barstock, their 3/4" skew from 5/16" bar, and the 1" skew hits the 3/8" thickness. And I've used Crown Pro-PM tools for over 20 years and have found them to offer an excellent edge off the wheel or hone that lengthens time at the lathe between trips to the grinding wheel. My votes would be with these tools, but there are other great brands out there to consider as well.

I'd agree that the 1-1/4" skew would be a big tool on smaller work (mine is). A 1/2" works great, for me, on diameters of 1" or so, but for your 2-3" diameters, I'd be most comfortable with a little extra breathing room between the skew tips, so a radius edge 3/4" skew (bought as a radius, or a ground at home radius) would be my choice from any tool maker. Still light and nimble, but stout enough to hang off the rest rolling over beads and tapers. I hope that helps.

To any first-time skew buyers, in my opinion the 3/4" or 1" sizes make a great first skew for my reasons above. They'll work over a range of diameters and keep you out of trouble with catches as you learn to use the tool.
 
Hi John, quick question: I recently purchased a 1 1/4" skew from Carter and Son, but I find it a bit too wide for my small spindle work ( 2-3" diameter) . I'm unsure what size to get next. Any recommendations? They have a sale on right now, so I'd like to get a second skew. Any other brand you recommend ? Thanks!

Manny,

I'm also not John L, but do a lot of spindles. I keep skews from 1/4" up to wide (forget, 1-3/4" or so)
My favorites for the 2-3" sizes you mention are 3/4" to 1-1/4"
I use 1/2" skews a lot on about 3/4" diameter down to about 1/16". But the 1/2" is fine for 1" diameter stock although for beginners the 3/4" gives a little extra edge.

I usually start with 3/4" to 1" stock for these wands and use a 1/2" skew - I sometimes make them pretty thin on the ends.
I cut the coves with a 3/8" spindle gouge.

1763909923289.jpeg

But some other things to consider on skew size: the type of wood, the included angle of the grind, the shape of the edge (straight/curved), the angle of the edge measured from the edge of the bar. Lots of variables: a smaller included angle (maybe 25-30 deg can cut cleaner but might be harder to control when beginning - an included angle between 45 and 60 degrees with a curved edge is very forgiving when learning. For new beginners who have never touched a lathe I give them the skew in this photo as their first tool.

1763907622668.jpeg

Note that a VERY small included angle can be a problem with some wood - I've had fibers pulled out of long thin spindles (1/2" and less) of some Osage Orange blanks, not all. No problem with any other type of wood with the same skew.

If planing cylinders or tapers, the width of the skew doesn't matter. When making shallow curves/coves a narrower skew can help. The larger the diameter of the work, a skew is my choice - for 3" diameters I'd probably pick up the 1.5" wide skew. I also often use a fairly wide skew for roughing square blanks instead of a roughing gouge - if done thoughtfully it can be quicker. Roughing 2" squares with a 1/2" skew can be challenging!

For miniatures and thin finials, the 1/2" is usually perfect for shaping, although I don't use it for coves - switch to the 3/8 or even 1/4" spindle gouges for detailed curves. I do most finger tops with a spindle gouge and a 1/2" skew.

1763908360418.jpeg

What I recommend is to have a variety of skews if possible. Try one for a specific cut, then try another. Make planing cuts in both directions. Make v-grooves, shallow and deeper. Make peeling cuts. Try these on a variety of woods - soft, hard, fine, coarse grain. Each turner can see what works best for them. As Sir Lucas mentioned, practice, practice, practice. Spend 50 hours with the skew for each hour of watching videos!

And for the full effect, read and follow the the exercises in Mike Darlow's book "Fundamentals of Woodturning" and Richard Raffan's book "Turning Wood". That's how I learned - I was teaching turning to family and friends before I watched a video or a demo.

(I should really measure all my skews and make notes of which I like best for what. I get asked that a lot and never have a good answer.)

If you can manage it, take a road trip and go visit John Lucas in Cookville TN! Or if you want a lower quality perspective stop my my shop for an afternoon.

BTW, I'm with Bill Blasic - I skip the C&S and buy Thompson. I like Doug and I like his tools. However, I don't use Doug's factory grinds - they are a good start. But I have my own opinions on grinds.

JKJ
 
Last edited:
Our club has a library of DVDs and I just got the 2 part Taming of the Skew by Mike Darrow and Alan Lacer’s The Skew Chisel. Will peruse and try my luck.
 
Manny,

I'm also not John L, but do a lot of spindles. I keep skews from 1/4" up to wide (forget, 1-3/4" or so)
My favorites for the 2-3" sizes you mention are 3/4" to 1-1/4"
I use 1/2" skews a lot on about 3/4" diameter down to about 1/16". But the 1/2" is fine for 1" diameter stock although for beginners the 3/4" gives a little extra edge.

I usually start with 3/4" to 1" stock for these wands and use a 1/2" skew - I sometimes make them pretty thin on the ends.
I cut the coves with a 3/8" spindle gouge.

View attachment 81845

But some other things to consider on skew size: the type of wood, the included angle of the grind, the shape of the edge (straight/curved), the angle of the edge measured from the edge of the bar. Lots of variables: a smaller included angle (maybe 25-30 deg can cut cleaner but might be harder to control when beginning - an included angle between 45 and 60 degrees with a curved edge is very forgiving when learning. For new beginners who have never touched a lathe I give them the skew in this photo as their first tool.

View attachment 81842

Note that a VERY small included angle can be a problem with some wood - I've had fibers pulled out of long thin spindles (1/2" and less) of some Osage Orange blanks, not all. No problem with any other type of wood with the same skew.

If planing cylinders or tapers, the width of the skew doesn't matter. When making shallow curves/coves a narrower skew can help. The larger the diameter of the work, a skew is my choice - for 3" diameters I'd probably pick up the 1.5" wide skew. I also often use a fairly wide skew for roughing square blanks instead of a roughing gouge - if done thoughtfully it can be quicker. Roughing 2" squares with a 1/2" skew can be challenging!

For miniatures and thin finials, the 1/2" is usually perfect for shaping, although I don't use it for coves - switch to the 3/8 or even 1/4" spindle gouges for detailed curves. I do most finger tops with a spindle gouge and a 1/2" skew.

View attachment 81843

What I recommend is to have a variety of skews if possible. Try one for a specific cut, then try another. Make planing cuts in both directions. Make v-grooves, shallow and deeper. Make peeling cuts. Try these on a variety of woods - soft, hard, fine, coarse grain. Each turner can see what works best for them. As Sir Lucas mentioned, practice, practice, practice. Spend 50 hours with the skew for each hour of watching videos!

And for the full effect, read and follow the the exercises in Mike Darlow's book "Fundamentals of Woodturning" and Richard Raffan's book "Turning Wood". That's how I learned - I was teaching turning to family and friends before I watched a video or a demo.

(I should really measure all my skews and make notes of which I like best for what. I get asked that a lot and never have a good answer.)

If you can manage it, take a road trip and go visit John Lucas in Cookville TN! Or if you want a lower quality perspective stop my my shop for an afternoon.

BTW, I'm with Bill Blasic - I skip the C&S and buy Thompson. I like Doug and I like his tools. However, I don't use Doug's factory grinds - they are a good start. But I have my own opinions on grinds.

JKJ
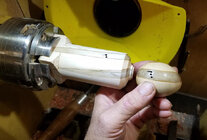
Thank you so much for all this useful information .
 
Back
Top