Relying only on safety glasses while coring is a recipe for disaster in my book! In my own shop, I might not use a shield ALL the time, but bowl stock has to be well beyond the basic rough shaping before I take the shield off. Three years ago, I had a Stronghold chuck (what? 4pounds? 5?) along with a 5-pound bowl fly off the lathe. If I'd been standing in the way, it would have hurt badly, but at least the shield was on. [Won't happen again. it was due mainly to habit developed with a Powermatic lathe, which has slow start, and slow change from forward to reverse. The Harvey, which I had just started using, easily can be switched from forward to reverse accidentally and the servo motor changes directions in a split second. Now there's a home-shop rule that I always turn down the speed before turning the lathe to the off position.Sounds like a great class.
On the subject of speed, rpms have to be considered relative to diameter. There is a rule of thumb stating that rpms x diameter in inches should be 6000-9000. It's not written in stone, but it's a useful reference. At the upper end (rpms x D = 9000) the rim speed is about 27 miles per hour. The more mass and the higher the rim speed, the more energy is embodied in the spinning wood and the more damage it can do if something breaks loose.
You probably know all this, and everyone can make their own judgments about shop safety. My tolerance for getting hit by speeding objects is pretty low. I tend to regulate the speed by perceptible vibration and adjust my tool feed rate to match.
I was showing my friend how to use his McNaughton coring system on a 8.5" walnut bowl blank last Monday. It looked quite sound to me. He called me later that day to say he had blown the piece up at 1700 rpm, about 2/3 faster than I would have spun it. He's getting to be a good turner, but he's only been doing it for a year, usually wears only safety glasses, and had never heard of my rule of thumb. I worry that he is going to get beaned one day.

-
Congratulations to David Wyke, People's Choice in the April 2026 Turning Challenge (click here for details) -
Congratulations to Roberto Ferrer and Carol Hall for "Waking Dream - Danza Pagana" being selected as Turning of the Week for May 4, 2026 (click here for details) -
Welcome new registering member. Your username must be your real First and Last name (for example: John Doe). "Screen names" and "handles" are not allowed and your registration will be deleted if you don't use your real name. Also, do not use all caps nor all lower case.
You are using an out of date browser. It may not display this or other websites correctly.
You should upgrade or use an alternative browser.
You should upgrade or use an alternative browser.
Woodturning Class and Speed
- Thread starter Ed Brekke
- Start date
The whole mortise vs tenon thing is sort of like hanging toilet paper over the roll, or under. Both work, it's just a matter of preference or what you're used to. Everybody has their own way of getting to the same endpoint, but some have many gadgets and extra steps that I just don't see the need for. (yet) I think how you start your work can sort of dictate your preference.
I like to start my work between centers. It doesn't lock me in to any particular axis like a faceplate or screw chuck does. I can change based on balance, grain, features, etc. If you're between centers, making a clean cut tenon is much easier than trying to cut a clean and accurate mortise. I like to size the tenon for optimal grip (jaws almost closed) and sliced cleanly rather than scraped. It's also the last thing I do before flipping the piece around and chucking it up. It My methods give me almost zero runout. I can make a mortise, but it's usually scraped and tough to get the clean, crisp faces and corners that give the accuracy I get with a tenon.
I use a 1/2" steb center most of the time, so when I finish turning a bowl, it's easy to get back on the original axis (pressed against a scrap of leather on a chucked waste block) to turn away the tenon and shape the foot. I'm often turning away everything except a tiny cone in the center that I break off with my thumb when it comes off.
There it is...that point in high school when they told us that algebra may save our lives someday.I was told there would be no math.
I'm assuming the way you describe working here is with a possibly uneven chunk of wood. I sometimes work and have taught that way when turning green wood or dry burl.I like to start my work between centers. It doesn't lock me in to any particular axis like a faceplate or screw chuck does. I can change based on balance, grain, features, etc.
I think the method of starting and holding may depend somewhat on the starting blank. For example, turning a dry wood blank with top and bottom already flattened and the outline already cut round or to some shape on the bandsaw may work better by starting with a firm holding method in a fixed position. The axis is already "locked", er, determined. (And though the blanks are usually well balanced, wearing good face protection and working at a safe speed is, of course, advised - could be a hidden defect.)
For example, dry, defect-free blanks like these are flattened and balanced and have only one practical starting center point - I'd have no reason to move the center unless I deliberately wanted to turn one off-axis.


For this type of turning, I find a screw chuck the most practical and efficient way to hold although I have used faceplates and scroll chucks and occasionally started between centers.

For me, turning bowls, platters and more from start to finish from dry wood has many advantages.
The huge disadvantage, of course, is having suitable wood to start with, perhaps difficult or expensive for some to obtain. I cut many blanks from free green wood but it takes some effort and patience to end up with good dry blanks, and can benefit from access to machines such as a bandsaw, sanders, and even a sawmill.
One thing I love about this hobby is the incredibly huge variety of ways to work and the finished pieces possible starting with pieces of wood from trees!
") Might be boring if we all worked the same way.
Might be boring if we all worked the same way.JKJ
I haven't turned much lumber blanks, I tend to do more green wood. I've just started to rough turn and put aside some pieces to turn a 2nd time. I need to work on my process, I've had a few split on me. I had 3 walnut blanks recently that really checked, but I turned them anyway. I'm sort of liking the splits, they add some character.
Attachments
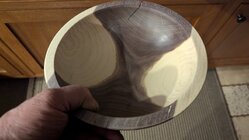


Donna Banfield
TOTW Team
My experience with bowl blanks that contain a lot of sapwood, cracking is more common. That's because the sapwood is lighter in density compared to the heartwood. It's losing moisture at a faster rate than the heartwood. That creates stress, which is why most of your cracks are in the denser heartwood. This is common in cherry, too. If I turn these species with plenty of sapwood, I turn them once to final thickness, which is about 1/4" thick. Success rates increase for me using that method.I haven't turned much lumber blanks, I tend to do more green wood. I've just started to rough turn and put aside some pieces to turn a 2nd time. I need to work on my process, I've had a few split on me. I had 3 walnut blanks recently that really checked, but I turned them anyway. I'm sort of liking the splits, they add some character.