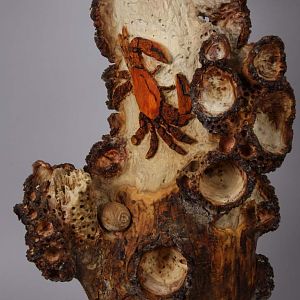
Weathered Post
Burl Tree series No 3
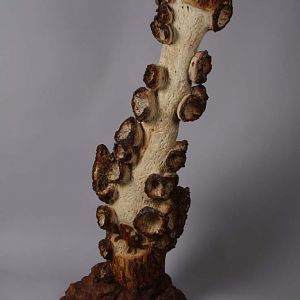
Allot bigger than the first two this was quite a challenge as it stands finished at 1m 39 inches high
This my third piece in my Burl tree series is once again influenced by my surroundings.
At our holiday home and many beaches around NewZealand most of the coastal property has been farm land and farmers used to take fencing down to the low water mark. Remnants of these fences are still to be seen that some pour farm hand had to chisel holes into bed rock. They were lucky if the rock was sandstone but often like I have tried to convey by using a Kanuka Burl at the base of my post was often larva rock. How they ever chipped away the rock between tides by hand is a mystery.
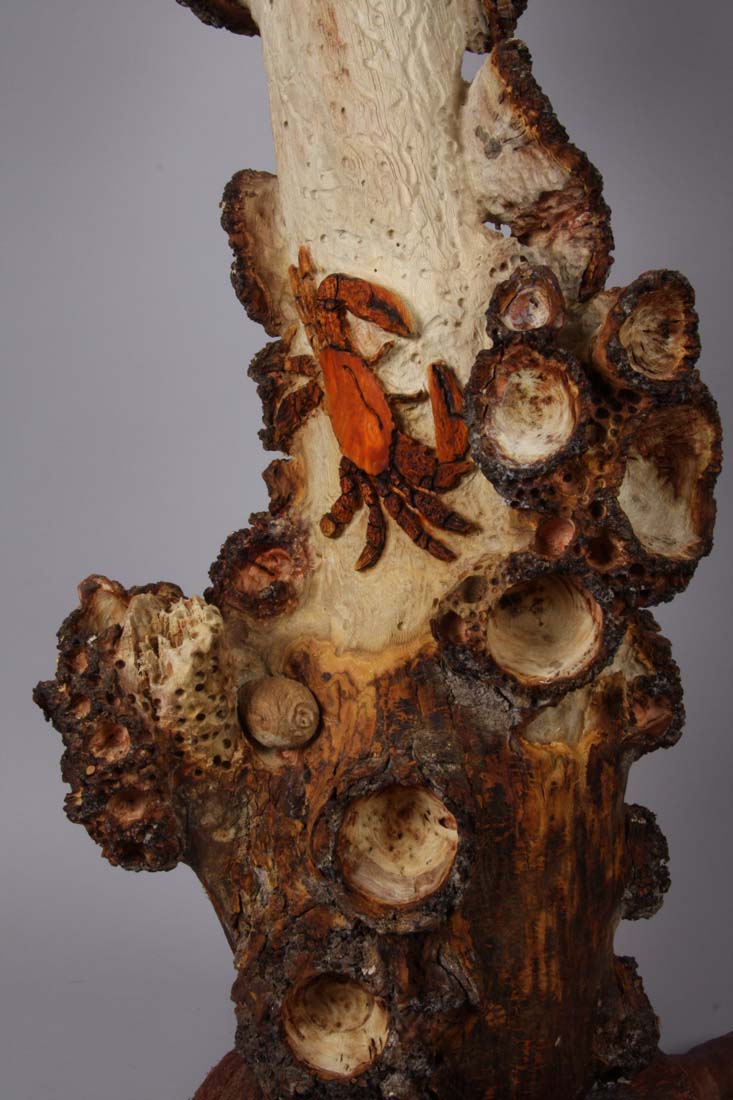
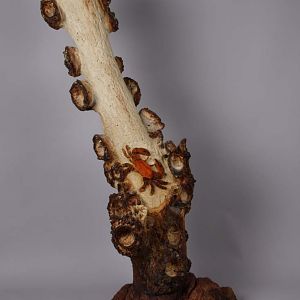
The post part was another branch covered in small burls, my boat building days enabled me to scribe and carve the post /branch into the burl. This is done by the sight method and a trick I have come up with by sitting the post on the burl carve a little away and by repeating the process by oiling the end of the post and placing on the burl and removing the wet spots .
The post is such a tight fit that it looks like the larva has entrapped the post
After the shaping of the inside of all the burls the piece was then attacked with my new king Arthur set of Merlin that I fitted to my Mini Arbotec
The backing board that I used looks like Swiss cheese there are so many holes were the tek screws went to hold each turning position .Using a large been bag behind the burls turned helped to keep the bark from being damaged against the backing board The Crabs were carved with the aid of hand chisels and dremel. The shell was turned then carved.
The bug holes and texture were then carved using a ball bit in the dremel .I was surprised by the realism of this after I wire brushed and sandblasted the worm holes.
The piece was then bleached, I was a bit worried as when applying the bleach the wood went orange. In the morning I was delighted to find it had gone white ,my first success with bleaching although I did wire brush the bleach to take away some of the glare as it was to white.
Sprayed with Artist fixative to hold the colour then Lacquered with a thin coat of Acrylic lacquer.
I will try and find an old piece of fencing wire and some staples and add to the top of the post as I think it is lacking something to pull the piece together
I need to work on the name any ideas welcomed
Comments welcome