Yes, true, I still have one with the felt still on it, I turned it before 1967, probably 65 or 66.That is what the felt was for
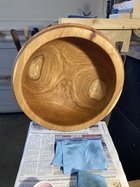
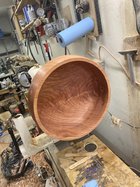
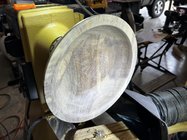
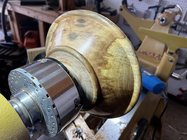
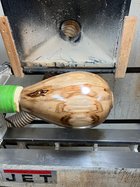
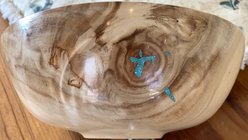
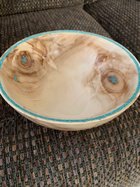
Teak wood bowl 11.5 inches.


Yes, true, I still have one with the felt still on it, I turned it before 1967, probably 65 or 66.That is what the felt was for
I'm not upset and find the advice thoughtful! I will try a foot on the next one. I am new to the lathe not wood working.Sorry I didn’t mean to upset you or anybody else. Just trying to give some helpful advice because I thought you were new.
That is what the felt was for
")

For bark inclusions and small voids, the coffee ground routine works very nicely, the stuff looks so much like bark and it is solid, it is wood.Turning some green walnut. The grain on this one reminds me of the Great Red Spot and swirling clouds on the planet Jupiter. Might need some epoxy on this one when it dries, there’s a small bark inclusion to the right of the “red spot”.
View attachment 50336

When you say “Moist” do you mean water or CA?Just use barely moist coffee ground


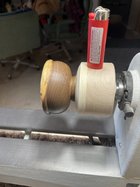
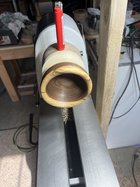
James, Catalpa is a wood that does dry without splitting or distorting,I have large chunks sitting that have never had anything on them, just air dry in my shop at that time and now sitting in the storage shed.Here is a Catalpa bowl I'm working on. I coated several with Anchorseal when I roughed them out and they didn't warp very much at all drying. I don't know if it is the nature of the wood or if the Anchorseal has anything to do with it. This bowl is about 18" now, the wood is light and some of the grain sands out easily. So I thought I'd try using Danish oil before sanding might help (maybe sanding sealer would be a better choice?). Latter today I'll see if it helps when I sand it.
View attachment 50360View attachment 50361


Water, as if totally dried it does not pack very well and likes to float up when you add the CA.When you say “Moist” do you mean water or CA?
Rusty. the idea came to me when I found a couple tile cutouts for the toilet openings, at my son's new build place, the tile setter did a real nice round cutout, so I got then the large Elm platter and turned it so the tile did fit in, then gave it to my son, they did like it and have had it often on the large island they have.Leo a couple of guys at our club have been doing that and it does look good. Nice platter.
Thanks Leo! I’ve got a rough turned bowl with a void that I think will benefit from this treatment. I’ll give it a try.Water, as if totally dried it does not pack very well and likes to float up when you add the CA.
What a beautiful piece of cherry!!! Isn't it amazing what shows up in a piece of wood.....Sweet Cherry crotch 16 x 4ish. Very green and wet. Anchor sealed and put away.
View attachment 50148View attachment 50149
I truly believe that has promise of greatness!Black Acacia bowl. First turning while wet. I will seal and come back later to finish when it is dry.
Jay
View attachment 50192
The Australian brown Mallee burl was finished last night, other than it's still on the waste block waiting to have the foot done. The foot will be done in about 2 weeks time. The Danish oil has just been applied in these two photos......I came in from the shop past 1am last night.....which is pretty much normal for me!
The third photo is of my current stash being seasoned and waste blocks applied.....
View attachment 50165 View attachment 50166 View attachment 50167
-----odie-----

Beautiful piece. I turn quite a bit of cherry.Cherry, harvested from the forest this morning.

What a gorgeous piece of wood!Also working on a Box Elder Burl bowl. Half of it will be live edge, so the wall on one side will be thicker than on the live side.
View attachment 50410

I do a finish cut. I will sharpen my gouge and take a light cut from the Chuck to the rim. Sometimes two light cuts. That normally gets rid of the tear out for me. My starting grit for sanding is 125.Currently working on Cedar Elm bowl. At least that is common name here in North Central Texas. Looking for ideas on how to handle the torn end grain, I’ve quickly sanded with 80 grit, sealed with sanding sealer, and added saw dust to fill the holes. Next step is to finish sanding the inside.


Lovely work, per usual, Odie.Ziricote.....photo taken earlier yesterday, and I finished it last night.....except for it's still on the waste block, and the foot needs to be done. A fairly difficult wood to get a clean cut, but can be done with sharp tools.
-----odie-----
View attachment 50566
Jeez, Odie, what's a maverick to do? Your work is appreciated by the herd!I did buy one of Odie's pieces. Pictures are nice, but you need to seem them in person to really appreciate the work that goes into them...
robo hippy

I did buy one of Odie's pieces. Pictures are nice, but you need to seem them in person to really appreciate the work that goes into them...
robo hippy
")