Be advised that wet persimmon is one of the most warping wood I've had, almost as bad as green holly. I've had boards from the sawmill twist and crook until they were unusable except for small things. Dry persimmon is fine. (Persimmon is wonderful wood to turn - hard, fine-grained, cuts lie glass). BTW, it's a species of ebony)
I cut up some more wet persimmon on the bandsaw recently. I seal well with Anchorseal, sometimes on all sides (depending) and let it dry for at leaast a while or until totally dry until I use it. Even square blanks warp significantly as they dry, depending on where they are cut in the log and how and where the rings cross..
Persimmon is best cut in the winter to help keep it white. If cut when warm, it will often quickly develop brown/grey streaks which don't look bad.
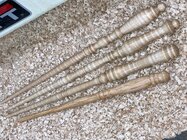
These are persommon:
View attachment 84632
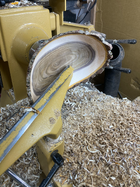
Unlike black ebony, persimmon usually has just a pencil-thin streak of black in the middle, sometime more like one of those boxes. Occasionally I'll find wood like this. When I do, I hide it from woodturners:
View attachment 84633
JKJ


")