• We just finished moving the forums to a new hosting server. It looks like everything is functioning correctly but if you find a problem please report it in the Forum Technical Support Forum (click here) or email us at forum_moderator AT aawforum.org. Thanks!
  • Beware of Counterfeit Woodturning Tools (click here for details)
  • Johnathan Silwones is starting a new AAW chapter, Southern Alleghenies Woodturners, in Johnstown, PA. (click here for details)
  • Congratulations to Dave Roberts for "2 Hats" being selected as Turning of the Week for April 22, 2024 (click here for details)
  • Welcome new registering member. Your username must be your real First and Last name (for example: John Doe). "Screen names" and "handles" are not allowed and your registration will be deleted if you don't use your real name. Also, do not use all caps nor all lower case.

What’s on your lathe?

Joined
Oct 13, 2016
Messages
1,067
Likes
1,551
Location
Rainy River District Ontario Canada
A friend gave me a couple of chunks of Sumac a long while ago (not sure what species). One of those situations where the wood looked so crummy you almost want to say no. BUT, I had never turned Sumac, so I couldn’t pass it up. It sat, and sat, and sat, until today when I decided to turn a mini-calabash out of it. The wood was super dry, super soft, hollow-pith, but very beautiful. Green and brown colors and wide growth rings. Here are before, during, and after shots:

View attachment 61135
View attachment 61136
View attachment 61137
We do have Staghorn Sumac here in southern Ontario, and I have turned some, still have pieces sitting in my storage, it seems to grow slower than what you have there Michael, there are other species, one is called Poison Sumac { also called Swamp Sumac) with the same/similar poisonous outcome as Poison Ivy and poison Oak, rash and blisters, though I do not know what it looks like, or if it grew in the London area, over here in NW Ontario no Sumac grows :D

I just now went to the storage and shop, had to close them, as I had them opened up to warm up some, like it is around 5-6 degrees C, and like the shop was below freezing (cooling water by the grinder was solid ice) we had a couple of cold nights -29C, much warmer now ;-))

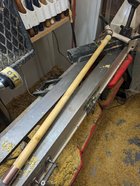
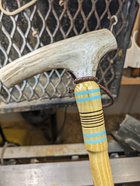
Anyway took a couple pictures of a Sumac log I have sitting and the turned bowl from the largest end of the Staghorn wood I had, kind of a bird-beak shape, and I don't like it, so it sits.

I also have smaller pieces sitting in the shop, might use them someday, though that Pith in it is a nuisance.

Staghorn Sumac log.jpg

Large Sumac bowl.jpg
Sumac waiting for use someday.jpg
 
Last edited:

Michael Anderson

Super Moderator
Staff member
TOTW Team
Joined
Aug 22, 2022
Messages
1,360
Likes
3,922
Location
Chattanooga, TN
I was wondering if you had any Sumac turnings Leo. That’s a rich brown color on the turning! How long ago did you turn it?

Random fact, Poison Sumac is now in a totally different genus than true Sumacs. Kind of funny. It’s rare to see around here, but you will if you look in the right places. There are some areas around here where all three of the “poisons” (ivy, oak, and sumac).

If I had to guess, this is probably either Winged or Smooth Sumac, but I can’t tell them sort by their bark. We have a couple of very random, small Staghorn Sumac populations, as well as another rare type I can’t remember the name. Fragrant Sumac also grows around here, but it is a low shrub.

The pith is problematic for sure. You can see in the first image I posted, the piece was the convergence of 3 large branches and a smaller fourth. All hollow pith, which made for a bunch of holes. Fortunately, I only need a small section, so it wasn’t too bad. The bowl ended up being about 1.5” diameter, and has a small hole on the bottom about a 1/4 of the way up. Interesting wood, for sure one of the worst I’ve turned (though maybe that was just this piece specifically). I have one more slightly larger chunk that I’m going to save for a while. Not in a rush. Lol.
 
Joined
Aug 14, 2022
Messages
29
Likes
86
Location
Atascadero, CA
A chunk of California Pepper with some burl that was dripping wet when I turned it for the first time. Took it off the lathe and stuck it back into the shavings. Two weeks later I put it back on the lathe and hollowed it to help the piece dry. It is still very wet. So I stuck it back in the shavings. I will see what it looks like in a couple more weeks.
Jay

IMG_7761.jpegIMG_7768.jpeg
 
Joined
Dec 29, 2022
Messages
835
Likes
814
Location
West Central, IL
I have been thinking about doing one for myself as well. I would love to see the finished product.

Thanks,

Bob
Here you go. Have mercy! lol

It doesn't have a finish yet and I need to get on that $%^& you tube and learn how to tie some knots or something if I'm going to keep a loop on it.

If the bigger distance under the blue inlay on the top looks funny it's because my wood burner is not going to be here till Monday. Still not sure what to put there. I'm not real artistic.
 

Attachments

  • PXL_20240303_023835707.jpg
    PXL_20240303_023835707.jpg
    547.2 KB · Views: 31
  • PXL_20240303_023847818.jpg
    PXL_20240303_023847818.jpg
    440.2 KB · Views: 31
  • PXL_20240303_023751664.jpg
    PXL_20240303_023751664.jpg
    333 KB · Views: 30
Joined
Jan 6, 2024
Messages
30
Likes
33
Location
Chicopee, MA
Here you go. Have mercy! lol

It doesn't have a finish yet and I need to get on that $%^& you tube and learn how to tie some knots or something if I'm going to keep a loop on it.

If the bigger distance under the blue inlay on the top looks funny it's because my wood burner is not going to be here till Monday. Still not sure what to put there. I'm not real artistic.

Very nice. That gives me some ideas. Did you muse a threaded insert for the handle?
 
Joined
Dec 29, 2022
Messages
835
Likes
814
Location
West Central, IL
Very nice. That gives me some ideas. Did you muse a threaded insert for the handle?
I used a 5/16" dowel screw I bought at the local home store. It's an experiment because this cane I didn't use any epoxy there and I'm not sure what the antler does as it ages. I figure I can put some epoxy on later if it loosens up.

Next one I'm going to try copper pipe instead of a fitting or just some ferrules from Amazon because the 1 inch rubber caps don't fit because the copper fitting is a little over 1 inch.
 
Joined
Jan 6, 2024
Messages
30
Likes
33
Location
Chicopee, MA
I used a 5/16" dowel screw I bought at the local home store. It's an experiment because this cane I didn't use any epoxy there and I'm not sure what the antler does as it ages. I figure I can put some epoxy on later if it loosens up.

Next one I'm going to try copper pipe instead of a fitting or just some ferrules from Amazon because the 1 inch rubber caps don't fit because the copper fitting is a little over 1 inch.

If you look at walking stick tips there is a huge selection of slip on and threaded tips available for all kinds of surfaces. I use a cane and I also still hunt some so tips for all types of surfaces is a huge plus for me.
 

odie

TOTW Team
Joined
Dec 22, 2006
Messages
7,116
Likes
9,836
Location
Panning for Montana gold, with Betsy, the mule!
Last evening, I roughed a couple bowls for seasoning, and finished up a small Birdseye Maple.

-o-

20240304_005744.jpg 20240304_005815.jpg
 
Last edited:

odie

TOTW Team
Joined
Dec 22, 2006
Messages
7,116
Likes
9,836
Location
Panning for Montana gold, with Betsy, the mule!
Oh, BTW.....there is a reminder on my headstock to always lock in the faceplate/chuck to the spindle by giving it a little flip when mounting.


About ten years ago, I had a bowl dismount from the lathe and hit the floor still spinning.....and, all I did was turn off the lathe! This is why that reminder persists today.....It is my constant reminder to always lock it in.

-o-

20240304_005744-MARKED.jpg
 
Joined
Mar 22, 2023
Messages
152
Likes
317
Location
Strasburg, VA
I don’t know how I never heard of it before, but I just stumbled on some “bowls from boards” videos when one randomly popped up on my YouTube feed last week. So I watched a few, made a jig for my tool rest from scraps of hardwood and MDF,


IMG_9459.jpegand turned one from an old piece of table top I was repurposing.

It’s a pretty cool method.

IMG_9473.jpegIMG_9480.jpegIMG_9481.jpeg
 
Joined
Jun 5, 2023
Messages
121
Likes
693
Location
Portage, MI
I don’t know how I never heard of it before, but I just stumbled on some “bowls from boards” videos when one randomly popped up on my YouTube feed last week. So I watched a few, made a jig for my tool rest from scraps of hardwood and MDF,


Google "Michael Mode" You will be amazed :)
 
Joined
Aug 14, 2007
Messages
5,491
Likes
2,841
Location
Eugene, OR
I am trying to remember, which seems to be more difficult now days.... I can't remember any piece coming off the lathe, or unwinding, but I think that was more common with the older lathes, especially if you were turning in high speed range. I did have the parameters on my 3520A changed, and it seemed like they made the ramp down/off range slower. I think most modern lathes come with slower ramp down times as standard. This must be like the soft start on many lathes now days for those who don't check their speed before turning on the lathe.

robo hippy
 
Joined
Jul 19, 2018
Messages
1,713
Likes
2,246
Location
Ponsford, MN
I am trying to remember, which seems to be more difficult now days.... I can't remember any piece coming off the lathe, or unwinding, but I think that was more common with the older lathes, especially if you were turning in high speed range. I did have the parameters on my 3520A changed, and it seemed like they made the ramp down/off range slower. I think most modern lathes come with slower ramp down times as standard. This must be like the soft start on many lathes now days for those who don't check their speed before turning on the lathe.

robo hippy
The majority of the VFD's available have easily accessible parameters that commonly includes ramp up and down settings, minimum speed (lowest frequency setting) and maximum frequency (note the motor will operate at a constant torque up to the motors name plate frequency but if operated above that frequency the voltage out put remains constant and the torque curve starts dropping off. The VFD's that I have installed on my lathes I have set with ramp up and down settings that provide soft start and reasonable stop ramp that does not threaten to unscrew the chuck or face plate. The frequency settings on my lathes are set at 90 Hz on 60 Hz motors so I am able to leave the mechanical step down in the low range and still get high speed for small diameter pieces that do not require as much torque.
 

odie

TOTW Team
Joined
Dec 22, 2006
Messages
7,116
Likes
9,836
Location
Panning for Montana gold, with Betsy, the mule!
I am trying to remember, which seems to be more difficult now days.... I can't remember any piece coming off the lathe, or unwinding, but I think that was more common with the older lathes, especially if you were turning in high speed range. I did have the parameters on my 3520A changed, and it seemed like they made the ramp down/off range slower. I think most modern lathes come with slower ramp down times as standard. This must be like the soft start on many lathes now days for those who don't check their speed before turning on the lathe.

robo hippy

Yeah Robo......I don't remember the exact date I converted from changing belts to variable speed, but it must have been 10-15 years ago. Since I've come to habitually giving the mounted faceplate or chuck a little flip to lock it in, this problem has never happened again. It doesn't take much of a flip, but just enough to give it a little friction fit.....that's all it takes. If newer lathes have slower start-ups and shut-downs, that will probably take care of the issue for most turners who have newer lathes than mine.

-o-
 

odie

TOTW Team
Joined
Dec 22, 2006
Messages
7,116
Likes
9,836
Location
Panning for Montana gold, with Betsy, the mule!
Last night, I roughed several bowls for seasoning, and plan to continue adding to the pile again this evening.....

-o-
12 1/2" x 3" fiddleback maple:
20240306_000715.jpg
14" x 3" maple burl:
20240306_000606.jpg
The current pile of shavings:
20240306_000633.jpg
 
Joined
Feb 18, 2023
Messages
615
Likes
1,111
Location
Orange, CA
Last night, I roughed several bowls for seasoning, and plan to continue adding to the pile again this evening.....

-o-
12 1/2" x 3" fiddleback maple:
View attachment 61248
14" x 3" maple burl:
View attachment 61246
The current pile of shavings:
View attachment 61247
@odie
How close to final shape do you first get? These don’t look “rough” to me. So you just later remount and bring round by taking off as little as possible or do you knock it down a lot more than that?
 
Joined
Feb 10, 2023
Messages
21
Likes
60
Location
Yardley, PA
Yeah Robo......I don't remember the exact date I converted from changing belts to variable speed, but it must have been 10-15 years ago. Since I've come to habitually giving the mounted faceplate or chuck a little flip to lock it in, this problem has never happened again. It doesn't take much of a flip, but just enough to give it a little friction fit.....that's all it takes. If newer lathes have slower start-ups and shut-downs, that will probably take care of the issue for most turners who have newer lathes than mine.

-o-
I've read about that "little flip" before, and am using it. The problem I have is, even with that the faceplates & chuck tend to further lock in while turning, to the point where I require a lever arm to unstick them. Should I oil the spindle's threads? What other options should I try, so I can take them off by hand?

Today with the chuck I'm nervously using my chuck key for the leverage--nervous because I don't want to ruin the chuck or the key. For the faceplates (which don't have nice flats for a wrench), I wrap some rubber drawer-bottom sheeting around them then use a toothed wrench. Thankfully the wrench has only left a couple marks on the faceplate, but over time that's not a good solution.
 
Joined
Feb 28, 2021
Messages
1,226
Likes
1,075
Location
Roulette, PA
Website
www.reallyruralwoodworks.com
I've read about that "little flip" before, and am using it. The problem I have is, even with that the faceplates & chuck tend to further lock in while turning, to the point where I require a lever arm to unstick them. Should I oil the spindle's threads? What other options should I try, so I can take them off by hand?

Today with the chuck I'm nervously using my chuck key for the leverage--nervous because I don't want to ruin the chuck or the key. For the faceplates (which don't have nice flats for a wrench), I wrap some rubber drawer-bottom sheeting around them then use a toothed wrench. Thankfully the wrench has only left a couple marks on the faceplate, but over time that's not a good solution.
What I do is more of a "whack" of the hand - Have not needed a wrench of any sort ever since (other than the spindle spanner, since my lathe doesn't have a spindle lock) With the key chucks, I just chuck up a piece of scrap wood long enough to stick out 6 inches or so from one side, oriented so it points towards me, lock (or spanner hold) the spindle and a sharp whack with the side of my fist on the scrap wood invariably pops the chuck loose (and with tommy bar chuck, I just need one of the tommy bars in the chuck body) - You do NOT want to oil the spindle threads or chuck at all - you want them clean and DRY- Oil or any lubrication would allow them to torque down impossibly tight , and then you'd have a whale of a time getting them loose again. the sharp whack helps jar the chuck loose quite easily as opposed to trying to manually twist it off.
 

odie

TOTW Team
Joined
Dec 22, 2006
Messages
7,116
Likes
9,836
Location
Panning for Montana gold, with Betsy, the mule!
@odie
How close to final shape do you first get? These don’t look “rough” to me. So you just later remount and bring round by taking off as little as possible or do you knock it down a lot more than that?
Alan.....Most of my roughed bowls resemble the shape in the fiddleback maple photo, but the shape of the maple burl bowl was the result of removing material near the rim because it had a large bark inclusion that I wanted to eliminate. My roughed bowls are normally very thick, so the second turn usually needs quite a bit of stock removal to reveal the final version. I try my best NOT to reduce either the height or width over what is necessary to bring it to round.....but that leaves a lot of material that will still need to be removed for the final shape.....and, a great deal of creative possibilities are left up to the imagination! :)

For roughing bowls, there is a rule about making the thickness about 1/10th of the diameter......but, I've come to increase the thickness even further to maybe 15%, or so. This normally increases the seasoning time.....but, I've found the increase in time is an advantage in seasoning roughed bowls well.
The problem I have is, even with that the faceplates & chuck tend to further lock in while turning, to the point where I require a lever arm to unstick them.
Greg.....The act of turning, in itself, may or may not further seat the chuck or faceplate.....that is, unless aggressive use of tools in stock removal, or any "catches" are in the mix. I've found it's better to have the added insurance of "the flip", in order to guarantee a good "locked in" fit between spindle and chuck/faceplate.

-o-

.
 
Last edited:
Joined
Dec 29, 2022
Messages
835
Likes
814
Location
West Central, IL
I've read about that "little flip" before, and am using it. The problem I have is, even with that the faceplates & chuck tend to further lock in while turning, to the point where I require a lever arm to unstick them. Should I oil the spindle's threads? What other options should I try, so I can take them off by hand?

Today with the chuck I'm nervously using my chuck key for the leverage--nervous because I don't want to ruin the chuck or the key. For the faceplates (which don't have nice flats for a wrench), I wrap some rubber drawer-bottom sheeting around them then use a toothed wrench. Thankfully the wrench has only left a couple marks on the faceplate, but over time that's not a good solution.
I've never tried it but I either read it somewhere or maybe I had an AA haa moment but what about one of those oil filter wrenchs that uses a belt?

Can't imagine they cost too much and lots of places probably carry them.
 
Joined
Apr 1, 2019
Messages
358
Likes
236
Location
Bashaw, Alberta
I've read about that "little flip" before, and am using it. The problem I have is, even with that the faceplates & chuck tend to further lock in while turning, to the point where I require a lever arm to unstick them. Should I oil the spindle's threads? What other options should I try, so I can take them off by hand?

Today with the chuck I'm nervously using my chuck key for the leverage--nervous because I don't want to ruin the chuck or the key. For the faceplates (which don't have nice flats for a wrench), I wrap some rubber drawer-bottom sheeting around them then use a toothed wrench. Thankfully the wrench has only left a couple marks on the faceplate, but over time that's not a good solution.
If you can take your chuck off by hand it was never on securely. On my super nova chucks I use a wreck on the insert to remove them. On my nova titan I use a strap wrench
 
Joined
Sep 19, 2023
Messages
395
Likes
603
Location
Columbia, TN
I've read about that "little flip" before, and am using it. The problem I have is, even with that the faceplates & chuck tend to further lock in while turning, to the point where I require a lever arm to unstick them. Should I oil the spindle's threads? What other options should I try, so I can take them off by hand?

Today with the chuck I'm nervously using my chuck key for the leverage--nervous because I don't want to ruin the chuck or the key. For the faceplates (which don't have nice flats for a wrench), I wrap some rubber drawer-bottom sheeting around them then use a toothed wrench. Thankfully the wrench has only left a couple marks on the faceplate, but over time that's not a good solution.

This may not apply to you, but I have the SuperNova 2s, insert version. The insert has a set screw. I don't do the "snap" when attaching the chuck. Instead, I just snug it up and use the setscrew on the insert. The reason being, once I loosen the setscrew I can loosen the chuck by hand.

With my old, cheap Wen chuck, I use the t-bar handle to loosen the chuck like you are doing. I don't see any issues with it. The SuperNova 2s have a separate hole for a screwdriver or whatever else you want to use to loosen it.
 

Dave Landers

Beta Tester
Joined
Dec 1, 2014
Messages
811
Likes
2,502
Location
Estes Park, CO
Website
dlwoodturning.com
I've read about that "little flip" before, and am using it. The problem I have is, even with that the faceplates & chuck tend to further lock in while turning, to the point where I require a lever arm to unstick them. Should I oil the spindle's threads? What other options should I try, so I can take them off by hand?

Today with the chuck I'm nervously using my chuck key for the leverage--nervous because I don't want to ruin the chuck or the key. For the faceplates (which don't have nice flats for a wrench), I wrap some rubber drawer-bottom sheeting around them then use a toothed wrench. Thankfully the wrench has only left a couple marks on the faceplate, but over time that's not a good solution.
I use the chuck Allen key and give it a jolt - a sharp pull, sometimes I knock it with my hand. Not trying to unspin it, just get it loose. I do this with my Vicmarcs because the Allen fits solidly in the key hole. It shouldn't take much - if it's not working, experiment with less "drama" in the "flip".
I also have an old Nova chuck and I do the same thing (but not with the ball-end Allen it came with). The fit of the Allen in the hole is not as good (deep) on this chuck vs the Vics, and I suppose I do risk wearing out the thing. But I don't use it too often, so it'll probably outlast me anyway.
If that doesn't work, you can always just chuck a 1x2 or similar cross-wise in the jaws and use that as a lever.
For your faceplate, look for a spot on the outer edge or around the spindle and drill a hole so you can insert a rod to lever it off.
 
Joined
Jul 27, 2020
Messages
300
Likes
1,214
Location
Durham, NC
I always use a snap when seating a chuck. That noise and sudden stop lets you know that both surfaces, chuck and spindle are clean and have mated properly. They will run true. A snap on an 8 pound chuck is actually quite a bit of torque, which is why removal can be difficult if you’re not tooled and trained for it.
This is an adjustable pin spanner wrench. It can grab the small hole in the adapter, or hook into the Allen or opening for the chuck key. If it’s really tight, smack the tool with your hand or even a mallet. It’s easy on the tools and is quite effective. Use only for loosening.
1709829103683.jpeg
 

Michael Anderson

Super Moderator
Staff member
TOTW Team
Joined
Aug 22, 2022
Messages
1,360
Likes
3,922
Location
Chattanooga, TN
Working on the finish turning of an Osage Orange calabash. The blank had a crack that I decided to keep with the intention of adding pewa. Will be about 7.5”d and 3.25”h when finished. If interested, I wrote a tutorial of how I installed the pewa. Here is a link to the tutorial in the appropriate section of the forum.

3CDE05A1-73B2-4A4D-859B-7068B677DE05.jpeg
 
Last edited:
Joined
Mar 19, 2016
Messages
1,187
Likes
1,282
Location
Haubstadt, Indiana
I always use a snap when seating a chuck. That noise and sudden stop lets you know that both surfaces, chuck and spindle are clean and have mated properly. They will run true. A snap on an 8 pound chuck is actually quite a bit of torque, which is why removal can be difficult if you’re not tooled and trained for it.
This is an adjustable pin spanner wrench. It can grab the small hole in the adapter, or hook into the Allen or opening for the chuck key. If it’s really tight, smack the tool with your hand or even a mallet. It’s easy on the tools and is quite effective. Use only for loosening.
View attachment 61265
We differ in our methods of doing things. I never use a snap anymore. Doing so I have had chucks “stuck”. The reason I quit was advice from the late John Jordan doing a demo at our club. He strongly advised against snapping a chuck. He just did a snug using the key and commented you never need anymore torque to loosen than you did to install. I’ve been doing it that way for several years now and have had no problems or stuck chucks.
 

Michael Anderson

Super Moderator
Staff member
TOTW Team
Joined
Aug 22, 2022
Messages
1,360
Likes
3,922
Location
Chattanooga, TN
in addition to the calabash above, I’m also finish turning a Bradford Pear calabash. I skipped the sanding on the other one so I could turn this one. Of course, that means I get to sand two bowls in a row. Yay!

67F46B98-50E2-4960-8D8A-43F0E8E131AC.jpeg

The Osage Orange calabash has a slight recurve, and I’m going to leave it unembellished. The Bradford Pear calabash is closed form, and I’m going to embellish it quite a bit. Here they are together:

D9930BB4-E873-4748-A505-122FFBB08449.jpeg
 
Joined
Feb 18, 2023
Messages
615
Likes
1,111
Location
Orange, CA
in addition to the calabash above, I’m also finish turning a Bradford Pear calabash. I skipped the sanding on the other one so I could turn this one. Of course, that means I get to sand two bowls in a row. Yay!

View attachment 61285

The Black Locust calabash has a slight recurve, and I’m going to leave it unembellished. The Bradfor Oear calabash is closed form, and I’m going to embellish it quite a bit. Here they are together:

View attachment 61286
gonna fume that locust bowl?
 

odie

TOTW Team
Joined
Dec 22, 2006
Messages
7,116
Likes
9,836
Location
Panning for Montana gold, with Betsy, the mule!
I always use a snap when seating a chuck. That noise and sudden stop lets you know that both surfaces, chuck and spindle are clean and have mated properly. They will run true. A snap on an 8 pound chuck is actually quite a bit of torque, which is why removal can be difficult if you’re not tooled and trained for it.
This is an adjustable pin spanner wrench. It can grab the small hole in the adapter, or hook into the Allen or opening for the chuck key. If it’s really tight, smack the tool with your hand or even a mallet. It’s easy on the tools and is quite effective. Use only for loosening.
View attachment 61265
1709856778596.png

Great idea Marc!

I already have one of these spanner wrenches, so the next time I get a stubborn chuck, I'll think of it! :)

-o-
 
Joined
Jan 6, 2013
Messages
133
Likes
482
Location
Delaware
13” x 4” piece of ribbon sapele on the lathe. First of three wedding gifts… too tired to begin turning tonight as I am just back from a trip and jet-lagged.

Just got back from the UK where we visited friends for two weeks. One evening I got away to attend the South Downs Woodturners meeting. I greatly appreciated the transportation assistance from Tony Trigg, who picked me up at the train station and showed me his shop before the meeting, and who generously drove me to a larger train station farther East, as the meeting ran late and I missed the close train!
 

Attachments

  • IMG_0114.jpeg
    IMG_0114.jpeg
    461.5 KB · Views: 23
  • IMG_0115.jpeg
    IMG_0115.jpeg
    842.7 KB · Views: 23
  • IMG_0116.jpeg
    IMG_0116.jpeg
    257.4 KB · Views: 23
Back
Top