-
Congratulations to Bernie Hyrtzak, People's Choice in the January 2026 Turning Challenge (click here for details) -
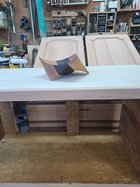
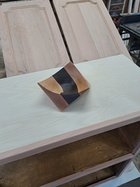
Congratulations to Matt Carvalho for "Red Mallee Folded Form" being selected as Turning of the Week for February 9, 2026 (click here for details) -
AAW Symposium demonstrators announced - If the 2026 AAW International Woodturning Symposium is not on your calendar, now is the time to register. And there are discounts available if you sign up early, by Feb. 28. Early Bird pricing gives you the best rate for our 40th Anniversary Symposium in Raleigh, North Carolina, June 4–7, 2026. (There are discounts for AAW chapter members too) For more information vist the discussion thread here or the AAW registration page
-
Welcome new registering member. Your username must be your real First and Last name (for example: John Doe). "Screen names" and "handles" are not allowed and your registration will be deleted if you don't use your real name. Also, do not use all caps nor all lower case.
You are using an out of date browser. It may not display this or other websites correctly.
You should upgrade or use an alternative browser.
You should upgrade or use an alternative browser.
What’s on your lathe?
- Thread starter Rusty Nesmith
- Start date
Thanks Alan. I'm going to get a plaque made and quote you, haha.You are the king of calabash. Beautiful work.
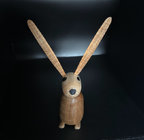
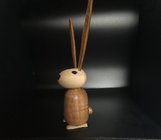
My sister is always using the excuse:
"Yah but" You know, yah but it was raining! Yah but it was on sale! Yah but it was blue! Yah but etc. etc.
One day I looked at her and said: What's a yabut? Are they little creatures that jump in the woods? Now it's a running joke every time she says it!
Today I caught one! I will surprise her hopefully this weekend.


Last edited:
Brilliant, Phil. Love it!
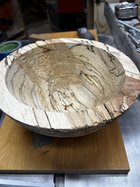
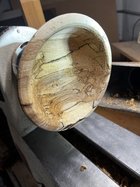
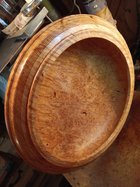
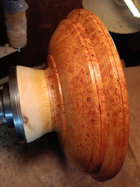
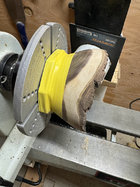
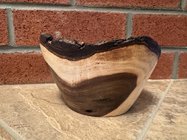
Woo-hoo! Got a new lathe and was able to do some turning for the first time this year. Two for one. Catalpa 9 x 4-1/2. Black walnut 11 x 4.
Attachments
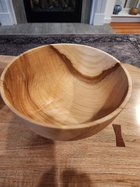
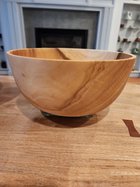
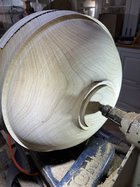
Nothing too unique but at 18.5" twice turned diameter it's my largest to date. Siberian elm with Mahoney's Walnut Oil finish. Have to work on a better exterior cut. Those tool marks sand out but I'd love to one day have an uninterrupted flowing final pass with the bowl gouge. Ah, the grace of it!
Attachments
That's a beautiful design.Nothing too unique but at 18.5" twice turned diameter it's my largest to date. Siberian elm with Mahoney's Walnut Oil finish. Have to work on a better exterior cut. Those tool marks sand out but I'd love to one day have an uninterrupted flowing final pass with the bowl gouge. Ah, the grace of it!
Odie
Panning for Montana gold, with Betsy, the mule!
What's a yabut? Are they little creatures that jump in the woods?
Phil.....Now you're going to have to make some "round tuits".....I know a few people who's like some of those!
-o-
Odie
Panning for Montana gold, with Betsy, the mule!
I love it! Great idea! Will have to let my brain work on that for a while!Phil.....Now you're going to have to make some "round tuits".....I know a few people who's like some of those!
-o-
Kevin Jesequel
TOTW Team
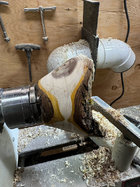
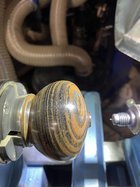
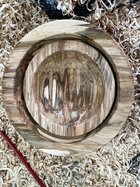
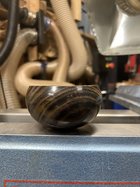
A railroad tie, that is crazy.A chunk of Lignum Vitae that was once a railroad tie on the Panama Canal. I don’t normally sand a piece before I hollow it, but I just had to see what this one was going to look like.
Different to say the least from a railroad tie. Is the darkish area because of creosote? Up here they used to soak railroad ties in creosote to prevent rotting.
Kevin Jesequel
TOTW Team
I’m not sure what this was soaked in, but I think that is what caused the black streaks. It smells like used motor oil instead of the usual sweet/spicy scent of lignum. Also, quick update on this HF, it is now a bowl, SMH! I have one more chunkDifferent to say the least from a railroad tie. Is the darkish area because of creosote? Up here they used to soak railroad ties in creosote to prevent rotting.
- Joined
- Nov 27, 2021
- Messages
- 255
- Likes
- 1,090
- Location
- Silver Spring, MD
- Website
- www.transpirationturning.com
Version 2 of my bolt-on CNC for the lathe has made its first cut. The perfect pewa.
Kevin, Lignum Vitae was/is used as bearings in Ships propellor shafts, oil is used to help with the natural lubrication, I have also seen it used as sliding bearing blocks, they also were lubricated with oil.
On one ship I was on, we had a fire as we were running high speed, then when the fire was put out with water, we had a warped shaft and had to go in dry dock to replace the shaft after we had received a new one.
That "railroad tie" might have been used for something else where it would receive lubrication, hard to say, it sure is a beautiful wood and big piece like that would be expensive I imaging.
small apple bowl
Turned on a pole lathe?
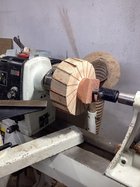
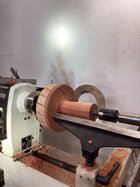
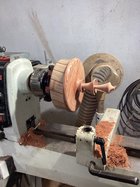
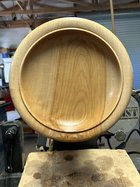
Inspired by Ralph Pugh and a YouTube from ThePapa1947, this an attempt to make a tangential segments project. This was done by feeling, but in means time I went in the math involved and figured out on how to design it. It is as simple as normal segments geometries….
VCru+
VCru+
Attachments
I use a little airbag to lift heavy blanks and get the center where I want it. It also makes it easy to make adjustments to get grain balance after starting turning.
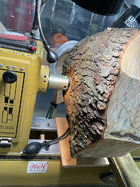
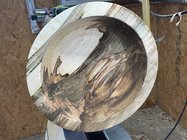
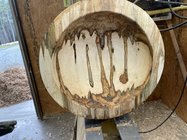
If this survives I might call it scary cherry. It has a large bark inclusion that I wasn't totally confident that it would stay together. I had an English Walnut one that didn't stay together. It just didn't sound right so I stopped and thumped it with a dead blow hammer, and it broke apart. This one sounded solid with a light thump. It really wasn't scary, but I did use the cage, (always stayed out of the line of fire) and turned it a bit slower than usual. It is 16" x 6" x 1/4". I also used a faceplate and cored the center. Hopefully I will get a couple more bowls from that.
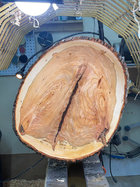

If this survives I might call it scary cherry. It has a large bark inclusion that I wasn't totally confident that it would stay together. I had an English Walnut one that didn't stay together. It just didn't sound right so I stopped and thumped it with a dead blow hammer, and it broke apart. This one sounded solid with a light thump. It really wasn't scary, but I did use the cage, (always stayed out of the line of fire) and turned it a bit slower than usual. It is 16" x 6" x 1/4". I also used a faceplate and cored the center. Hopefully I will get a couple more bowls from that.

How was that on your tool edges Kevin? Lignum vitae is the preferred hand plane material because it is tough as nails.A chunk of Lignum Vitae that was once a railroad tie on the Panama Canal. I don’t normally sand a piece before I hollow it, but I just had to see what this one was going to look like.
Last edited:
Jim that bowl would get a few staples in it on the underside to keep it from opening up if it was mine.I use a little airbag to lift heavy blanks and get the center where I want it. It also makes it easy to make adjustments to get grain balance after starting turning.
View attachment 60971
If this survives I might call it scary cherry. It has a large bark inclusion that I wasn't totally confident that it would stay together. I had an English Walnut one that didn't stay together. It just didn't sound right so I stopped and thumped it with a dead blow hammer, and it broke apart. This one sounded solid with a light thump. It really wasn't scary, but I did use the cage, (always stayed out of the line of fire) and turned it a bit slower than usual. It is 16" x 6" x 1/4". I also used a faceplate and cored the center. Hopefully I will get a couple more bowls from that.
View attachment 60972
I have used staples with good results on several turnings that I kept from opening up or self-destruction, I made the staple from some stiff SS wire, pre-drilled the holes undersize and ten hammered them in.
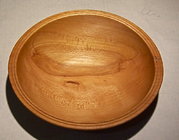
Here are a couple pictures of the ones I did, the Beech bowl we still have and use, still is as when done.
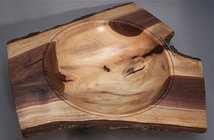
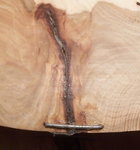
This is a Black Walnut crotch that I stapled and the staple kept it as shown.
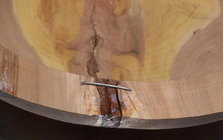
Here is one I did and places a staple on the underside later after returning the bowl, I did remove the staple holes when returning to round the oval shape when the piece dried.
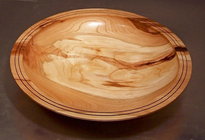
This Black Cherry did not open up, the bark inclusion dried and there is an opening that was filled when finishing, and a new staple went in on the underside.
+I use a little airbag to lift heavy blanks and get the center where I want it. It also makes it easy to make adjustments to get grain balance after starting turning.
View attachment 60971
If this survives I might call it scary cherry. It has a large bark inclusion that I wasn't totally confident that it would stay together. I had an English Walnut one that didn't stay together. It just didn't sound right so I stopped and thumped it with a dead blow hammer, and it broke apart. This one sounded solid with a light thump. It really wasn't scary, but I did use the cage, (always stayed out of the line of fire) and turned it a bit slower than usual. It is 16" x 6" x 1/4". I also used a faceplate and cored the center. Hopefully I will get a couple more bowls from that.
View attachment 60972
James-I LOVE your air-bag idea for centering heavy blanks; I definitely have to try it! In exchange for that idea, I tried a tip for my last piece of Chinese Elm that had a very similar bark inclusion that went through the center and almost to above my base-cut and tenon. I haven't taken a picture (yet) of the finished product because I still need to sand it out, but basically you just mix up some 5-minute epoxy with fine-ground coffee, dab all of it around on a paper plate per the usual mixing technique with a popsicle stick, and then mush it up into that inclusion the best you can. Yeah, it's much thicker than pourable 2-part epoxy, but the upside is it won't drip through the cracks and go to waste (which has happened to me more than once, unfortunately). The projects I've tried it on so far, the finished product just looks like a shinier, harder, more uniformly brown bark inclusion. And that being figured cherry with 3 branch piths, it's probably not done cracking lol! In any event, please show off the finished product if this makes it.
- Joined
- Aug 29, 2016
- Messages
- 3
- Likes
- 3
With the right lighting it would look like the eye of Mordor!I use a little airbag to lift heavy blanks and get the center where I want it. It also makes it easy to make adjustments to get grain balance after starting turning.
View attachment 60971
If this survives I might call it scary cherry. It has a large bark inclusion that I wasn't totally confident that it would stay together. I had an English Walnut one that didn't stay together. It just didn't sound right so I stopped and thumped it with a dead blow hammer, and it broke apart. This one sounded solid with a light thump. It really wasn't scary, but I did use the cage, (always stayed out of the line of fire) and turned it a bit slower than usual. It is 16" x 6" x 1/4". I also used a faceplate and cored the center. Hopefully I will get a couple more bowls from that.
View attachment 60972
Leo, are the staples a permanent fixture or do you remove them after the bowl has dried and ready for second turning/sanding?Jim that bowl would get a few staples in it on the underside to keep it from opening up if it was mine.
I have used staples with good results on several turnings that I kept from opening up or self-destruction, I made the staple from some stiff SS wire, pre-drilled the holes undersize and ten hammered them in.
Here are a couple pictures of the ones I did, the Beech bowl we still have and use, still is as when done.
View attachment 60974
This is a Black Walnut crotch that I stapled and the staple kept it as shown.
View attachment 60975
Here is one I did and places a staple on the underside later after returning the bowl, I did remove the staple holes when returning to round the oval shape when the piece dried.View attachment 60977
This Black Cherry did not open up, the bark inclusion dried and there is an opening that was filled when finishing, and a new staple went in on the underside.
View attachment 60978
- Joined
- Feb 28, 2021
- Messages
- 1,799
- Likes
- 1,607
- Location
- Roulette, PA
- Website
- www.reallyruralwoodworks.com
Kevin Jesequel
TOTW Team
I’d say it was in line with other very hard woods that I’ve turned (Cocobolo, Bocote, Bubinga, etc). It did not seem particularly abrasive. I did sharpen my gouge maybe 4 times to shape this little vessel. It is very oily and I had to clean the flute of my gouge of a hardened mixture of oil and wood fibers several times.@Kevin Jesequel How was that on your tool edges Kevin? Lignum vitae is the preferred hand plane material because it is tough as nails.
Vince, the small staple in the Beech bowl is still like shown, the other staples are removed to be able to second turn the piece, and then put a new staple out of sight, just to make. sure the wood is not moving later in life.Leo, are the staples a permanent fixture or do you remove them after the bowl has dried and ready for second turning/sanding?
After all it is important to keep the piece from splitting later on, just insurance ;-))
This is the Black Cherry after being twice turned.
Last edited:
Odie
Panning for Montana gold, with Betsy, the mule!
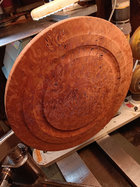
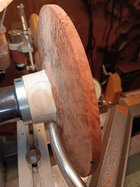
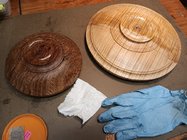
In the shop past midnight again last night. Removed waste blocks on two bowls, and turned the feet......foots?....on a Brown Mallee burl and Fiddleback Maple bowls. I had this Jarrah burl for years on the shelf. I can't stand looking at it any longer.....so, I just want it gone! Being so thin, there's not much you can do with it.....It's going to be a thin platter. Started out as 12" x 1".....but, after bringing it to round it will be no larger than 10 1/2" x 3/4".....pretty darn slim, but it is what it is..... 
-o-
-o-


Last edited:
Did it have a lot of silicate in it?A chunk of Lignum Vitae that was once a railroad tie on the Panama Canal. I don’t normally sand a piece before I hollow it, but I just had to see what this one was going to look like.
That’s awesome, Brian! Great design and execution. Thanks for following up.Here it is. - I'm not sure about posting it to gallery - I need to work on my photography some more.... View attachment 60979
View attachment 60980
- Joined
- Apr 27, 2004
- Messages
- 9,313
- Likes
- 6,095
- Location
- Lakeland, Florida
- Website
- www.hockenberywoodturning.com
TerrificHere it is. - I'm not sure about posting it to gallery - I need to work on my photography some more....
A mastery of the 3 cornered bowl taken to nes dimensions
Last edited:
Kevin Jesequel
TOTW Team
The lignum hollowform became a bowl when I went through the top. I have one more chunk of this particular piece to try again. The bowl went to the wood donor and he and his wife are very happy to have it.
It didn’t seem to. From what I have been told, these ties spent a long time under water. I believe they are from a section of the track that became submerged under a lake that was formed when the canal was opened. I was told that they were salvaged and brought to the US 25-30 years ago, likely in the rush to get everything possible here before CITES regulation became effective.
Did it have a lot of silicate in it?
It didn’t seem to. From what I have been told, these ties spent a long time under water. I believe they are from a section of the track that became submerged under a lake that was formed when the canal was opened. I was told that they were salvaged and brought to the US 25-30 years ago, likely in the rush to get everything possible here before CITES regulation became effective.
Attachments
@Kevin Jesequel I know the bowl wasn't part of the original plan, but it is stunning nonetheless. Great save  . Also, how are you liking the new Vic?

