Moar cherry burl.


Tzalam... it seems to be the stepchild of walnut and limba.
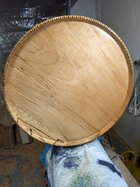
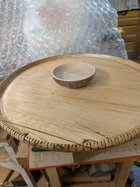
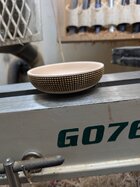
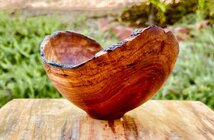
This was on lathe today. Finished it today, but needs more oil. First time with Goncalo Alves.


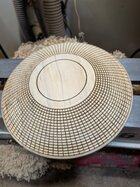
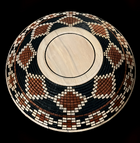
Beautiful, Odie! And getting those consistent accent grooves with all those interrupted cuts must have been tricky.The Red Mallee Burl bowl was finished up around midnight last night......
=o=
View attachment 77778 View attachment 77779
From what I understand, Limba is Limba. "Black" Limba just has more dark color and figure, and is generally prettier wood. The little 4-inch square trays I make with it just fly off my table at shows (probably because they're the least expensive trays I make). And yes, it is really soft, and quite chippy in my experience, thus requiring light cuts with razor-sharp gouges.Black Limba (Terminalia superba)? I got some from a dealer in Atlanta years ago, turned a couple of things. Easy to turn but kind of soft.
Thank you Aaron.....Beautiful, Odie! And getting those consistent accent grooves with all those interrupted cuts must have been tricky.
")

Wow Odie, I really like how the lines and steps of the design are seen even on the little interrupted areas especially on the right side of the piece.The Red Mallee Burl bowl was finished up around midnight last night......
=o=
View attachment 77778 View attachment 77779

Cute. Kind of looks like a WW1 helmetHere is another small box, but a more tricky design. The Sun Hat box currently on the lathe. The chuck gives perspective on the size.View attachment 77867
The figure from that angle looks a bit like a face.Cute. Kind of looks like a WW1 helmet

It is a small box, the chuck is a Vicmarc VM120 and I turn on a Robust Sweet 16. Less then 1 3/4" tall and wide.The figure from that angle looks a bit like a face.
Either a delightfully tiny box or a MASSIVE chuck and lathe.
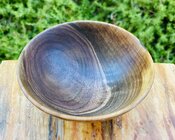
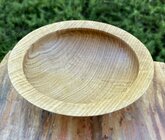
Beautiful bowl, great form and I really like that style!First time with madrone burl—love it. Start to finish today.
When this popped up the first thing I saw was the paper plate, I thought it was a new dessertMaple and resin. Curing in a paper plate mold.
View attachment 77871

Thanks. Never done it or seen it to my recollection, just winged it. Looks ok.Beautiful bowl, great form and I really like that style!


Cute. Kind of looks like a WW1 helmet
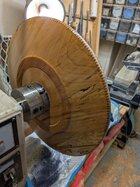
That sure is an interesting piece of wood. It's got a bit of everything.We were having some real good luck at this point and felt confident. I set up the hollowing jig and we proceeded to push the envelope. The wall thickness is just under 1/4 inch. It is now ready to pull off the lathe and do a little finish hand sanding and apply some Watco Danish Oil. It has been a great collaborative project. Both of us pushing the other to exceed our capabilities and push the envelope.
View attachment 77908View attachment 77909View attachment 77910


Looks interesting. How did you turn the outside of each pot?
Only the tops can be turned, using a scraper. Most of the rough shaping is done with grinders held in a compound vise supported by a banjo. I use an overhead mounted template and laser to mill the pots as close to identical as possible. Hollowing is done as usual, but complicated by the imbalance of the piece.Looks interesting. How did you turn the outside of each pot?
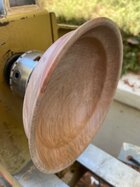
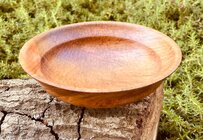
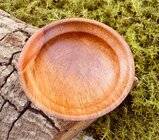
I think it’s happy it’s a bowl.I braved the 105* heat index today to turn a bowl. I was getting the jitters since it had been a couple days since I was in the shop.
This bowl was supposed to be something else entirely but since that didn’t work out I listened to the wood and it wanted to become a bowl with a slightly enclosed rim, 12” x5”.
View attachment 77958
View attachment 77957
View attachment 77956
I don't know what the original plan was, but the reimagined piece is outstanding.I braved the 105* heat index today to turn a bowl. I was getting the jitters since it had been a couple days since I was in the shop.
This bowl was supposed to be something else entirely but since that didn’t work out I listened to the wood and it wanted to become a bowl with a slightly enclosed rim, 12” x5”.
View attachment 77958
View attachment 77957
View attachment 77956