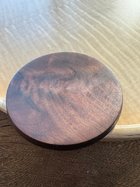
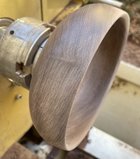
Another Arbutus bowl & friends. Friends being the design element additions from powder post beetle holes and cracks both filled with CA glue. Turn the bowl, bake at 140d for 6 hours to kill any remaining bugs then final turn and finish.

-
March 2026 Turning Challenge: Olla! (click here for details) -
Congratulations to David Wyke, People's Choice in the February 2026 Turning Challenge (click here for details) -
Congratulations to Michael Nathal for "Eroded Wheel" being selected as Turning of the Week for March 23, 2026 (click here for details) -
Welcome new registering member. Your username must be your real First and Last name (for example: John Doe). "Screen names" and "handles" are not allowed and your registration will be deleted if you don't use your real name. Also, do not use all caps nor all lower case.
You are using an out of date browser. It may not display this or other websites correctly.
You should upgrade or use an alternative browser.
You should upgrade or use an alternative browser.
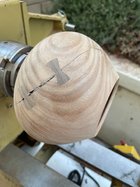
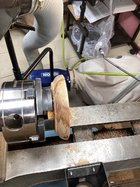
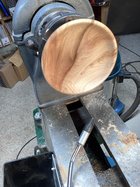
What’s on your lathe?
- Thread starter Rusty Nesmith
- Start date
Cool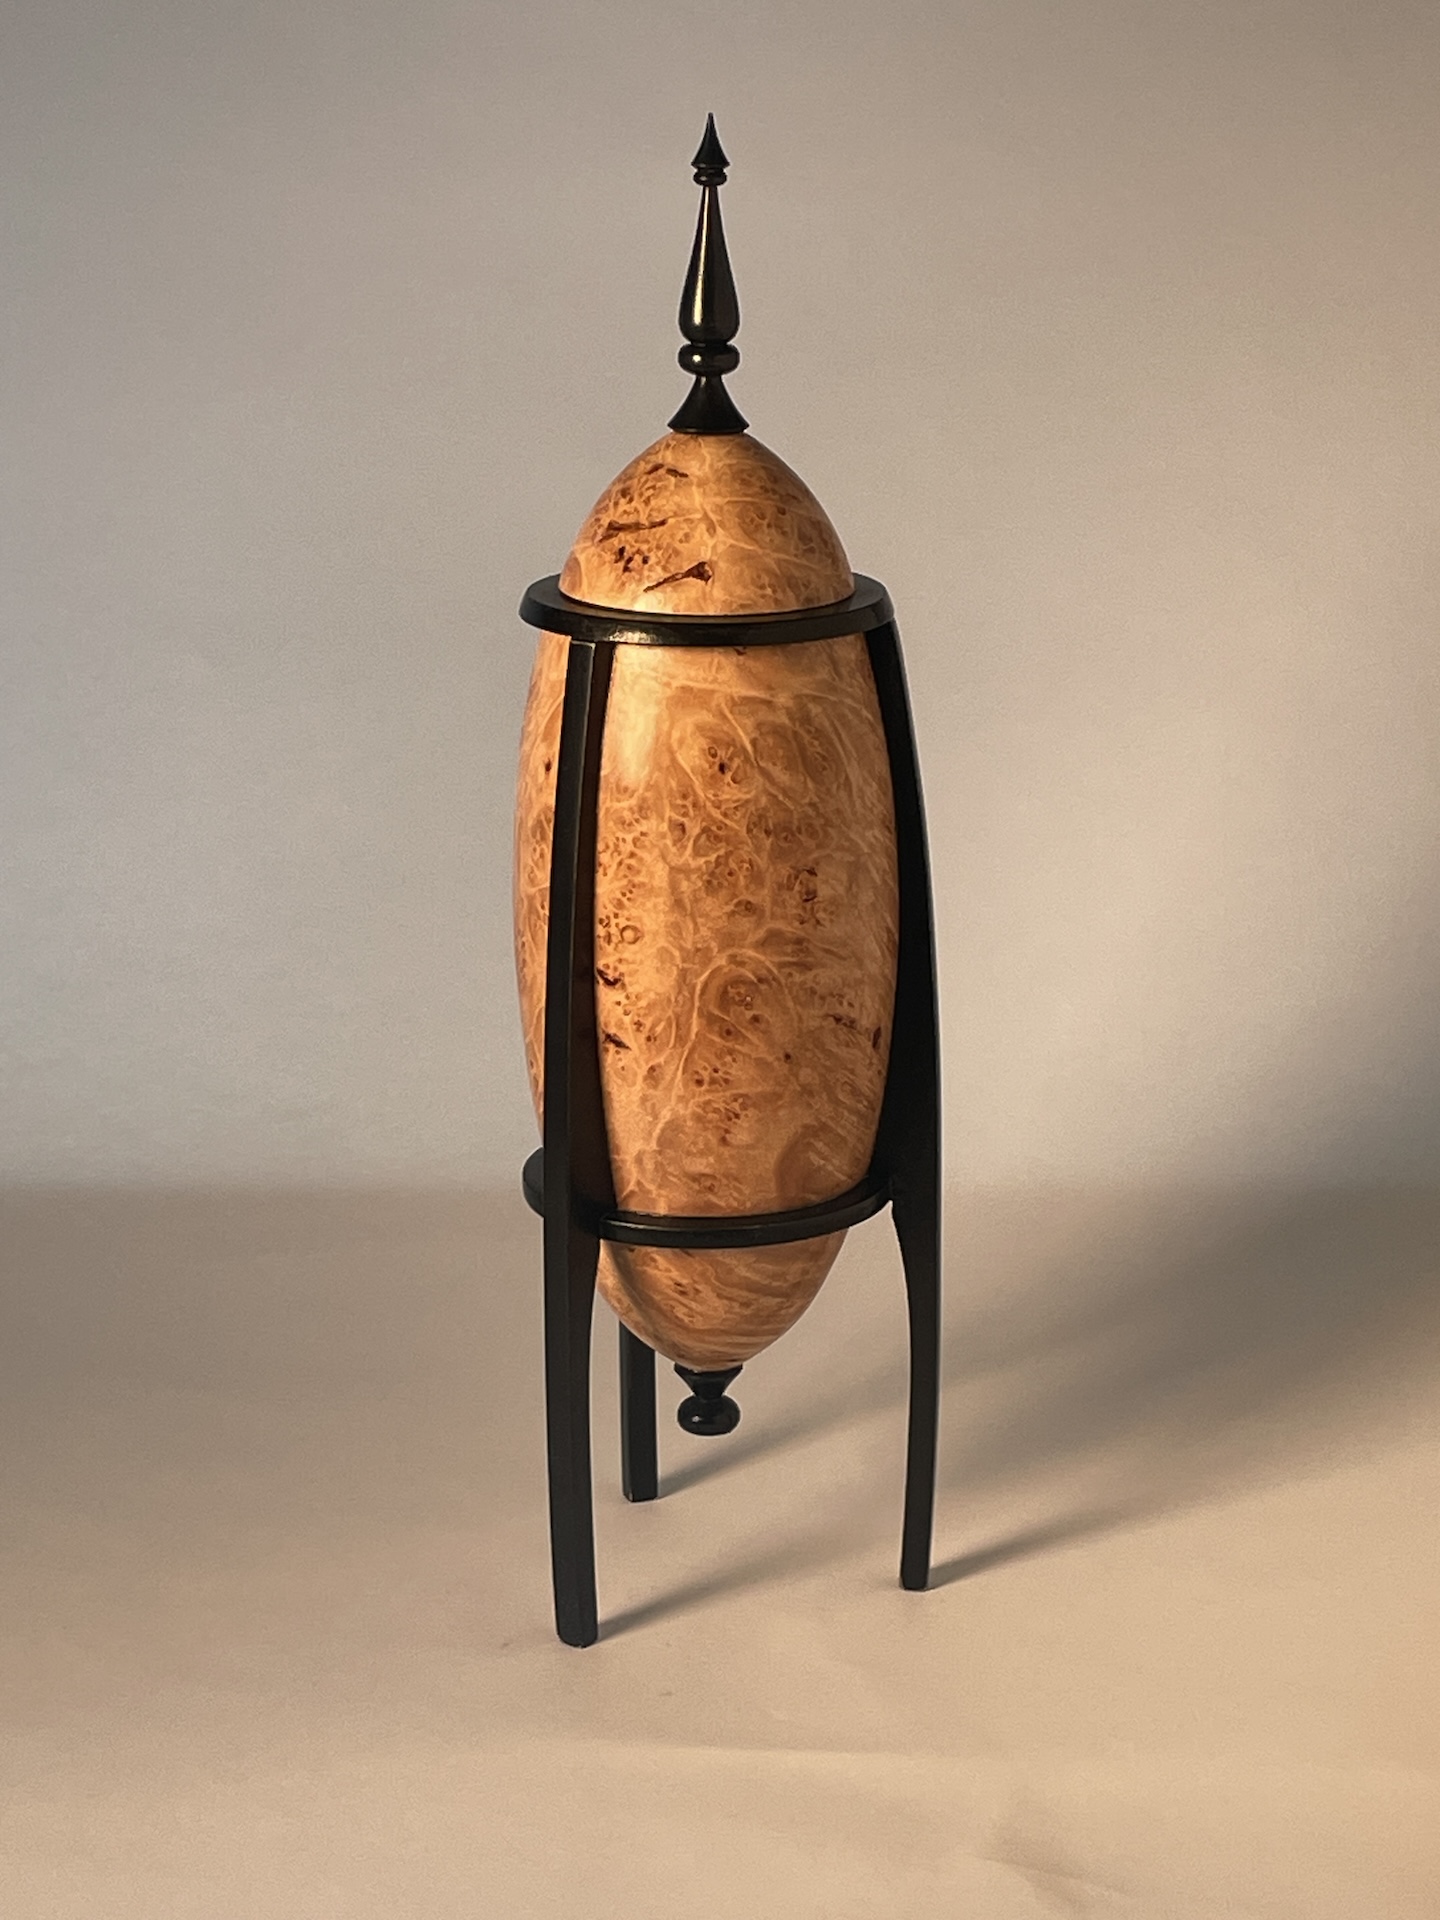
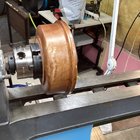
Rocket Box?
- Dave Landers
- 10
Not sure what to call this, but it was fun and challenging to make. Inspired loosely by a piece...
Trying out the Catalpa. Super wet and stringy!

Odie, to me tear out is what happens when you cut against the grain. There are 'levels' of tear out. Brian Havens who has not done any videos in a while used plastic straws to demonstrate grain orientation, and I will resurrect his straw idea when I do a new bowl turning video. With side/bowl grain orientation, you go with/against/with/against the grain each revolution. Trying to minimalize tear out so you have less sanding to do is the whole object, at least to me, when bowl turning. It sounds like you have reduced it to the point where there is minimal sanding to be done. That 'roughness' that you mention is what I would call tear out. For most of my bowls I am starting sanding at 120. Some times coarser like with big leaf maple, some times finer like with madrone where I can start at 180 or so. I doubt many have refined their techniques as well as you have. You should do a video, kind of a 'public service' to your fellow turners....
robo hippy
robo hippy
Continuing work on the hornbeam bowl. The surface dried enough, actually quite quickly, to allow me to sand easily. Mostly with lathe off, but not entirely. I know this stuff is quite hard, but not while green. It cut and sanded cleanly and efficiently. I applied lots of finish immediately. T&t oil varnish, walnut oil, turpentine and some black pigment. Soaked it, and then again after 8 hours or so. Next day bathed it with walnut oil, which it drank in greedily. Will do the walnut oil again today, then let it sit, probably for a month or so to let the water leave and the finish to set up.
The lower part, near the pith is soft (water damage, rot), not punky but heading in that direction, while the rest is quite firm and fresh. Not sure if that a characteristic of the species,,or just the log a got.
The pith had cracks before I started, so uncertain, for sure. They were opening while still on the lathe, but I was able to maintain enough vacuum to complete the foot,,which is now opening up. Truing the foot is possible after everything finds its happy place.
Its been fun and gnarly.
Odie
Panning for Montana gold, with Betsy, the mule!
Odie, to me tear out is what happens when you cut against the grain. There are 'levels' of tear out. Brian Havens who has not done any videos in a while used plastic straws to demonstrate grain orientation, and I will resurrect his straw idea when I do a new bowl turning video. With side/bowl grain orientation, you go with/against/with/against the grain each revolution. Trying to minimalize tear out so you have less sanding to do is the whole object, at least to me, when bowl turning. It sounds like you have reduced it to the point where there is minimal sanding to be done. That 'roughness' that you mention is what I would call tear out. For most of my bowls I am starting sanding at 120. Some times coarser like with big leaf maple, some times finer like with madrone where I can start at 180 or so. I doubt many have refined their techniques as well as you have. You should do a video, kind of a 'public service' to your fellow turners....
robo hippy
Yep, robo.....reducing the need for sanding is the name of the game for bowl turning.
With the Brown Mallee burl bowl I completed last evening, I started sanding the exterior surfaces at 240gt!
I'll be posting a photo of this BMB bowl in a few minutes...
-o-
Last edited:
Odie
Panning for Montana gold, with Betsy, the mule!
Brown Mallee burl bowl finished last evening.....didn't come in from the shop until past 1am!
-o-


-o-
Pat, approximately how long does it take you to cut the spirals?Had a 6 1/2” x 1 1/2” scrap of walnut sitting there so it became another victim of the ornamental lathe treatment.
Jim McLain
Artist


Walnut crotch platter. View attachment 60208View attachment 60209
Outstanding. Great grain.
Not on the lathe but holding projects from the lathe.
Playing with plate stands this morning. Here is prototype 3.

Playing with plate stands this morning. Here is prototype 3.
Pat, approximately how long does it take you to cut the spirals?
It takes about twenty minutes, and half or more of that is setting everything up.


It takes about twenty minutes, and half or more of that is setting everything up.
That's pretty cool. I imagine the initial setup took days (or weeks?).
Took it off the lathe for the picture it coming long now!

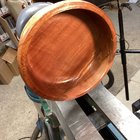
Decided I needed to get away from the computer, so I tried to make a tiny bowl from the maple branch that had fallen last year. A deep crack meant I had to take off a lot more than I had planned. The interior near the rim could have been smoother, but it was getting pretty thin and chattery at that point. Quarter in the last picture for scale.


- Joined
- Feb 6, 2010
- Messages
- 3,517
- Likes
- 2,596
- Location
- Brandon, MS
- Website
- threeringswoodshop.square.site
I can see from your answer you are not talking about white oak or live oak. Red oak yes splits easily. Whites will split some bur the largest problem is that they will warp in the extreme. This piece turned into a football.Oak is a different creature. I love it even though it requires more care than most woods, or maybe because of that. I tend to be a sucker for challenges. My thoughts about oak;
For a very strong, heavy wood, it’s surprisingly weak between fibers. It can’t handle much tensile load there. Splitting oak for firewood is great fun because of this.
Also it seems to move rather quickly as it dries. Far too quickly considering the weak bonds between fibers. So, slow drying is essential. A paper bag just isn’t going to work, nor will a box with shavings. Anchorseal the entire bowl. Use it liberally, then apply strips of paper towel over the rim, about an inch, inch and a half down each side (inside and outside), and liberally coat with more anchorseal. Then you need to put it away, out of draughts and breezes, and leave it. It’s the slow way, but it works.
When working the wet Oak, never let it air out on the lathe. Keep it wrapped in plastic anytime you’re not turning.
A bowl that has a rim to rim curve is stronger than a flat bottom with more vertical walls.
Pith down is stronger than pith up.
Last point is to have fun!

That is live oak . I do not have pics but on a 14 inch platter it turned to a taco which I was able to flatten somewhat by wetting and clamping with cauls. Both were turned green to finish, which can be done but very risky getting a moderately stable piece.
That's pretty cool. I imagine the initial setup took days (or weeks?).
It was 25 years of innovating and creating the tools and techniques by Harvey, and just months of apprenticing under his direction to understand it and to be able to start creating.
13” live edge cherry bowl. Turned green. Will finish with Waterlox when dry.

Rearranged my blower setup again. This time I made brackets to hold the pipe from moving. Shortened up the elbow and mounted the whole thing lower and from the bottom up. Much better!

After that I grabbed a piece of Ash and a piece of Walnut. Had a project sitting for a few months waiting for it to dry.

After that I grabbed a piece of Ash and a piece of Walnut. Had a project sitting for a few months waiting for it to dry.
what was sold to me as walnut, was indeed oak with a walnut stain. Seller made good—sent me a real walnut blank. He was upset and very easy to deal with. The oak turned nicely, though. It was bone dry. One coat PTO, sanded to 800. Debating putting it back on Cole and rounding bottom a bit more.


Time for finishing.


- Joined
- Nov 27, 2021
- Messages
- 268
- Likes
- 1,142
- Location
- Silver Spring, MD
- Website
- www.transpirationturning.com
A CNC machine doing some embellishments...
Cool explain how it worksA CNC machine doing some embellishments...View attachment 60292

- Joined
- Nov 27, 2021
- Messages
- 268
- Likes
- 1,142
- Location
- Silver Spring, MD
- Website
- www.transpirationturning.com
I'm describing it as a bolt-on CNC, so the lathe itself becomes a 4-axis CNC. It moves linearly in X and Z (parallel and perpendicular to the ways), the lathe spindle rotates from a pulley on the handwheel, and the tool sits on a "B" axis so it can set the tool normal to any surface of the bowl (on the exterior). The hard part is the software. This is really just (another) test. It does really work nicely for putting in pewas.Cool explain how it works
I can see from your answer you are not talking about white oak or live oak. Red oak yes splits easily. Whites will split some bur the largest problem is that they will warp in the extreme. This piece turned into a football.View attachment 60244
That is live oak . I do not have pics but on a 14 inch platter it turned to a taco which I was able to flatten somewhat by wetting and clamping with cauls. Both were turned green to finish, which can be done but very risky getting a moderately stable piece.
Lovely piece, Gerald.
That’s a really nice once turned piece, Gerald. Nice sweeping rays. Is this a round bottom? It’s a great shape for a bowl that rocks and sways.I can see from your answer you are not talking about white oak or live oak. Red oak yes splits easily. Whites will split some bur the largest problem is that they will warp in the extreme. This piece turned into a football.View attachment 60244
That is live oak . I do not have pics but on a 14 inch platter it turned to a taco which I was able to flatten somewhat by wetting and clamping with cauls. Both were turned green to finish, which can be done but very risky getting a moderately stable piece.
My comments had a lot to do with the constant reports I hear from other turners about their oak experiences. 90% failure rates. Those that won’t consider oak bowls because of this. Scroll up this thread and read about rough turned it, put it in a bag, and it was cracked a week later. Been there, done that. Rough turned oak bowls, coated in anchorseal and went on vacation. 10 days later several were cracked. So, oak went on a slow dry protocol giving special attention to the high stress areas, and my problem was solved. I hope others can find a happy place to work this amazing timber.
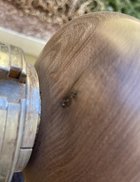
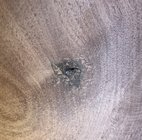
I need advice. Turning a nice piece of dry black walnut and noticed this small defect on outside as I shaped. But when I hollowed, it is more obvious and ugly on inside bottom. How to disguise/fix? Last picture a close up of interior defect, inside not sanded yet.
Attachments
If it was mine, I never have good luck getting a repair to match or blend in so I tend to make it stand out. Usually in a complimentary color way. I have some turquoise color milliput that I think goes good with walnut so I'd have no problem doing that. Or liquid epoxy in a gold color.
You've been doing pewas, how thick can those be? Remove the offending defect and stick a contrasting wood in there. "Elegant repair" look.
Or there's the coffee grounds and CA glue route.
You've been doing pewas, how thick can those be? Remove the offending defect and stick a contrasting wood in there. "Elegant repair" look.
Or there's the coffee grounds and CA glue route.
If it was mine would use black or dark brown CA glue to fill the void and hi lite the “design” feature!
I second that motion. Or colored epoxy.If it was mine would use black or dark brown CA glue to fill the void and hi lite the “design” feature!
I do hear turners have problems with oak wood, yet I have none, I start with fresh Oak that has NO splits or checks and then turn it in one cession and put it in my brown paper bags, set it in a cool draft free place and just let it dry, pretty easy and simple to do.
The 4 picture limit has me doing some fancy footwork to show a few more than 4.

The 4 picture limit has me doing some fancy footwork to show a few more than 4.
pewa won’t work on that area of inside. I think I’ll use coffee grounds and dark brown CA. Thanks all!Or there's the coffee grounds and CA glue route
Working on this year's Christmas ornaments
 .
.
.
hmm looks like small snowman eyeballs and buttons too.
- Joined
- Feb 6, 2010
- Messages
- 3,517
- Likes
- 2,596
- Location
- Brandon, MS
- Website
- threeringswoodshop.square.site
No it is not round bottom, as I had not started doing that when this was turned. ThanksThat’s a really nice once turned piece, Gerald. Nice sweeping rays. Is this a round bottom? It’s a great shape for a bowl that rocks and sways.
My comments had a lot to do with the constant reports I hear from other turners about their oak experiences. 90% failure rates. Those that won’t consider oak bowls because of this. Scroll up this thread and read about rough turned it, put it in a bag, and it was cracked a week later. Been there, done that. Rough turned oak bowls, coated in anchorseal and went on vacation. 10 days later several were cracked. So, oak went on a slow dry protocol giving special attention to the high stress areas, and my problem was solved. I hope others can find a happy place to work this amazing timber.