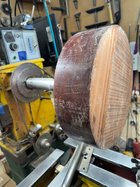
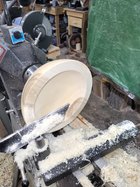
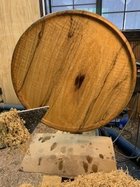
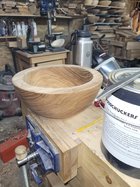
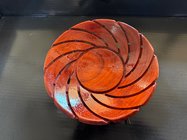
Getting close to the finish line. The cherry base, on the lathe is complete. Everything has 3 coats of lacquer. The leather inlays are ready to be attached and laced after buffing.


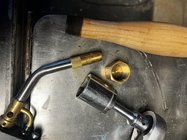
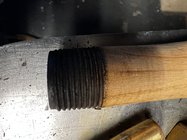
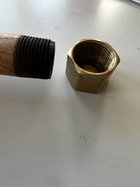
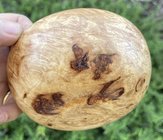
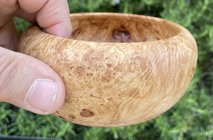
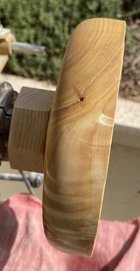
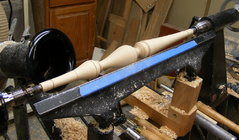
Finishing up this chisel handle from a fellow turner that never got to it ! Added some stone too the voids
View attachment 61768View attachment 61769


I heated a fitting to thread it on the end and then turned on the lathe round and epoxied the 8mm square for carbide cutter in used it this morning !Finishing up this chisel handle from a fellow turner that never got to it ! Added some stone too the voids
View attachment 61768View attachment 61769

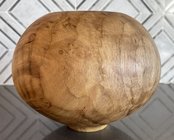
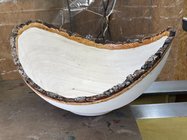
I have been able to improve questionable surfaces shear scraping and/or sanding after letting Danish oil dry on the piece. You may already do this.
I didn't on this one, but may return it to the lathe to give it another try. There's nothing to lose, because as it is, it's not anything more than a "give away". Thanks for the advice, Jim.....
-o-
")
I never realized that it hardened like that. That’s great info.
Thanks,
Bob


I have also had success using DO in this manner, but it takes a long time to dry/cure. Something you might try - 5 min epoxy thinned 1:1 with acetone. The downside is the dangerous fumes - do it outside or with a lot of venting for an hour or so. It sets up in a few hrs due to the chemical reaction of the epoxy. It’s my answer for punky wood.it might be best to apply the D.O. after the first turn of a twice turned bowl.....after seasoning, and just prior to the second turn.
Thanks Doug. I'll add that to the list of things that could be done. I have tossed out punky pieces in the past that might have been saved, as well as had other more successful attempts that didn't need anything. It is very difficult to analyze a bowl block, and decide beforehand if it needs help.....until you mount it and start lathe turning. Many of the bowl blocks I use, I only get to see photos of prior to purchasing, so that makes it that much more difficult to decide if it's worth it, or not.I have also had success using DO in this manner, but it takes a long time to dry/cure. Something you might try - 5 min epoxy thinned 1:1 with acetone. The downside is the dangerous fumes - do it outside or with a lot of venting for an hour or so. It sets up in a few hrs due to the chemical reaction of the epoxy. It’s my answer for punky wood.
There's a guy on Youtube that takes very soft,punky wood and covers it with two part epoxy thinned with denatured alcohol. Seems to soak right in and harden up fine. I can grab a link if interested.Thanks Doug. I'll add that to the list of things that could be done. I have tossed out punky pieces in the past that might have been saved, as well as had other more successful attempts that didn't need anything. It is very difficult to analyze a bowl block, and decide beforehand if it needs help.....until you mount it and start lathe turning. Many of the bowl blocks I use, I only get to see photos of prior to purchasing, so that makes it that much more difficult to decide if it's worth it, or not.
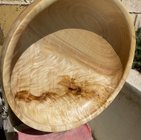
This particular piece worked great with the D.O., and my plans are to experiment with it a little further the next time I have soft punky wood....
-o-


I'm also interested in what people are using to harden punky, styrofoam-like spalted wood. I've got a bunch of spalted maple that's on the edge of too far gone, but perhaps I can use it for learning what works or doesn't. I did one piece with a 2-3 coats of sanding sealer, and got decent results. Hadn't thought of using DO, but that's worth a try. I've seen a reference to the Minwax wood hardener that Odie mentioned but haven't tried it yet.
At what point should any of the above be applied? Before the last cut, or after the last cut and before sanding?
I would start applying as you approach the final form.The styrofoam like wood tends to tear out deep so needs to be firmed up sooner than later. It may take several applications depending on how deep the finish penetrates.


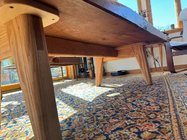
That is precise and very well turned Bob!! I'm impressed...Another round of Windsor chairs underway (comb back arm chair, fan back side chair, and fan back arm chair). The 12 legs are turned, as are the necessary stretchers. Still need to do back posts. The oak crests and arm rail are bent, oak spindles shaped with draw knife and spokeshave. A few more pieces to turnn then on to assembly.